
The holiday season is supposed to be joyful—but between shopping, decorating, hosting, and cooking, it can quickly turn overwhelming. That’s why make-ahead Christmas recipes are a lifesaver.
Whether you’re preparing Christmas brunch, planning a festive dinner, or simply trying to enjoy a slow, peaceful morning with family, these easy, prepare-ahead dishes take the stress out of the kitchen.
From overnight casseroles and slow cooker favorites to no-bake desserts and quick appetizers, this collection of 12 Make-Ahead & Easy Christmas Recipes will help you spend less time cooking and more time enjoying the magic of the season. Let’s dive into the delicious, no-stress meals that make Christmas feel effortless.
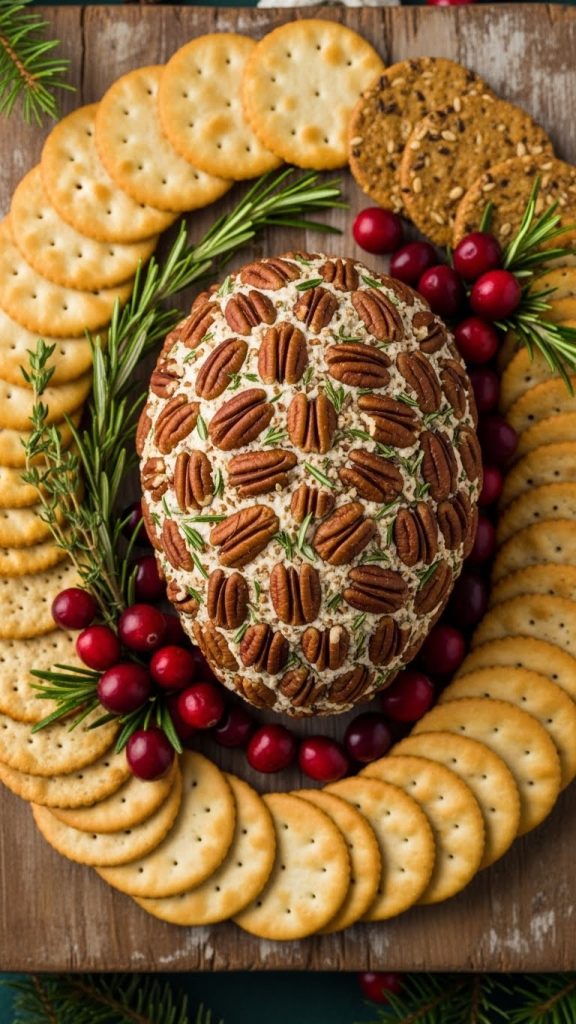
1. Classic Holiday Cheese Ball
There’s something undeniably nostalgic about a cheese ball sitting proudly on the holiday appetizer table. This creamy, tangy, and utterly addictive Classic Holiday Cheese Ball is the ultimate make-ahead recipe that will have your guests hovering around the snack spread all evening. Studded with herbs and coated in crunchy toasted pecans, it pairs perfectly with crackers, pretzels, or fresh vegetables. Best of all? You can make it up to 5 days in advance, leaving you stress-free when the festivities begin.
📋 Recipe Card: Classic Holiday Cheese Ball
Prep Time: 20 minutes
Chill Time: 2 hours (minimum)
Total Time: 2 hours 20 minutes
Servings: 12-16 servings
Difficulty: Easy
Ingredients
For the Cheese Ball:
- 16 oz (2 blocks) cream cheese, softened to room temperature
- 2 cups sharp cheddar cheese, finely shredded
- 1 cup white cheddar cheese, finely shredded
- 3 green onions, finely chopped (white and light green parts)
- 2 tablespoons fresh parsley, minced
- 1 tablespoon fresh chives, minced
- 2 teaspoons Worcestershire sauce
- 1 teaspoon garlic powder
- 1 teaspoon onion powder
- ½ teaspoon smoked paprika
- ¼ teaspoon cayenne pepper (optional, for a subtle kick)
- ½ teaspoon salt (adjust to taste)
- ¼ teaspoon freshly ground black pepper
For the Coating:
- 1½ cups pecans, toasted and finely chopped
- 2 tablespoons fresh parsley, finely minced
- 1 teaspoon flaky sea salt (optional, for finishing)
For Serving:
- Assorted crackers (butter crackers, wheat thins, or water crackers)
- Pretzel crisps
- Sliced baguette rounds
- Fresh vegetables (celery sticks, carrot sticks, bell pepper strips)
Equipment Needed
- Large mixing bowl
- Electric hand mixer or stand mixer (or strong arms!)
- Rubber spatula
- Plastic wrap
- Baking sheet (for toasting pecans)
- Sharp knife and cutting board
- Measuring cups and spoons
Step-by-Step Instructions
Step 1: Prepare Your Ingredients
Remove the cream cheese from the refrigerator at least 1-2 hours before you begin. Softened cream cheese is essential for a smooth, lump-free cheese ball. The cream cheese should be soft enough that you can easily press your finger into it.
Shred your cheddar cheeses using the fine side of a box grater. Pre-shredded cheese from the store contains anti-caking agents that can affect the texture, so freshly shredded is strongly recommended for the creamiest result.
Finely chop your green onions, parsley, and chives. Keep them separate for now.
Step 2: Toast the Pecans
Preheat your oven to 350°F (175°C).
Spread the pecans in a single layer on a baking sheet. Toast for 6-8 minutes, stirring halfway through, until fragrant and lightly golden. Watch carefully as nuts can burn quickly.
Remove from the oven and let cool completely (about 15 minutes). Once cooled, finely chop the pecans using a sharp knife. You want small, uniform pieces that will adhere well to the cheese ball. Set aside.
Step 3: Mix the Cream Cheese Base
In a large mixing bowl, add the softened cream cheese. Using an electric hand mixer on medium speed, beat the cream cheese for 1-2 minutes until completely smooth and fluffy. Scrape down the sides of the bowl as needed.
Add the Worcestershire sauce, garlic powder, onion powder, smoked paprika, cayenne pepper (if using), salt, and black pepper. Beat on low speed until all seasonings are fully incorporated, about 30 seconds.
Step 4: Add the Shredded Cheeses
Add the sharp cheddar and white cheddar cheeses to the cream cheese mixture. Using the mixer on low speed, blend until the cheeses are fully combined. The mixture will become quite thick.
Switch to a rubber spatula and fold in the chopped green onions, parsley, and chives until evenly distributed throughout the mixture.
Taste the mixture and adjust seasoning if needed. Remember, the flavors will meld and intensify as it chills.
Step 5: Form the Cheese Ball
Lay out a large piece of plastic wrap (about 18 inches long) on your work surface.
Transfer the cheese mixture onto the center of the plastic wrap. Using the plastic wrap to help you (to avoid messy hands), gather the edges and begin shaping the mixture into a ball. Twist the plastic wrap at the top to compact the cheese into a tight, uniform ball shape.
If you prefer, you can also shape it into a log for easier slicing.
Place the wrapped cheese ball on a plate and refrigerate for a minimum of 2 hours, or until firm. For best results, refrigerate overnight to allow the flavors to fully develop.
Step 6: Prepare the Coating
In a shallow bowl or plate, combine the finely chopped toasted pecans with the 2 tablespoons of minced fresh parsley. Mix well to combine.
Step 7: Coat the Cheese Ball
Remove the cheese ball from the refrigerator. Unwrap it and place it in the center of the pecan mixture.
Using your hands, gently roll the cheese ball in the pecan mixture, pressing lightly to help the nuts adhere. Use your hands to scoop up the mixture and press it onto any bare spots. Continue until the entire surface is evenly coated.
If desired, sprinkle a pinch of flaky sea salt over the top for an elegant finish and a burst of flavor.
Step 8: Final Chill and Serve
Place the coated cheese ball on your serving plate or board. Cover loosely with plastic wrap and return to the refrigerator for at least 30 minutes to let the coating set.
Remove from the refrigerator 15-20 minutes before serving to allow it to soften slightly for easier spreading.
Arrange crackers, pretzel crisps, baguette rounds, and fresh vegetables around the cheese ball. Provide a cheese knife or spreader for guests.
🎬 Video Tutorial
Watch a step-by-step video guide for making the perfect holiday cheese ball:
💡 Pro Tips for the Perfect Cheese Ball
- Room Temperature is Key: Ensure your cream cheese is fully softened. Cold cream cheese will result in a lumpy texture that’s impossible to smooth out.
- Freshly Shred Your Cheese: Pre-shredded cheese contains cellulose or potato starch to prevent clumping, which can make your cheese ball grainy. Take the extra 5 minutes to shred your own.
- Toast Those Nuts: Toasting pecans brings out their natural oils and deepens their flavor dramatically. Never skip this step.
- Let it Rest: The cheese ball tastes significantly better after resting in the refrigerator overnight. The flavors meld together beautifully.
- Bring to Room Temperature Before Serving: A rock-hard cheese ball is difficult to spread. Remove it 15-20 minutes before guests arrive.
- Use Damp Hands: If shaping the ball with your hands, lightly dampen them to prevent sticking.
🗄️ Storage Tips
Refrigerator Storage:
- Uncoated cheese ball: Wrap tightly in plastic wrap and store for up to 5 days.
- Coated cheese ball: Cover loosely with plastic wrap (to avoid crushing the nut coating) and store for up to 3 days. The coating may soften slightly over time.
Freezer Storage:
- The cheese ball freezes beautifully! Wrap the uncoated cheese ball tightly in plastic wrap, then place in a freezer-safe zip-top bag, removing as much air as possible.
- Freeze for up to 1 month.
- To thaw: Transfer to the refrigerator 24 hours before serving. Add the nut coating after thawing.
- Do not freeze the cheese ball after coating as the nuts will become soggy upon thawing.
🔄 Variations to Try
- Bacon Cheddar Cheese Ball: Add ½ cup crispy crumbled bacon to the mixture and coat with more bacon bits.
- Ranch Cheese Ball: Add 1 packet (1 oz) ranch seasoning mix to the cream cheese base.
- Jalapeño Popper Cheese Ball: Add ¼ cup diced pickled jalapeños and coat with crushed tortilla chips.
- Cranberry Pecan Cheese Ball: Fold in ½ cup dried cranberries for a festive twist.
- Everything Bagel Cheese Ball: Coat with everything bagel seasoning instead of pecans.
- Blue Cheese & Walnut: Substitute ½ cup crumbled blue cheese for some cheddar and coat with toasted walnuts.
❓ Frequently Asked Questions
Can I make this dairy-free? Yes! Use dairy-free cream cheese and vegan cheddar shreds. The texture may be slightly different, but it will still be delicious.
Why is my cheese ball too soft? This usually means the cream cheese wasn’t chilled long enough. Return it to the refrigerator for at least another hour, or place it in the freezer for 20-30 minutes.
Can I double this recipe? Absolutely! Simply double all ingredients and make two cheese balls, or shape one large impressive ball for a big gathering.
How far in advance can I make this? For best results, make the uncoated cheese ball 2-5 days ahead. Add the coating the day before or the morning of your event.
🍽️ Serving Suggestions
A cheese ball makes a stunning centerpiece on a holiday appetizer board. Pair it with:
- Crackers: Ritz, Triscuits, water crackers, or artisan seed crackers
- Bread: Sliced baguette, pita chips, or crostini
- Vegetables: Celery, carrots, bell peppers, cucumber slices, cherry tomatoes
- Cured Meats: Salami, prosciutto, or pepperoni
- Pickled Items: Cornichons, olives, or pickled onions
- Fruits: Apple slices, grapes, or dried apricots
- Nuts: Extra toasted pecans or candied walnuts
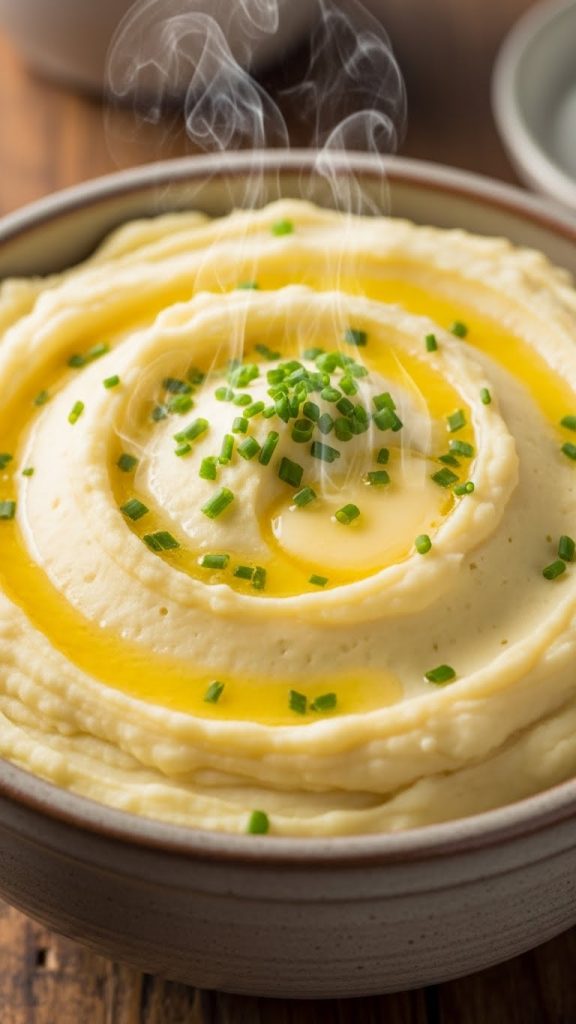
2. Make-Ahead Creamy Mashed Potatoes
Nothing says Christmas dinner quite like a heaping bowl of silky, buttery mashed potatoes. But let’s be honest—standing over a pot of boiling potatoes while trying to time the turkey, gravy, and a dozen other dishes is a recipe for holiday stress. Enter these glorious Make-Ahead Creamy Mashed Potatoes that you can prepare up to two days before Christmas and simply reheat to pillowy perfection. Loaded with butter, cream cheese, and sour cream, these potatoes are impossibly creamy and hold up beautifully when reheated. This is the secret weapon every holiday cook needs.
📋 Recipe Card: Make-Ahead Creamy Mashed Potatoes
Prep Time: 20 minutes
Cook Time: 25 minutes
Reheating Time: 45-60 minutes
Total Time: 1 hour 45 minutes (plus chilling time)
Servings: 10-12 servings
Difficulty: Easy
Ingredients
For the Mashed Potatoes:
- 5 lbs Yukon Gold potatoes (about 10-12 medium potatoes)
- 1 tablespoon salt (for boiling water)
- 8 oz (1 block) cream cheese, softened and cubed
- 1 cup (2 sticks) unsalted butter, softened and cubed, divided
- 1 cup sour cream, full-fat, at room temperature
- ½ – ¾ cup whole milk or heavy cream, warmed
- 2 teaspoons salt (adjust to taste)
- 1 teaspoon white pepper (or black pepper)
- ½ teaspoon garlic powder
- 2 tablespoons fresh chives, finely chopped (optional, for garnish)
For Reheating:
- 2-4 tablespoons unsalted butter, cut into pats
- 2-3 tablespoons whole milk or heavy cream (if needed)
Equipment Needed
- Large stockpot (8-quart or larger)
- Colander for draining
- Potato masher or potato ricer (ricer preferred for smoothest results)
- Electric hand mixer (optional, for extra creamy texture)
- Large mixing bowl
- 9×13 inch baking dish (or two 8×8 dishes)
- Aluminum foil
- Rubber spatula
- Measuring cups and spoons
Step-by-Step Instructions
Step 1: Select and Prep the Potatoes
Choose Yukon Gold potatoes for the best results. Their naturally buttery flavor and creamy texture make them ideal for mashed potatoes. Russet potatoes also work well if you prefer a fluffier texture, though they absorb more liquid.
Peel all the potatoes using a vegetable peeler. Remove any eyes or blemishes with a paring knife.
Cut the potatoes into evenly sized chunks, approximately 2-inch pieces. Uniform sizing is crucial—it ensures all pieces cook at the same rate, preventing some from becoming waterlogged while others remain undercooked.
As you cut, place the potato chunks into a large bowl of cold water to prevent browning.
Step 2: Boil the Potatoes
Drain the potatoes from the cold water and transfer them to a large stockpot. Cover with fresh cold water by about 2 inches.
Important: Always start potatoes in cold water. If you add potatoes to boiling water, the outside cooks faster than the inside, resulting in unevenly cooked potatoes.
Add 1 tablespoon of salt to the water. This seasons the potatoes from the inside out.
Place the pot over high heat and bring to a boil. Once boiling, reduce heat to medium and maintain a gentle boil (not a rolling boil, which can break apart the potatoes).
Cook for 18-22 minutes, or until the potatoes are fork-tender. A fork or knife should slide easily into the center of a potato piece with no resistance. Test multiple pieces to ensure even cooking.
Step 3: Drain Properly
This step is critical for creamy, not gluey, mashed potatoes.
Drain the potatoes in a colander and let them sit for 2-3 minutes to allow excess steam to escape. This removes excess moisture that can make potatoes gummy.
Pro Tip: For the driest potatoes, return them to the empty hot pot and place it back on the turned-off (but still warm) burner for 1-2 minutes. Shake the pot occasionally. You’ll see steam rising—that’s moisture leaving the potatoes.
Step 4: Mash the Potatoes
For the smoothest results, use a potato ricer. Press the warm potatoes through the ricer directly into a large mixing bowl. This creates light, fluffy potatoes with no lumps.
If using a potato masher: Transfer potatoes to a large bowl and mash until no large lumps remain. Some texture is fine and even desirable for rustic mashed potatoes.
Important: Never use a food processor or blender for mashed potatoes. The high-speed blades will over-work the starches and create a gluey, paste-like texture that cannot be fixed.
Step 5: Add the Dairy
While the potatoes are still hot, add the softened cream cheese cubes. The heat will help the cream cheese melt. Use a rubber spatula or wooden spoon to fold the cream cheese into the potatoes until fully melted and incorporated.
Add 6 tablespoons (¾ stick) of the softened butter, reserving the remaining 2 tablespoons for topping before reheating. Fold until the butter is completely melted and mixed in.
Add the sour cream and fold gently until combined. The sour cream adds tanginess and helps the potatoes stay creamy when reheated.
Step 6: Add Warm Milk and Seasonings
Warm the milk or heavy cream in the microwave for 30-45 seconds (it should be warm, not hot). Using warm liquid prevents cooling down the potatoes and ensures better absorption.
Add ½ cup of the warmed milk to start. Fold gently to combine. Assess the consistency—if you prefer creamier potatoes, add the remaining ¼ cup gradually until you reach your desired texture.
Note: The potatoes will firm up when chilled, so make them slightly looser than you’d serve them fresh. They should be creamy and just barely hold their shape.
Add the salt, white pepper, and garlic powder. Fold to combine, then taste and adjust seasonings. Remember, the potatoes will be reheated with additional butter, so season generously but don’t over-salt.
For ultra-smooth potatoes, use an electric hand mixer on low speed for 30-60 seconds. Do not overmix.
Step 7: Transfer to Baking Dish
Grease a 9×13 inch baking dish with butter or non-stick cooking spray.
Transfer the mashed potatoes to the prepared dish using a rubber spatula. Spread into an even layer, smoothing the top.
Using the back of a spoon, create gentle swirls or waves across the surface. These ridges will turn golden and slightly crispy when baked, adding wonderful texture.
Step 8: Prepare for Storage
Cut the remaining 2 tablespoons of butter into small pats and distribute them evenly across the top of the potatoes. These will melt during reheating and create a luscious buttery top.
Cover the baking dish tightly with plastic wrap, pressing it directly onto the surface of the potatoes to prevent a skin from forming.
Then cover with aluminum foil for extra protection.
Refrigerate for up to 2 days. The potatoes can also be made the morning of and refrigerated for several hours.
Step 9: Reheat for Serving
Remove the potatoes from the refrigerator 30-45 minutes before reheating to take the chill off. This helps them heat more evenly.
Preheat your oven to 350°F (175°C).
Remove the plastic wrap but keep the foil cover on.
Bake covered for 30 minutes. This allows the potatoes to heat through without drying out.
Remove the foil and continue baking for an additional 15-25 minutes, until heated through and the top is lightly golden in spots. The internal temperature should reach at least 165°F (74°C).
If the potatoes seem dry, drizzle 2-3 tablespoons of warm cream over the top and gently fold it in before serving.
Step 10: Final Touches and Serve
Remove from the oven and let rest for 5 minutes.
Give the potatoes a gentle stir to redistribute the melted butter and refresh the texture.
Taste and adjust seasoning with additional salt and pepper if needed.
Garnish with freshly chopped chives and an extra pat of butter if desired.
Serve immediately alongside your holiday roast, turkey, ham, or prime rib.
🎬 Video Tutorial
Watch a step-by-step video guide for making perfect make-ahead mashed potatoes:
💡 Pro Tips for the Perfect Make-Ahead Mashed Potatoes
- Yukon Golds Are Your Friend: Their naturally waxy-starchy balance and buttery flavor make them superior to russets for make-ahead applications. They hold up to reheating without becoming gummy.
- Warm Your Dairy: Cold butter, cream cheese, and milk will cool down the potatoes and result in a denser texture. Everything should be at room temperature or slightly warmed.
- Don’t Skip the Cream Cheese: Cream cheese is the secret to make-ahead mashed potatoes that don’t dry out. The proteins and fats help maintain creaminess through refrigeration and reheating.
- Sour Cream for Stability: The acidity in sour cream helps prevent the potatoes from becoming gluey and adds a subtle tang that complements rich holiday dishes.
- Make Them Looser Than Normal: The potatoes will thicken considerably when chilled. If they look perfect when fresh, they’ll be too thick when reheated. Aim for a slightly loose consistency.
- Low and Slow Reheating: Resist the urge to crank up the oven temperature. A moderate oven ensures even heating without drying out the edges.
- The Butter Topping Trick: Those butter pats on top aren’t just for flavor—they create a protective layer that prevents the surface from drying out during baking.
- Rest Before Serving: Let the potatoes rest for 5 minutes after baking. This allows the temperature to equalize and makes stirring easier.
🗄️ Storage Tips
Refrigerator Storage:
- Prepared for reheating (in baking dish): Cover tightly with plastic wrap and foil. Store for up to 2 days.
- In an airtight container: Store for up to 4 days, though the texture may be slightly less fluffy.
Freezer Storage:
- Mashed potatoes made with cream cheese and sour cream freeze exceptionally well.
- Transfer cooled potatoes to a freezer-safe container or zip-top freezer bag, removing as much air as possible.
- Freeze for up to 2 months.
- To reheat from frozen: Thaw overnight in the refrigerator, then transfer to a baking dish and follow reheating instructions. You may need to add a splash of cream to restore creaminess.
- Alternative: Bake from frozen at 350°F for 60-75 minutes, covered for the first 45 minutes.
🔄 Variations to Try
- Garlic Lover’s Mashed Potatoes: Roast 2 whole heads of garlic (slice top, drizzle with oil, wrap in foil, roast at 400°F for 40 min) and squeeze the soft cloves into the potatoes.
- Loaded Mashed Potatoes: Top with crispy bacon bits, shredded cheddar cheese, sour cream, and green onions before serving.
- Herbed Mashed Potatoes: Fold in 3 tablespoons of mixed fresh herbs (rosemary, thyme, parsley) with the dairy.
- Parmesan Mashed Potatoes: Add 1 cup freshly grated Parmesan cheese and a pinch of nutmeg.
- Brown Butter Mashed Potatoes: Brown the butter until nutty and fragrant before adding to potatoes for a rich, sophisticated flavor.
- Horseradish Mashed Potatoes: Perfect for prime rib! Fold in 2-3 tablespoons prepared horseradish.
- Boursin Mashed Potatoes: Replace cream cheese with one 5.2 oz package of Boursin Garlic & Fine Herbs cheese.
❓ Frequently Asked Questions
Can I use russet potatoes instead? Yes, but Yukon Golds are preferred for make-ahead potatoes because they hold up better to reheating. Russets are starchier and can become slightly gummy or dry. If using russets, you may need to add extra cream when reheating.
Why did my potatoes turn gluey? This happens when potatoes are overworked, usually from using a food processor, blender, or over-mixing with an electric mixer. Always mash gently and mix just until combined.
Can I make these in a slow cooker? Absolutely! Transfer the prepared mashed potatoes to a greased slow cooker, top with butter pats, cover, and cook on LOW for 3-4 hours. Stir once halfway through. This is perfect for keeping potatoes warm during a party.
Why do I need to start with cold water? Starting potatoes in cold water allows them to cook evenly. If added to boiling water, the outside overcooks before the inside is done, resulting in unevenly cooked potatoes.
Can I peel and cut potatoes ahead of time? Yes! Peel and cube potatoes up to 24 hours ahead. Store fully submerged in cold water in the refrigerator. Drain and pat dry before boiling. Note: Potatoes may darken slightly but will lighten when cooked.
How do I know when the reheated potatoes are done? The potatoes should be heated through (165°F internal temperature) and steaming. The edges should be bubbling slightly and the top may have light golden spots.
🍽️ Serving Suggestions
Make-ahead mashed potatoes are the perfect canvas for all your holiday proteins and gravies. Serve alongside:
- Proteins: Roast turkey, glazed ham, prime rib, roast chicken, beef tenderloin
- Gravies: Turkey gravy, mushroom gravy, red wine reduction, pan drippings
- Vegetables: Roasted Brussels sprouts, glazed carrots, green bean casserole, roasted root vegetables
- Presentation: Serve in a warmed bowl with a well in the center for gravy, topped with a pat of butter and fresh chives
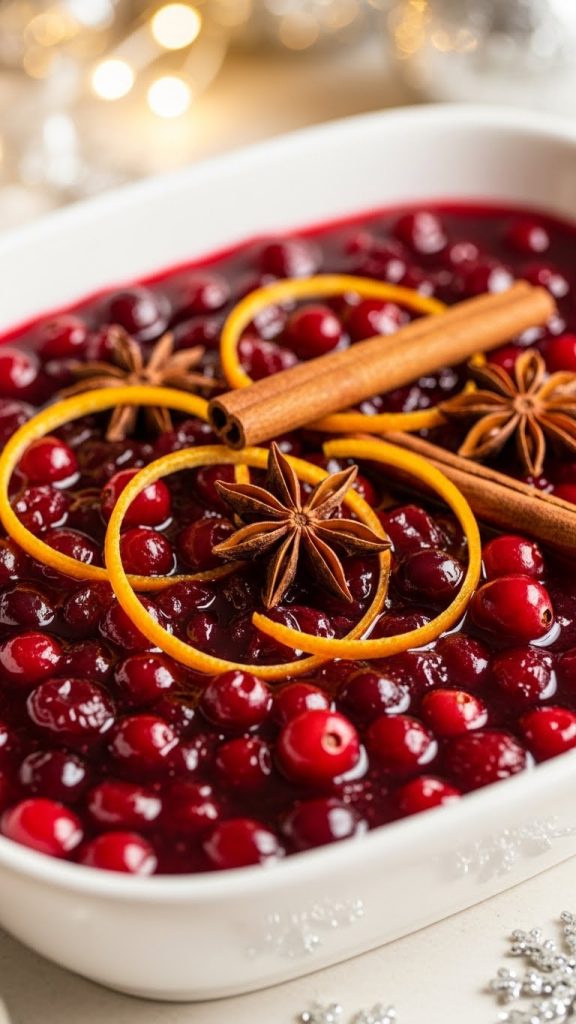
3. Homemade Cranberry Sauce with Orange & Warm Spices
Step away from the canned cranberry sauce and discover how incredibly easy—and infinitely more delicious—homemade cranberry sauce truly is. This stunning ruby-red Homemade Cranberry Sauce with Orange & Warm Spices takes just 15 minutes of hands-on time and delivers a symphony of flavors: tart cranberries balanced with just the right amount of sweetness, brightened with fresh orange zest, and kissed with warm cinnamon and a hint of ginger. The best part? It actually improves as it sits, making it the ultimate make-ahead Christmas condiment. Prepare it up to two weeks in advance and check one more thing off your holiday to-do list.
📋 Recipe Card: Homemade Cranberry Sauce with Orange & Warm Spices
Prep Time: 10 minutes
Cook Time: 15 minutes
Cooling Time: 2 hours
Total Time: 2 hours 25 minutes
Yield: Approximately 2½ cups
Servings: 10-12 servings
Difficulty: Very Easy
Ingredients
For the Cranberry Sauce:
- 12 oz (1 bag) fresh or frozen cranberries
- 1 cup granulated sugar
- 1 cup fresh orange juice (about 2-3 large oranges)
- Zest of 1 large orange (about 1 tablespoon)
- ¼ cup water
- 1 cinnamon stick (or ½ teaspoon ground cinnamon)
- ¼ teaspoon ground ginger
- ⅛ teaspoon ground allspice
- Pinch of ground cloves
- Pinch of salt
Optional Add-Ins:
- 1 tablespoon Grand Marnier or orange liqueur
- ½ cup dried cranberries (for extra texture)
- ½ cup chopped toasted pecans or walnuts
- 1 teaspoon pure vanilla extract
- 1 tablespoon fresh grated ginger (for more ginger punch)
Equipment Needed
- Medium saucepan (3-quart)
- Wooden spoon or silicone spatula
- Microplane or citrus zester
- Citrus juicer
- Fine mesh strainer (optional, for smooth sauce)
- Glass jars or airtight containers for storage
- Measuring cups and spoons
Step-by-Step Instructions
Step 1: Prepare the Cranberries
If using fresh cranberries, pour them into a colander and rinse thoroughly under cold running water. As you rinse, sort through the berries and discard any that are soft, shriveled, wrinkled, or discolored. Remove any stems or debris.
Fresh cranberries should be firm and bright red. They’ll make a slight bouncing sound when dropped—this is actually how cranberry farmers test for freshness!
If using frozen cranberries, there’s no need to thaw them. You can use them straight from the freezer. Simply give them a quick rinse and pick out any visible stems.
Place the cleaned cranberries in a bowl and set aside.
Step 2: Prepare the Orange
Using a microplane or fine citrus zester, zest one large orange. Zest only the bright orange outer layer, avoiding the bitter white pith beneath. You should have approximately 1 tablespoon of zest.
Tip: Zest the orange before juicing it—it’s much easier to zest a whole fruit than a squeezed one.
Cut the zested orange in half and juice it. Then juice additional oranges as needed to yield 1 cup of fresh orange juice. Strain the juice through a fine mesh strainer to remove pulp and seeds if desired.
Fresh orange juice makes a significant difference in this recipe. The brightness and natural sweetness of fresh juice elevates the sauce far beyond what bottled juice can achieve.
Step 3: Combine Liquids and Sugar
In a medium saucepan, combine the fresh orange juice, water, and granulated sugar.
Place the saucepan over medium-high heat and stir continuously until the sugar is completely dissolved. This should take 2-3 minutes. You’ll notice the mixture transition from cloudy to clear as the sugar dissolves.
Do not let the mixture boil before the sugar is fully dissolved, as this can cause crystallization.
Step 4: Add the Cranberries and Aromatics
Once the sugar is dissolved, add the cleaned cranberries to the saucepan.
Add the cinnamon stick (or ground cinnamon), ground ginger, ground allspice, ground cloves, and pinch of salt. Stir to combine.
Add the orange zest, stirring to distribute it evenly throughout the mixture.
Step 5: Bring to a Boil
Increase the heat to high and bring the mixture to a boil. Stir occasionally to ensure even heating.
You’ll notice the cranberries floating at first. As the liquid heats, the berries will begin to bob and move around.
Once the mixture reaches a full rolling boil, reduce the heat to medium-low to maintain a gentle simmer.
Step 6: Simmer Until Cranberries Burst
Simmer the cranberry mixture uncovered for 10-12 minutes, stirring occasionally.
As the cranberries cook, they will begin to burst open—you’ll hear satisfying popping sounds. This is exactly what you want! The pectin inside the cranberries is released when they burst, which naturally thickens the sauce.
Visual Cues to Watch For:
- Minutes 3-5: Cranberries begin to soften and a few start to pop
- Minutes 6-8: Most cranberries have burst; mixture starts to thicken
- Minutes 10-12: Sauce coats the back of a spoon; most berries have collapsed
The sauce is ready when approximately 90% of the cranberries have burst and the mixture has thickened enough to coat the back of a wooden spoon. When you drag your finger across the coated spoon, it should leave a clear trail.
Important: The sauce will continue to thicken significantly as it cools. If it seems slightly loose at this stage, that’s perfect. If it’s already very thick while hot, it may become too jammy when cooled.
Step 7: Remove from Heat and Add Final Touches
Remove the saucepan from the heat.
If using a whole cinnamon stick, fish it out with a spoon and discard (or save for another use like mulled wine).
If using any optional add-ins, now is the time:
- Stir in Grand Marnier or orange liqueur
- Add dried cranberries for extra texture
- Add vanilla extract
- Fold in toasted nuts (add these just before serving to maintain crunch)
Taste the sauce and adjust if needed. If it’s too tart, you can stir in an additional 1-2 tablespoons of sugar while the sauce is still warm. If it’s too sweet, a squeeze of fresh lemon juice will balance it.
Step 8: Cool the Sauce
Let the cranberry sauce cool in the saucepan for 15-20 minutes, stirring occasionally.
Transfer the sauce to a heat-proof glass jar or serving bowl.
For a chunky, rustic sauce (traditional style): Leave as-is with the whole and partially burst berries intact.
For a smooth sauce: While still warm, push the sauce through a fine mesh strainer using a rubber spatula, or pulse briefly in a food processor. Some people enjoy a partially smooth sauce—blend half and fold it back into the chunky portion.
Cover loosely and let cool to room temperature (about 1-2 hours). The sauce will continue to thicken as it cools.
Once completely cool, cover tightly and refrigerate.
Step 9: Chill and Let Flavors Develop
Refrigerate the cranberry sauce for at least 4 hours, or preferably overnight, before serving.
The flavors will meld and deepen as the sauce chills. The orange and warm spices will become more pronounced and harmonious.
The sauce will also thicken further in the refrigerator as the natural pectin sets.
Step 10: Serve
Remove the cranberry sauce from the refrigerator 20-30 minutes before serving to take the chill off. Room temperature or slightly cool sauce has the best flavor and texture.
Transfer to a beautiful serving bowl or keep in a decorative jar.
If the sauce has thickened too much in the refrigerator, stir in 1-2 tablespoons of orange juice or water to reach your desired consistency.
Garnish with a curl of orange zest, a cinnamon stick, or a sprig of fresh rosemary for a festive presentation.
Serve alongside roast turkey, glazed ham, roast chicken, or spread on leftover turkey sandwiches.
🎬 Video Tutorial
Watch a step-by-step video guide for making perfect homemade cranberry sauce:
💡 Pro Tips for the Perfect Cranberry Sauce
- Listen for the Pop: The popping sound of cranberries bursting is your audio cue that the sauce is cooking correctly. If you’re not hearing pops after 5 minutes, increase your heat slightly.
- Don’t Overcook: The sauce thickens dramatically as it cools due to the natural pectin in cranberries. If it’s thick while hot, it’ll be like jam when cold. Pull it off heat while still slightly loose.
- Fresh Orange Juice is Non-Negotiable: Bottled juice lacks the bright, fresh flavor that makes this sauce special. Take the extra 5 minutes to squeeze fresh oranges.
- Make It Ahead: Cranberry sauce is one of the rare dishes that genuinely improves with time. The flavors become more complex and integrated. Making it 3-5 days ahead is ideal.
- Adjust to Your Taste: This recipe produces a balanced sweet-tart sauce. Prefer it sweeter? Add more sugar. Love it tangy? Reduce sugar to ¾ cup and add a splash of lemon juice.
- Save Some Whole Berries: For textural interest, reserve a small handful of raw cranberries and stir them in during the last minute of cooking. They’ll soften but retain their shape.
- Room Temperature Serving: Cold cranberry sauce straight from the fridge mutes the flavors. Let it warm up slightly for the best taste experience.
- Buy Extra Cranberries: Fresh cranberries are only available October through December. Buy several extra bags and freeze them so you can make this sauce year-round.
🗄️ Storage Tips
Refrigerator Storage:
- Transfer to a clean glass jar or airtight container
- Store in the refrigerator for up to 2 weeks
- The high sugar and acid content acts as a natural preservative
- Always use a clean spoon when serving to prevent contamination
Freezer Storage:
- Cranberry sauce freezes exceptionally well
- Transfer to freezer-safe containers or zip-top bags, leaving ½ inch headspace for expansion
- Freeze for up to 2 months
- Thaw overnight in the refrigerator
- Stir well after thawing; the texture may be slightly looser but flavor remains excellent
Canning for Long-Term Storage:
- For shelf-stable cranberry sauce, process in sterilized jars using proper water bath canning techniques
- Follow USDA guidelines for acidified foods
- Properly canned cranberry sauce lasts 12-18 months in a cool, dark pantry
🔄 Variations to Try
- Classic Simple Cranberry Sauce: Omit the spices and orange zest. Use 1 cup water instead of orange juice for a pure cranberry flavor. Simple, traditional, and delicious.
- Maple Cranberry Sauce: Replace granulated sugar with ¾ cup pure maple syrup. Adds a subtle earthy sweetness perfect for fall and winter tables.
- Cranberry Apple Sauce: Add 1 medium Granny Smith apple, peeled and diced, along with the cranberries. The apple adds sweetness and body.
- Bourbon Cranberry Sauce: Stir in 2 tablespoons bourbon at the end of cooking. Adds warmth and complexity.
- Jalapeño Cranberry Sauce: Add 1 seeded and minced jalapeño pepper with the cranberries for a sweet-heat version that’s amazing with ham.
- Port Wine Cranberry Sauce: Replace water with ruby port wine for a sophisticated, deeply flavored sauce. Perfect for beef or duck.
- Ginger Cranberry Sauce: Add 2 tablespoons freshly grated ginger and ¼ cup finely chopped crystallized ginger for a spicy, zingy variation.
- Cranberry Citrus Sauce: Add the zest and juice of 1 lemon and 1 lime in addition to the orange for a multi-citrus burst.
- Chai-Spiced Cranberry Sauce: Add 2 chai tea bags to the simmering liquid, removing before serving. Adds cardamom, black pepper, and cinnamon notes.
❓ Frequently Asked Questions
Can I use frozen cranberries? Absolutely! Frozen cranberries work just as well as fresh. No need to thaw—add them directly to the pot. They may take 1-2 minutes longer to start popping.
Why didn’t my sauce thicken? Cranberry sauce thickens primarily as it cools, not while hot. If it’s been refrigerated and is still thin, return it to a saucepan and simmer for a few more minutes, or add 1 teaspoon of cornstarch mixed with 1 tablespoon cold water.
My sauce is too thick/jammy. How do I fix it? Stir in orange juice, water, or apple cider, 1 tablespoon at a time, until you reach the desired consistency. Warming the sauce slightly will make it easier to thin.
Can I reduce the sugar? Yes, but cranberries are quite tart. You can reduce sugar to ¾ cup minimum. Alternatively, substitute with honey (¾ cup), maple syrup (¾ cup), or a sugar alternative to taste. Keep in mind that sugar helps with thickening.
Why is my sauce bitter? Bitterness usually comes from overcooking, using too much orange pith (white part), or from bitter compounds released when cranberry seeds are crushed. For the smoothest, least bitter sauce, strain out the solids.
Can I make this without oranges? Yes! Substitute apple cider or apple juice for the orange juice, and omit the zest. The sauce will be delicious with a different flavor profile.
Is homemade cranberry sauce healthier than canned? Homemade sauce allows you to control the sugar content and avoid preservatives and high fructose corn syrup often found in canned versions. Plus, fresh cranberries are packed with antioxidants and vitamin C.
How do I make cranberry sauce less tart? Add more sugar (1-2 tablespoons at a time while warm), use sweeter orange juice, add a diced sweet apple during cooking, or stir in a tablespoon of honey at the end.
🍽️ Serving Suggestions
Cranberry sauce isn’t just for Thanksgiving and Christmas turkey—it’s incredibly versatile!
Classic Holiday Uses:
- Alongside roast turkey, chicken, duck, or goose
- Paired with glazed ham or pork tenderloin
- Served with brie and crackers as an appetizer
- Spooned over cream cheese as an instant dip
Creative Uses for Leftovers:
- Spread on turkey sandwiches and paninis
- Swirled into oatmeal or yogurt parfaits
- Used as a glaze for roasted meats (thin with a little water and brush on)
- Layered in brie en croûte
- Mixed into muffin or quick bread batter
- Spooned over vanilla ice cream or cheesecake
- Stirred into cocktails (cranberry margarita, anyone?)
- Spread on toast with cream cheese
Presentation Ideas:
- Serve in a clear glass bowl to showcase the gorgeous ruby color
- Present in a small decorative jar with a ribbon for a hostess gift
- Spoon into a hollowed-out orange half for a stunning table presentation
- Garnish with sugared cranberries, rosemary sprigs, or candied orange peel

4. Slow Cooker Beef Bourguignon
Few dishes capture the essence of a cozy Christmas celebration quite like Beef Bourguignon. This legendary French stew—featuring fork-tender beef braised in rich red wine with earthy mushrooms, sweet pearl onions, and aromatic herbs—is the ultimate centerpiece for a holiday feast. And here’s the best part: the slow cooker does all the heavy lifting while you focus on wrapping presents, decorating the tree, or simply enjoying time with loved ones. Prep everything the night before, pop it in the slow cooker Christmas morning, and by dinnertime, your home will be filled with an intoxicating aroma that screams “special occasion.” This is make-ahead cooking at its finest.
📋 Recipe Card: Slow Cooker Beef Bourguignon
Prep Time: 45 minutes
Cook Time: 8-10 hours (Low) or 5-6 hours (High)
Total Time: 9-11 hours
Servings: 8 servings
Difficulty: Easy (but impressive!)
Ingredients
For the Beef:
- 4 lbs beef chuck roast, cut into 2-inch cubes
- 1 tablespoon kosher salt
- 1 teaspoon freshly ground black pepper
- ¼ cup all-purpose flour
- 4 tablespoons olive oil, divided
For the Sauce:
- 1 bottle (750ml) dry red wine (Burgundy, Pinot Noir, or Côtes du Rhône)
- 2 cups beef broth, low-sodium
- 3 tablespoons tomato paste
- 4 cloves garlic, minced
- 1 tablespoon fresh thyme leaves (or 1 teaspoon dried)
- 2 bay leaves
- 1 teaspoon sugar
For the Vegetables:
- 8 oz thick-cut bacon, cut into ½-inch lardons
- 1 lb cremini or baby bella mushrooms, quartered
- 1 lb frozen pearl onions (or fresh, peeled)
- 4 medium carrots, peeled and cut into 1-inch chunks
- 2 celery stalks, cut into ½-inch pieces
- 1 large yellow onion, diced
For Finishing:
- 2 tablespoons butter, softened
- 2 tablespoons all-purpose flour
- ¼ cup fresh parsley, chopped
- Salt and pepper to taste
For Serving:
- Creamy mashed potatoes, egg noodles, or crusty French bread
- Extra fresh parsley for garnish
Equipment Needed
- 6-quart slow cooker (or larger)
- Large Dutch oven or heavy skillet (for browning)
- Tongs
- Wooden spoon
- Small bowl (for beurre manié)
- Large plate or baking sheet (for resting browned meat)
- Measuring cups and spoons
- Chef’s knife and cutting board
Step-by-Step Instructions
Step 1: Prep the Beef (Night Before or Morning Of)
Remove the beef chuck roast from the refrigerator 30 minutes before cooking to take the chill off. This ensures more even browning.
Pat the beef cubes completely dry with paper towels. This is crucial—wet meat will steam instead of sear, and you won’t get that flavorful brown crust.
In a large bowl, season the beef generously with the kosher salt and black pepper. Toss to coat evenly.
Add the flour to the beef and toss until all pieces are lightly coated. The flour will help thicken the sauce later and promotes better browning. Shake off any excess flour.
Step 2: Brown the Beef
Heat 2 tablespoons of olive oil in a large Dutch oven or heavy skillet over medium-high heat until shimmering and almost smoking.
Working in batches (do not overcrowd the pan), add the beef cubes in a single layer with space between each piece. Overcrowding causes the meat to steam rather than sear.
Sear without moving for 2-3 minutes per side, until a deep golden-brown crust forms. Use tongs to turn the pieces. Brown on all sides—this should take 8-10 minutes total per batch.
Transfer the browned beef to a large plate. Add the remaining 2 tablespoons of oil between batches as needed.
Pro Tip: Don’t skip or rush the browning step. This Maillard reaction creates hundreds of complex flavor compounds that form the foundation of your bourguignon’s rich taste.
Step 3: Cook the Bacon
Pour off all but 1 tablespoon of fat from the pan (or add 1 tablespoon oil if the pan is dry).
Add the bacon lardons to the pan. Cook over medium heat, stirring occasionally, until the bacon is crispy and has rendered its fat, about 6-8 minutes.
Using a slotted spoon, transfer the bacon to a paper towel-lined plate. Reserve the bacon for later.
Leave the bacon fat in the pan—this liquid gold will flavor your vegetables beautifully.
Step 4: Sauté the Aromatics and Vegetables
Add the diced yellow onion to the bacon fat. Sauté over medium heat until softened and beginning to turn golden, about 5 minutes.
Add the carrots and celery. Cook for another 3-4 minutes, stirring occasionally, until the vegetables begin to soften.
Add the minced garlic and tomato paste. Stir constantly for 1-2 minutes until the tomato paste darkens slightly and becomes fragrant. The paste should coat the vegetables.
Step 5: Deglaze with Wine
This is where the magic happens. Pour the entire bottle of red wine into the pan.
Using a wooden spoon, scrape up all the browned bits (fond) stuck to the bottom of the pan. These flavorful caramelized bits are pure concentrated flavor.
Bring the wine to a boil and let it reduce by about one-third, approximately 5-7 minutes. This cooks off the harsh alcohol while concentrating the wine’s flavor.
Remove from heat and set aside.
Step 6: Layer the Slow Cooker
Place the browned beef cubes in an even layer at the bottom of your slow cooker.
Add the pearl onions, distributing them evenly around the beef.
Add the quartered mushrooms on top. (Note: Some prefer to add mushrooms during the last 1-2 hours to prevent them from becoming too soft. Both methods work—it’s personal preference.)
Pour the wine-vegetable mixture from the pan over everything in the slow cooker.
Add the beef broth, fresh thyme, bay leaves, and sugar. Stir gently to combine without disturbing the layers too much.
The liquid should come about three-quarters of the way up the meat and vegetables. If needed, add a splash more broth or wine.
Step 7: Slow Cook
Cover the slow cooker with the lid.
For LOW setting: Cook for 8-10 hours. This is ideal for starting in the morning and having dinner ready by evening.
For HIGH setting: Cook for 5-6 hours. Use this if you’re short on time, but low and slow yields more tender beef.
Resist the urge to lift the lid during cooking. Each peek releases heat and can add 15-30 minutes to the cooking time.
The bourguignon is ready when the beef is fork-tender and easily falls apart, and the vegetables are soft. The sauce should be rich, aromatic, and deeply flavored.
Step 8: Make the Beurre Manié (Thickening Agent)
About 30 minutes before serving, check the consistency of your sauce. If it seems thin (which is common with slow cooker recipes), you’ll thicken it with a beurre manié—a classic French technique.
In a small bowl, mash together 2 tablespoons softened butter and 2 tablespoons flour with a fork until a smooth paste forms. This is your beurre manié.
Remove the slow cooker lid. Pinch off small pieces of the beurre manié and stir them into the hot bourguignon.
Replace the lid and cook on HIGH for an additional 20-30 minutes, stirring once halfway through. The sauce will thicken to a velvety, gravy-like consistency.
Step 9: Final Adjustments
Remove and discard the bay leaves.
Stir in the reserved crispy bacon pieces.
Taste the bourguignon and adjust the seasoning. It will likely need additional salt and pepper—braised dishes often need more than you’d expect. Add salt in small increments, stirring and tasting between each addition.
If desired, stir in an additional splash of wine for brightness, or a teaspoon of balsamic vinegar to enhance the depth.
Step 10: Rest, Garnish, and Serve
Let the bourguignon rest with the lid off for 10 minutes. This allows the sauce to settle and makes serving easier.
Transfer to a large warmed serving bowl or serve directly from the slow cooker insert.
Garnish generously with freshly chopped parsley for color and freshness.
Serving Suggestions:
- Creamy Mashed Potatoes: The classic pairing—perfect for soaking up the luscious sauce
- Buttered Egg Noodles: Wide egg noodles tossed with butter and parsley
- Crusty French Bread: For mopping up every last drop of sauce
- Polenta: Creamy or grilled polenta makes an elegant base
Serve with a glass of the same red wine you used in the recipe for a truly authentic French experience.
🎬 Video Tutorial
Watch a step-by-step video guide for making perfect Beef Bourguignon:
💡 Pro Tips for the Perfect Slow Cooker Beef Bourguignon
- Choose the Right Cut: Chuck roast is ideal—it has the perfect fat-to-meat ratio and becomes incredibly tender during long cooking. Avoid lean cuts like sirloin, which will turn dry and stringy.
- Don’t Skip the Browning: Yes, it adds 30 minutes to your prep, but browning the beef creates deep, complex flavors that simply can’t be achieved otherwise. It’s the difference between good and extraordinary.
- Use Decent Wine: Cook with a wine you’d actually drink. Avoid “cooking wine” from the grocery store—it’s often salty and low quality. A $10-15 Burgundy or Pinot Noir works perfectly.
- Cut Uniformly: Cut your beef into 2-inch cubes of similar size. This ensures even cooking—some pieces won’t be overcooked while others are still tough.
- Pat the Meat Dry: Moisture is the enemy of browning. Thoroughly dry meat sears; wet meat steams. Use paper towels and press firmly.
- Season as You Go: Season the beef, season the vegetables, and taste and season at the end. Layered seasoning creates depth.
- Toast the Tomato Paste: Cooking the tomato paste until it darkens removes the raw, tinny flavor and adds caramelized sweetness.
- Deglaze Like You Mean It: Really scrape up all those browned bits on the bottom of the pan. That fond is concentrated flavor—don’t leave it behind.
- Make It a Day Ahead: Like most stews, beef bourguignon tastes even better the next day after the flavors have melded. Cool, refrigerate overnight, and reheat gently.
- Finish with Fresh Herbs: The long cooking dulls the herbs. Adding fresh parsley at the end brightens the entire dish.
🗄️ Storage Tips
Refrigerator Storage:
- Cool the bourguignon to room temperature within 2 hours (spread in a shallow container to speed cooling)
- Transfer to airtight containers
- Refrigerate for up to 4 days
- The flavor actually improves overnight as the spices meld
Freezer Storage:
- Cool completely before freezing
- Transfer to freezer-safe containers or heavy-duty zip-top bags
- Remove as much air as possible to prevent freezer burn
- Label with date and contents
- Freeze for up to 3 months
Make-Ahead Strategy:
For Christmas Day, consider this timeline:
- December 23: Purchase ingredients, prep vegetables, cut beef
- December 24: Complete all browning and prep. Layer everything in slow cooker insert, cover, and refrigerate overnight.
- December 25 Morning: Place insert in slow cooker base, set to LOW, and let cook all day
- December 25 Evening: Thicken, adjust seasonings, and serve
🔄 Variations to Try
- Beef Bourguignon with Cognac: Add 3 tablespoons cognac along with the wine for extra depth and warmth.
- Mushroom Lover’s Bourguignon: Double the mushrooms and use a mix of cremini, shiitake, and oyster mushrooms.
- Short Rib Bourguignon: Substitute bone-in short ribs for chuck roast. The bones add incredible richness to the sauce.
- Chicken Bourguignon (Coq au Vin): Replace beef with bone-in chicken thighs. Reduce slow cooker time to 4-6 hours on LOW.
- Bourguignon Pot Pie: Use leftover bourguignon as filling for individual pot pies topped with puff pastry.
- Beef Bourguignon with Root Vegetables: Add parsnips, turnips, and sweet potatoes for a heartier winter stew.
- Instant Pot Bourguignon: Complete browning on sauté function, then pressure cook on HIGH for 35-40 minutes with natural release.
- Red Wine-Free Version: Substitute beef broth plus 2 tablespoons balsamic vinegar and 2 tablespoons Worcestershire sauce. Different but still delicious.
❓ Frequently Asked Questions
What’s the best wine to use? Traditional Burgundy (Pinot Noir from the Burgundy region) is classic, but any dry red wine works beautifully. Good options include Pinot Noir, Côtes du Rhône, Merlot, or Cabernet Sauvignon. Avoid sweet wines or oaky, heavily tannic wines. Spend $10-15 for the best balance of quality and value.
Can I skip browning the meat? Technically yes, but you’ll sacrifice significant flavor. Browning creates the Maillard reaction, developing hundreds of flavor compounds. If you’re truly short on time, at minimum brown the bacon and sauté the aromatics to build some flavor base.
Why is my meat tough? The beef wasn’t cooked long enough. Chuck needs extended low-and-slow cooking to break down the collagen into gelatin. If still tough after 8 hours on LOW, continue cooking for another 1-2 hours. Alternatively, the beef may have been too lean—fattier cuts work best.
Can I use frozen beef? It’s not recommended. Frozen beef releases excess moisture, preventing proper browning and diluting the sauce. Always thaw beef completely in the refrigerator before using.
How do I know when it’s done? The beef should be fork-tender—a fork should slide in easily and the meat should pull apart with gentle pressure. The vegetables should be soft but not disintegrating, and the sauce should be rich and aromatic.
Can I cook this on HIGH the entire time? Yes, cooking on HIGH for 5-6 hours works, but the beef won’t be quite as tender. LOW and slow (8-10 hours) allows more collagen breakdown, resulting in more melt-in-your-mouth beef.
My sauce is too thin. What can I do? Use the beurre manié method in Step 8. Alternatively, remove the lid for the last 30-60 minutes of cooking to allow evaporation, or remove the meat/vegetables and simmer the liquid in a saucepan until reduced.
What can I substitute for bacon? Use pancetta for an Italian twist, or omit entirely and use 2 tablespoons butter plus 2 tablespoons olive oil for browning. The dish will be slightly less rich but still excellent.
🍽️ Serving Suggestions
Beef Bourguignon deserves beautiful accompaniments that complement its rich, wine-infused sauce.
Classic Starch Pairings:
- Creamy mashed potatoes (butter and cream-loaded)
- Wide egg noodles tossed with butter and parsley
- Crusty baguette or sourdough bread
- Creamy polenta or grits
- Roasted baby potatoes
Vegetable Sides:
- French green beans (haricots verts) sautéed in butter
- Simple green salad with Dijon vinaigrette
- Roasted Brussels sprouts with bacon
- Steamed asparagus with lemon zest
- Braised red cabbage
Wine Pairing: Serve with the same wine you used for cooking, or pair with:
- Burgundy (Pinot Noir)
- Côtes du Rhône
- Oregon Pinot Noir
- Barolo or Barbaresco for something special
Table Presentation:
- Serve family-style in a rustic enamel Dutch oven
- Ladle into warmed individual serving bowls over mashed potatoes
- Garnish each serving with fresh parsley and a grinding of black pepper
- Provide plenty of crusty bread for sauce-sopping
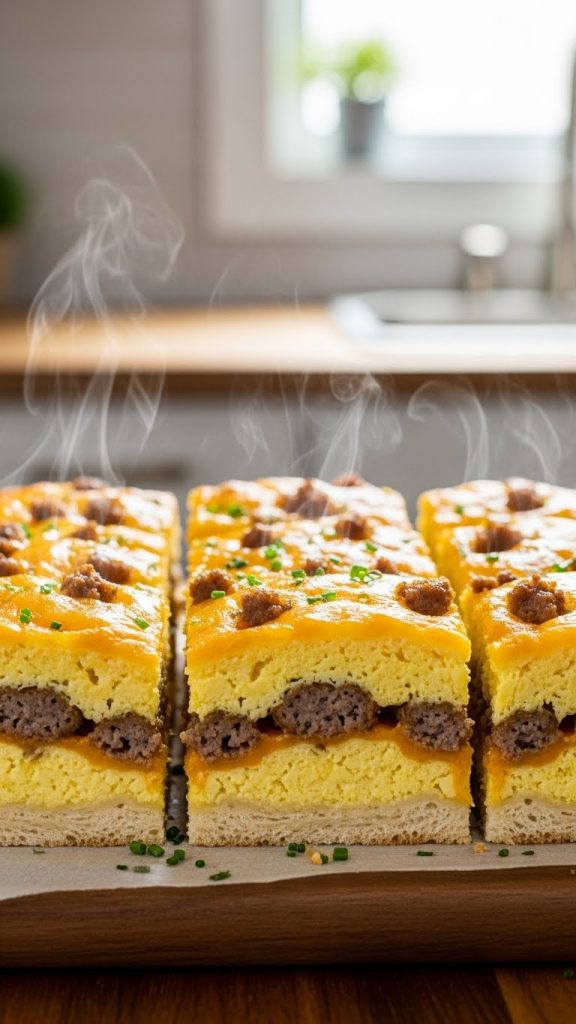
5. Overnight Breakfast Casserole
Christmas morning should be about tearing open presents in your pajamas, sipping hot cocoa by the fire, and creating magical memories with loved ones—not standing over a stove flipping pancakes. Enter the Overnight Breakfast Casserole, the ultimate make-ahead miracle that transforms your holiday morning from chaotic to calm. This savory masterpiece layers fluffy bread cubes, savory sausage, gooey cheese, and a silky egg custard that melds together overnight in the refrigerator. Simply slide it into the oven Christmas morning, and within an hour, you’ll have a golden, puffed, restaurant-quality breakfast that feeds a crowd. It’s basically Christmas morning magic in a baking dish.
📋 Recipe Card: Overnight Breakfast Casserole
Prep Time: 25 minutes
Chill Time: 8 hours or overnight
Cook Time: 55-65 minutes
Resting Time: 10 minutes
Total Time: 9-10 hours (mostly hands-off)
Servings: 12 servings
Difficulty: Easy
Ingredients
For the Casserole Base:
- 1 lb breakfast sausage (regular, maple, or sage-flavored)
- 1 lb thick-cut crusty bread (French bread, brioche, or challah), cut into 1-inch cubes (about 10-12 cups)
- 3 cups sharp cheddar cheese, shredded and divided
- 1 cup Gruyère or Swiss cheese, shredded
For the Egg Custard:
- 12 large eggs
- 2½ cups whole milk
- 1 cup half-and-half (or heavy cream for extra richness)
- 2 tablespoons Dijon mustard
- 1 teaspoon salt
- ½ teaspoon black pepper
- ½ teaspoon garlic powder
- ¼ teaspoon smoked paprika
- ¼ teaspoon ground nutmeg
- Pinch of cayenne pepper (optional)
For the Vegetables (Optional but Recommended):
- 1 tablespoon butter
- 1 medium yellow onion, diced
- 1 red bell pepper, diced
- 4 oz mushrooms, sliced
- 2 cups fresh spinach, roughly chopped
- 3 green onions, sliced (for garnish)
For Topping:
- 2 tablespoons butter, melted
- Fresh chives or parsley, chopped (for garnish)
- Hot sauce (for serving)
Equipment Needed
- 9×13 inch baking dish (3-quart capacity)
- Large skillet
- Large mixing bowl
- Whisk
- Cutting board and knife
- Measuring cups and spoons
- Plastic wrap or aluminum foil
- Rubber spatula
Step-by-Step Instructions
Step 1: Prepare the Bread Cubes
Choose a hearty bread that will hold up to the egg custard. French bread, brioche, challah, or Italian bread work beautifully. Avoid pre-sliced sandwich bread—it becomes too soggy.
Cut the bread into 1-inch cubes. You should have approximately 10-12 cups of bread cubes.
For the best texture, use bread that’s slightly stale (1-2 days old). If your bread is fresh, spread the cubes on a baking sheet and let them sit out for a few hours, or bake at 250°F for 15-20 minutes to dry them slightly. Stale bread absorbs the egg custard better without becoming mushy.
Set the bread cubes aside in a large bowl.
Step 2: Cook the Sausage
Heat a large skillet over medium-high heat.
Add the breakfast sausage, breaking it into small crumbles with a wooden spoon or spatula as it cooks.
Cook until the sausage is browned and cooked through, about 8-10 minutes. The sausage should have some crispy edges for the best texture.
Using a slotted spoon, transfer the cooked sausage to a paper towel-lined plate to drain excess fat.
Sausage Options:
- Classic pork breakfast sausage
- Maple-flavored sausage (adds subtle sweetness)
- Sage sausage (traditional holiday flavor)
- Turkey or chicken sausage (lighter option)
- Spicy Italian sausage (for those who like heat)
Step 3: Sauté the Vegetables (Optional)
If including vegetables, pour off all but 1 tablespoon of sausage drippings from the skillet (or add 1 tablespoon butter if the pan is dry).
Add the diced onion and red bell pepper. Sauté over medium heat for 4-5 minutes until softened.
Add the sliced mushrooms and cook for another 3-4 minutes until the mushrooms release their moisture and begin to brown.
Add the chopped spinach and stir until just wilted, about 1 minute.
Season with a pinch of salt and pepper.
Transfer the vegetables to a plate to cool slightly.
Step 4: Prepare the Egg Custard
In a large mixing bowl, crack all 12 eggs.
Add the whole milk, half-and-half, Dijon mustard, salt, black pepper, garlic powder, smoked paprika, nutmeg, and cayenne (if using).
Whisk vigorously until the mixture is completely smooth and homogeneous, with no visible egg whites. The custard should be uniform in color—a pale yellow.
Why These Ingredients?
- Dijon mustard: Adds subtle tang and helps emulsify the custard
- Nutmeg: Classic French addition that enhances the egg flavor
- Smoked paprika: Provides subtle smokiness that complements the sausage
- Half-and-half: Creates a richer, more velvety texture than milk alone
Step 5: Prepare the Baking Dish
Generously grease a 9×13 inch baking dish with butter or non-stick cooking spray. Make sure to coat the sides as well as the bottom.
Spread half of the bread cubes in an even layer at the bottom of the dish.
Sprinkle half of the cooked sausage over the bread.
If using vegetables, spread half of the sautéed vegetables over the sausage.
Sprinkle 1½ cups of the shredded cheddar cheese and ½ cup of the Gruyère evenly over the layer.
Step 6: Add the Second Layer
Add the remaining bread cubes in an even layer, pressing down gently to compact slightly.
Add the remaining sausage and vegetables (if using).
Sprinkle another 1 cup of cheddar cheese over the top. Reserve the remaining ½ cup of cheddar for topping before baking.
Step 7: Pour the Egg Custard
Give the egg custard mixture one final whisk to ensure it’s well combined.
Slowly and evenly pour the custard over the entire casserole, making sure to saturate all areas. Pour in a circular motion to distribute evenly.
Using a spatula or your hands, gently press down on the bread cubes to help them absorb the custard. The liquid should come up to just below the top layer of bread—some bread should peek above the surface for crispy tops.
Let the casserole sit for 10 minutes, then press down again. The bread will continue to absorb the liquid.
Step 8: Cover and Refrigerate Overnight
Cover the baking dish tightly with plastic wrap, pressing the wrap directly onto the surface of the casserole to prevent a skin from forming.
Add a layer of aluminum foil over the plastic wrap for extra protection.
Refrigerate for at least 8 hours, or up to 24 hours. Overnight is ideal.
Why Overnight? The overnight rest is essential—it allows the bread to fully absorb the egg custard, resulting in a cohesive casserole rather than dry bread floating in cooked eggs. The flavors also meld and deepen during this time.
Step 9: Prepare for Baking (Christmas Morning)
Remove the casserole from the refrigerator 30-45 minutes before baking. Letting it come to room temperature ensures even cooking.
Preheat your oven to 350°F (175°C).
Remove the plastic wrap and foil. Sprinkle the reserved ½ cup of cheddar cheese evenly over the top.
Drizzle the 2 tablespoons of melted butter over the entire surface. This promotes browning and creates irresistible crispy edges.
Step 10: Bake the Casserole
Place the baking dish on a rimmed baking sheet (to catch any potential drips) and place in the center of the preheated oven.
Bake uncovered for 55-65 minutes.
Visual Cues for Doneness:
- The top should be golden brown and slightly puffed
- The edges will be set and pulling away from the sides
- The center should be set—it will jiggle slightly but should not appear wet or liquid
- A knife inserted into the center should come out clean, with no runny egg
If the top is browning too quickly before the center is set, tent loosely with foil for the remaining baking time.
Step 11: Rest Before Serving
Remove the casserole from the oven and let it rest for 10 minutes before cutting.
The casserole will be quite puffed when it comes out of the oven—don’t worry when it deflates slightly as it rests. This is completely normal.
The resting time allows the custard to set fully, making for cleaner slices.
Step 12: Garnish and Serve
Sprinkle freshly chopped chives or parsley over the top for color and freshness.
Add sliced green onions for extra flavor and visual appeal.
Cut into squares and serve warm.
Suggested Accompaniments:
- Fresh fruit salad or berries
- Crispy bacon or extra sausage links
- Hot sauce (Tabasco, Cholula, or sriracha)
- Sour cream or crème fraîche
- Mixed green salad with light vinaigrette
- Fresh-baked muffins or croissants
- Orange juice and champagne (hello, mimosas!)
🎬 Video Tutorial
Watch a step-by-step video guide for making the perfect overnight breakfast casserole:
💡 Pro Tips for the Perfect Overnight Breakfast Casserole
- Use Day-Old Bread: Fresh bread becomes too mushy. Stale bread maintains structure while still absorbing the custard beautifully. Dry fresh bread in a low oven if needed.
- Don’t Skimp on Cheese: The cheese creates pockets of gooey deliciousness throughout the casserole. A blend of sharp cheddar and Gruyère provides both flavor and excellent melt.
- Press It Down: After pouring the custard, press the bread down multiple times over 10-15 minutes. This ensures even absorption and prevents dry spots.
- Room Temperature Before Baking: A cold casserole straight from the fridge will bake unevenly, with overdone edges and an underdone center. Let it sit out for 30-45 minutes while the oven preheats.
- Use a Water Bath for Silkier Texture: For an ultra-creamy casserole, place the baking dish inside a larger roasting pan filled with 1 inch of hot water. This creates a gentler cooking environment.
- Don’t Overbake: The casserole should still have a slight jiggle in the center when removed from the oven. It will continue to set as it rests. Overbaking results in a rubbery texture.
- Make Multiple Dishes: For large gatherings, it’s easier to make two 8×8 dishes rather than one huge casserole. They also bake more evenly.
- Customize to Your Crowd: This recipe is endlessly adaptable. Swap ingredients based on preferences and dietary needs—the technique remains the same.
🗄️ Storage Tips
Refrigerator Storage (Unbaked):
- The assembled, unbaked casserole keeps in the refrigerator for up to 24 hours
- Cover tightly with plastic wrap and foil
- After 24 hours, the bread may become too saturated—bake within this window for best texture
Refrigerator Storage (Baked):
- Cool leftover casserole to room temperature
- Cover tightly with plastic wrap or transfer to airtight containers
- Refrigerate for up to 4 days
Freezer Storage (Unbaked):
- Assemble the casserole without pouring the custard
- Freeze the bread, sausage, vegetables, and cheese layers covered tightly
- Freeze the custard separately in a freezer-safe container
- When ready to use, thaw both overnight in the refrigerator
- Pour custard over the layers, let sit 30 minutes, then bake as directed
Freezer Storage (Baked):
- Cool completely, then cover tightly with plastic wrap and foil
- Freeze for up to 2 months
- Thaw overnight in the refrigerator before reheating
🔄 Variations to Try
- Ham & Swiss Breakfast Casserole: Replace sausage with 2 cups diced ham. Use Swiss cheese instead of cheddar. Add a teaspoon of dried herbs de Provence.
- Bacon Lover’s Casserole: Use 1 lb crispy crumbled bacon instead of sausage. Add extra smoked paprika.
- Vegetarian Breakfast Casserole: Omit sausage. Double the vegetables and add 1 can drained black beans or 1 cup cooked quinoa for protein.
- Tex-Mex Breakfast Casserole: Use chorizo instead of breakfast sausage. Add diced jalapeños, swap cheddar for pepper jack, and use crumbled tortilla chips as the base instead of bread. Top with salsa, sour cream, and cilantro.
- Everything Bagel Casserole: Use cubed everything bagels as the bread base. Top with everything bagel seasoning before baking. Serve with cream cheese on the side.
- Croissant Breakfast Casserole: Replace bread with 8 large croissants torn into pieces. Extra buttery and indulgent!
- Smoked Salmon Breakfast Strata: Use cubed brioche, replace sausage with 8 oz smoked salmon pieces, add fresh dill, use cream cheese in chunks, and swap cheddar for Gruyère.
- Mediterranean Breakfast Casserole: Use Italian sausage, add sun-dried tomatoes, kalamata olives, artichoke hearts, and feta cheese. Season with oregano and basil.
- Apple Sausage Breakfast Casserole: Use maple sausage and add 1 diced Granny Smith apple. Include a touch of cinnamon in the custard.
❓ Frequently Asked Questions
Can I make this the same morning instead of overnight? Yes, but the texture won’t be quite as good. Assemble the casserole, let it sit for at least 30 minutes (preferably 1 hour), pressing down occasionally to help the bread absorb the custard. Then bake as directed.
Why did my casserole turn out soggy? This usually happens when the bread is too fresh and soft, or when too much liquid is added. Use day-old bread or dry it in the oven, and ensure the custard-to-bread ratio is correct. Also, make sure to bake until the center is set.
Why is the center still wet but the edges are overdone? The casserole was likely too cold when it went into the oven, or the oven temperature is too high. Always let the casserole come to room temperature before baking, and consider reducing the oven temp by 25°F if this happens.
Can I use a different type of meat? Absolutely! Try ham, bacon, cooked crumbled chorizo, diced chicken apple sausage, or even leftover holiday turkey or ham. Vegetarian versions with extra veggies work beautifully too.
What’s the best bread to use? Crusty breads with some structure work best: French bread, brioche, challah, ciabatta, or sourdough. Avoid soft sandwich bread, which turns mushy.
Can I assemble this 2 days ahead? It’s not recommended. After 24 hours, the bread becomes overly saturated and may turn mushy. For best results, assemble the night before and bake within 24 hours.
How do I know when the casserole is done? The top should be golden brown and puffed, and a knife inserted into the center should come out clean with no wet egg. The center may jiggle slightly, but it shouldn’t look liquid.
Can I use egg whites only? You can substitute egg whites for some of the whole eggs (use 2 egg whites per whole egg), but the casserole will be less rich and may have a slightly different texture. For a lighter version, try using 6 whole eggs and 12 egg whites.
Why did my casserole deflate after baking? This is completely normal! The casserole puffs up from steam and air during baking, then settles as it cools. The taste and texture aren’t affected.
🍽️ Serving Suggestions
An overnight breakfast casserole is the star of Christmas morning, but it deserves beautiful supporting players.
Complete Christmas Breakfast Spread:
- Fresh fruit platter (berries, melon, grapes, orange slices)
- Yogurt parfaits with granola
- Fresh-baked cinnamon rolls or muffins
- Crispy bacon or sausage links
- Hash brown patties
- Sliced avocado
Beverages:
- Freshly brewed coffee
- Hot chocolate with marshmallows
- Fresh-squeezed orange juice
- Mimosas or Bellinis
- Sparkling apple cider (for the kids or non-drinkers)
Condiments:
- Hot sauce (multiple varieties)
- Salsa and sour cream
- Fresh pico de gallo
- Maple syrup (for the sweet-and-savory lovers)
- Ketchup
Presentation Ideas:
- Serve directly from the baking dish for a cozy, family-style feel
- Use a festive dish towel under the baking dish
- Garnish with fresh herbs and a sprinkle of paprika
- Set out toppings in small bowls for customization
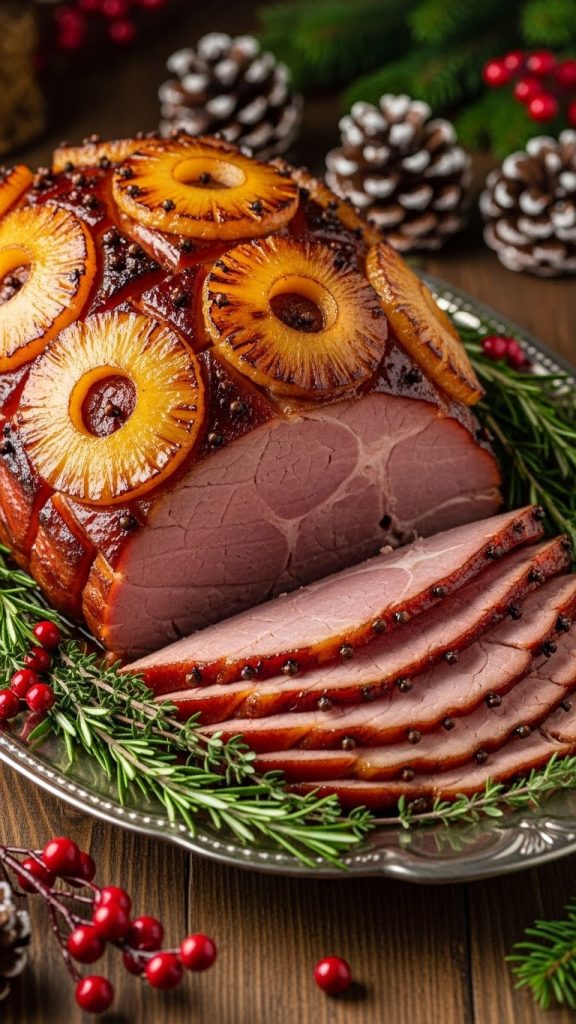
6. Brown Sugar & Pineapple Glazed Holiday Ham
Is there any sight more spectacular on a Christmas dinner table than a glistening, caramelized ham studded with cloves and crowned with golden pineapple rings? This Brown Sugar & Pineapple Glazed Holiday Ham is the ultimate showstopper—impressive enough to be the centerpiece of your feast, yet remarkably easy to prepare. Since most holiday hams come pre-cooked, your job is simply to warm it through while basting it with a sticky-sweet glaze that transforms into a lacquered, mahogany masterpiece. The brown sugar caramelizes into a crackly crust, the pineapple adds tropical sweetness, and the whole thing comes together with minimal hands-on effort. Make the glaze days ahead, and Christmas dinner practically cooks itself.
📋 Recipe Card: Brown Sugar & Pineapple Glazed Holiday Ham
Prep Time: 20 minutes
Cook Time: 2½ – 3½ hours (depending on size)
Resting Time: 15-20 minutes
Total Time: 3-4 hours
Servings: 15-20 servings
Difficulty: Easy
Ingredients
For the Ham:
- 1 bone-in spiral-cut ham (8-10 lbs), fully cooked
- 1 can (20 oz) pineapple rings, drained (reserve juice)
- 15-20 whole cloves (for studding)
- Maraschino cherries (optional, for decoration)
- Toothpicks (for securing pineapple)
For the Brown Sugar Glaze:
- 1 cup packed dark brown sugar
- ½ cup honey
- ¼ cup reserved pineapple juice
- ¼ cup Dijon mustard
- 2 tablespoons unsalted butter
- 1 tablespoon apple cider vinegar
- ½ teaspoon ground cinnamon
- ¼ teaspoon ground cloves
- ¼ teaspoon ground ginger
- ⅛ teaspoon ground allspice
- Pinch of cayenne pepper (optional, for subtle heat)
Optional Glaze Boosters:
- 2 tablespoons bourbon or dark rum
- 1 tablespoon soy sauce (adds umami depth)
- Zest of 1 orange
- 2 tablespoons maple syrup (replace some honey)
Equipment Needed
- Large roasting pan with rack
- Aluminum foil
- Small saucepan
- Whisk
- Basting brush or spoon
- Meat thermometer (instant-read recommended)
- Sharp carving knife
- Cutting board
- Toothpicks
- Measuring cups and spoons
Step-by-Step Instructions
Step 1: Select and Prepare the Ham
Choosing Your Ham: Most supermarket hams are sold fully cooked (either “ready to eat” or “fully cooked” on the label). You’re simply reheating and glazing. Look for:
- Bone-in spiral-cut ham: The spiral cuts make serving effortless, and the bone adds flavor
- Half ham (shank or butt end): Shank end has a more attractive presentation; butt end has more meat
- Whole ham (10-14 lbs): For larger gatherings
Plan for approximately ½ pound per person (bone-in) or ⅓ pound per person (boneless).
Bringing to Room Temperature: Remove the ham from the refrigerator 1-2 hours before cooking. A cold ham will cook unevenly. Unwrap and discard any plastic packaging, but keep any included glaze packet as a backup.
Step 2: Score the Ham (Optional but Recommended)
If your ham isn’t spiral-cut, scoring helps the glaze penetrate and creates an attractive presentation.
Place the ham flat-side down on a cutting board.
Using a sharp knife, score the outer fat layer in a diamond (crosshatch) pattern. Make cuts about 1 inch apart and approximately ¼ inch deep—just through the fat, not into the meat.
Why Score?
- Creates pockets for glaze to seep into
- Allows fat to render and baste the meat
- Results in beautiful caramelized edges
- Makes carving easier
For spiral-cut hams, scoring isn’t necessary as the cuts already provide glaze penetration.
Step 3: Stud with Cloves
Whole cloves add a warm, aromatic flavor and create a stunning visual presentation.
Insert whole cloves into the intersection points of your diamond scoring pattern. If using a spiral-cut ham, place cloves evenly across the surface, roughly 1-2 inches apart.
Use approximately 15-20 cloves for an 8-10 lb ham. Don’t overdo it—cloves have a strong flavor that can become overpowering.
Note: If you or your guests don’t enjoy clove flavor, feel free to skip this step. The ham will still be delicious.
Step 4: Set Up for Roasting
Preheat your oven to 325°F (165°C).
Line a large roasting pan with aluminum foil for easy cleanup. Place a roasting rack inside the pan.
Position the ham flat-side (cut-side) down on the rack. This protects the exposed meat from drying out and presents the rounded, fat-covered side for glazing.
Pour 1 cup of water (or reserved pineapple juice, ginger ale, or apple cider) into the bottom of the roasting pan. This creates steam that keeps the ham moist during the initial cooking phase.
Cover the entire ham tightly with aluminum foil, sealing the edges around the pan.
Step 5: Initial Roasting
Place the ham in the preheated oven.
Roast covered for the first portion of cooking, allowing approximately 10-12 minutes per pound:
- 8 lb ham: approximately 1 hour 20 minutes covered
- 10 lb ham: approximately 1 hour 40 minutes covered
During this covered phase, the ham gently heats through while staying moist from the steam.
Step 6: Prepare the Glaze
While the ham roasts, prepare the glaze. This can also be made up to 5 days ahead and refrigerated.
In a small saucepan, combine:
- Dark brown sugar
- Honey
- Reserved pineapple juice
- Dijon mustard
- Butter
- Apple cider vinegar
- Cinnamon, ground cloves, ginger, allspice
- Cayenne (if using)
Place over medium heat and whisk until the butter melts and the sugar dissolves completely.
Bring to a gentle simmer and cook for 3-5 minutes, stirring occasionally, until the glaze thickens slightly and becomes syrupy. It should coat the back of a spoon.
Remove from heat. If using bourbon or rum, stir it in now (off the heat to preserve some alcohol flavor).
Glaze Consistency Check: The glaze will thicken further as it cools and even more as it bakes onto the ham. If it becomes too thick, warm it gently and add a splash of pineapple juice.
Step 7: First Glaze Application
After the initial covered roasting time, carefully remove the ham from the oven.
Remove the foil (watch for steam!) and discard.
Using a basting brush or spoon, generously coat the entire surface of the ham with about one-third of the glaze. Make sure to get glaze into all the nooks, crannies, and spiral cuts.
Return the ham to the oven, uncovered, for 20 minutes.
Step 8: Add Pineapple Rings and Second Glaze
Remove the ham from the oven.
Arrange the pineapple rings decoratively over the surface of the ham, securing each with a toothpick pushed through the center.
For extra festive presentation, place a maraschino cherry in the center of each pineapple ring, secured with the same toothpick.
Brush the ham and pineapple rings with another third of the glaze.
Return to the oven, uncovered, for another 20 minutes.
Step 9: Final Glaze and Finish
Remove the ham from the oven.
Apply the remaining glaze, making sure to brush over the pineapple rings as well. The glaze should be starting to caramelize and turn a deep mahogany color.
Return to the oven for a final 15-20 minutes, or until the internal temperature reaches 140°F (60°C) when measured at the thickest part (not touching bone).
Watch Carefully: The sugars in the glaze can burn quickly at this stage. If the glaze is getting too dark, tent loosely with foil.
Step 10: Monitor Internal Temperature
The USDA recommends heating pre-cooked ham to an internal temperature of 140°F (60°C).
Insert an instant-read thermometer into the thickest part of the ham, avoiding contact with the bone (which conducts heat and gives a false high reading).
Total Cooking Time Guidelines:
- 8 lb ham: 2 – 2½ hours total
- 10 lb ham: 2½ – 3 hours total
- 12 lb ham: 3 – 3½ hours total
These are estimates—always rely on temperature, not time.
Step 11: Rest Before Carving
This step is crucial and often skipped. DO NOT skip it!
Transfer the ham to a cutting board (or leave on the rack). Tent loosely with foil.
Let the ham rest for 15-20 minutes.
Why Rest?
- Allows juices to redistribute throughout the meat
- Makes carving easier and neater
- The internal temperature will continue to rise 5-10°F (carryover cooking)
- Gives you time to finish side dishes and set the table
Step 12: Carve and Serve
For Spiral-Cut Ham: Carving couldn’t be easier. Run a sharp knife along the bone to release the slices, then simply slide them off.
For Non-Spiral Ham:
- Place ham cut-side down on a cutting board
- Locate the bone and cut parallel to it, creating thin slices
- Once you reach the bone, cut perpendicular to release the slices
- Turn the ham and repeat on the other side
Transfer slices to a warmed serving platter.
Pour any accumulated pan juices over the sliced ham or serve on the side as extra sauce.
Garnish with the roasted pineapple rings and fresh rosemary or parsley sprigs.
Serving Suggestions:
- Extra warm glaze on the side for drizzling
- Grainy mustard or honey mustard
- Warm dinner rolls for making mini ham sandwiches
- Classic sides: scalloped potatoes, green bean casserole, roasted Brussels sprouts
🎬 Video Tutorial
Watch a step-by-step video guide for making the perfect glazed holiday ham:
💡 Pro Tips for the Perfect Glazed Holiday Ham
- Buy Quality Ham: Look for hams labeled “ham with natural juices” rather than “ham with water added.” They’re less processed and have better flavor and texture.
- Room Temperature Matters: A cold ham will cook unevenly. Taking it out 1-2 hours before roasting ensures the center heats properly without overcooking the outside.
- Don’t Overheat: Since the ham is already cooked, you’re just warming it through. Overheating dries out the meat. Stop at 140°F internal temperature.
- Baste, Baste, Baste: Each basting builds layers of sticky, caramelized glaze. Don’t rush—the multiple applications create that irresistible lacquered finish.
- Save the Bone: The ham bone is liquid gold for soups. Use it to make split pea soup, ham and bean soup, or add it to collard greens. Freeze it if not using immediately.
- Tent If Necessary: If the glaze is browning too quickly, tent with foil. A burnt glaze turns bitter.
- Make Extra Glaze: Double the glaze recipe—use half for basting and serve the rest warm on the side. Guests will want more!
- Let It Rest: Patience pays off. Resting allows the juices to redistribute, resulting in moister slices.
- Slice Against the Grain: For the tenderest bites, identify the direction of the muscle fibers and slice perpendicular to them.
- Plan for Leftovers: Ham is one of the best leftover meats. Plan to use it for sandwiches, omelets, soups, and fried rice all week long.
🗄️ Storage Tips
Refrigerator Storage (Uncooked/Before Glazing):
- Keep ham in original packaging until ready to use
- Store in refrigerator for up to 7 days (check sell-by date)
- Make glaze up to 5 days ahead; refrigerate in airtight container
Refrigerator Storage (Cooked):
- Cool ham to room temperature within 2 hours
- Wrap tightly in plastic wrap or aluminum foil, or store in airtight containers
- Sliced ham: up to 5 days
- Whole ham (bone-in): up to 7 days
- Store ham bone separately wrapped tightly
Freezer Storage:
- Wrap ham tightly in plastic wrap, then aluminum foil
- Place in freezer bags, removing as much air as possible
- Sliced ham: up to 2 months
- Whole/half ham: up to 2 months
- Ham bone: up to 6 months
- Thaw in refrigerator (24-48 hours for large pieces)
🔄 Variations to Try
- Maple Bourbon Glazed Ham: Replace honey with pure maple syrup and add ¼ cup bourbon to the glaze. Add 1 tablespoon grainy mustard for texture.
- Orange Marmalade Glazed Ham: Use 1 cup orange marmalade as the base, add ¼ cup brown sugar, 2 tablespoons Dijon, and the juice of 1 orange.
- Coca-Cola Ham: Replace pineapple juice with Coca-Cola. Add ¼ cup ketchup and 1 tablespoon Worcestershire sauce for a Southern classic.
- Honey Mustard Glazed Ham: Use ¾ cup honey, ½ cup Dijon mustard, and 2 tablespoons whole grain mustard. Skip the brown sugar for a tangier profile.
- Cherry Glazed Ham: Replace pineapple with 1 can cherry pie filling. Use cherry juice in the glaze and add a splash of almond extract.
- Asian-Inspired Glazed Ham: Combine ½ cup hoisin sauce, ¼ cup honey, 2 tablespoons soy sauce, 1 tablespoon rice vinegar, and 1 teaspoon five-spice powder.
- Apple Cider Glazed Ham: Use apple cider instead of pineapple juice. Add ½ cup apple butter and increase cinnamon. Top with apple slices instead of pineapple.
- Spicy Brown Sugar Ham: Add 1 tablespoon sriracha or hot sauce to the glaze, increase cayenne to ½ teaspoon, and add 1 teaspoon smoked paprika for heat with depth.
- Dr. Pepper Ham: Replace liquids with Dr. Pepper soda for a uniquely sweet and slightly spiced glaze.
❓ Frequently Asked Questions
What’s the difference between bone-in and boneless ham? Bone-in ham has more flavor (the bone adds richness), stays juicier during cooking, and the bone is valuable for soup. Boneless ham is easier to carve and has no waste, but can dry out more easily. For holiday presentation, bone-in is traditional.
Spiral-cut vs. regular ham—which is better? Spiral-cut is far more convenient (pre-sliced for easy serving) and allows glaze to penetrate between slices. However, the cuts can make the ham dry out faster. Regular ham stays moister but requires carving skills.
Do I need to glaze the ham? No—ham is delicious without glaze. But the glaze adds caramelized sweetness, visual appeal, and transforms a simple ham into a showpiece. The effort-to-reward ratio is excellent.
My ham is too salty. What can I do? Soak the ham in cold water for 24-72 hours before cooking, changing the water every 12 hours. This draws out excess salt. Use a less sweet glaze to balance.
Can I use a fresh (uncooked) ham? Yes, but cooking times are significantly longer (approximately 20-25 minutes per pound at 325°F until internal temp reaches 145°F). Fresh ham has a different, more pork-roast flavor.
Why is my glaze not sticking? The ham surface may be too wet. Pat dry before applying glaze. Also, ensure the glaze has thickened sufficiently before brushing. Applying to a warm ham helps adhesion.
Can I prepare the ham a day ahead? You can score, stud with cloves, and prepare the glaze a day ahead. Cook the ham day-of for best results, but it reheats well if necessary.
How do I prevent the ham from drying out? Keep it covered during the first portion of cooking, don’t overheat (stop at 140°F), baste frequently, and let it rest before carving.
What size ham should I buy? Plan for ½ pound per person for bone-in ham, ⅓ pound for boneless. For a 10-person dinner, an 8-10 lb bone-in ham is perfect with some leftovers.
🍽️ Serving Suggestions
A glazed ham deserves equally spectacular accompaniments.
Classic Christmas Sides:
- Scalloped or au gratin potatoes
- Creamy mashed potatoes
- Green bean casserole
- Honey-glazed carrots
- Roasted Brussels sprouts with bacon
- Mac and cheese
- Sweet potato casserole
Breads:
- Buttery dinner rolls
- Cornbread
- Hawaiian sweet rolls (for mini sandwiches)
- Biscuits with honey butter
Salads:
- Classic Caesar salad
- Winter citrus salad
- Cranberry walnut salad with goat cheese
Condiments to Serve Alongside:
- Extra warm glaze for drizzling
- Whole grain Dijon mustard
- Honey mustard sauce
- Cranberry sauce
- Apple butter
Beverage Pairings:
- Riesling or Gewürztraminer (off-dry whites complement the sweetness)
- Sparkling cider
- Pinot Noir (if preferring red)
- Iced tea with lemon
Presentation:
- Serve on your largest platter, ideally warmed
- Surround with roasted pineapple rings and fresh herbs
- Place a carving knife and fork nearby
- Keep extra glaze warm in a gravy boat

7. Buttery Make-Ahead Dinner Rolls
There’s something almost magical about a basket of warm, freshly baked dinner rolls at the Christmas table—the way they fill the room with that irresistible yeasty aroma, the soft pillowy texture that tears apart to reveal a steaming, fluffy interior, and that golden buttery crust that begs to be slathered with even more butter. The catch? Most people assume homemade rolls require hours of work on an already hectic holiday. Not these rolls. This ingenious make-ahead method lets you prep the dough, shape the rolls, and freeze them up to a month in advance. On Christmas Day, simply thaw, let rise, and bake. Fresh-from-the-oven rolls with almost zero day-of effort. Now that’s something to be thankful for.
📋 Recipe Card: Buttery Make-Ahead Dinner Rolls
Prep Time: 30 minutes
First Rise: 1½ – 2 hours
Shaping Time: 15 minutes
Second Rise: 1 – 1½ hours (or overnight refrigerator rise)
Bake Time: 18-22 minutes
Total Time: 4-5 hours (mostly hands-off)
Yield: 24 rolls
Difficulty: Easy-Moderate
Ingredients
For the Dough:
- 1 cup whole milk, warmed to 110°F (43°C)
- ½ cup warm water (110°F)
- 2¼ teaspoons (1 packet) instant or active dry yeast
- ½ cup granulated sugar, divided
- 5½ – 6 cups all-purpose flour, divided
- 2 teaspoons salt
- 2 large eggs, at room temperature
- ½ cup (1 stick) unsalted butter, melted and slightly cooled
For Topping:
- 4 tablespoons unsalted butter, melted (for brushing)
- Flaky sea salt (optional)
- Fresh herbs (rosemary, thyme) for herb variation
For Make-Ahead Freezing:
- Cooking spray or parchment paper
- Plastic wrap
- Freezer-safe zip-top bags or airtight containers
Equipment Needed
- Stand mixer with dough hook (or large bowl for hand kneading)
- Instant-read thermometer (for checking liquid temperature)
- Large mixing bowl
- Clean kitchen towel or plastic wrap
- 9×13 inch baking pan (or two 9-inch round pans)
- Baking sheet (for freezing)
- Pastry brush
- Measuring cups and spoons
- Rubber spatula
Step-by-Step Instructions
Step 1: Activate the Yeast (Proof)
In a small bowl or liquid measuring cup, combine the warm milk, warm water, and 1 tablespoon of the sugar.
Temperature is Critical: The liquid should be between 105-115°F (40-46°C). Too cold and the yeast won’t activate; too hot and you’ll kill it. Use an instant-read thermometer to check.
Sprinkle the yeast over the surface of the liquid. Give it a gentle stir.
Let stand for 5-10 minutes until the mixture becomes foamy and bubbly. This is called “proofing” and confirms your yeast is alive and active.
Troubleshooting: If after 10 minutes you don’t see foam or bubbles, your yeast may be dead. Start over with fresh yeast and check your liquid temperature.
Step 2: Mix the Dough
In the bowl of a stand mixer fitted with the dough hook, combine 5 cups of the flour, the remaining sugar (about 7 tablespoons), and salt. Whisk briefly to combine the dry ingredients.
Add the proofed yeast mixture, eggs, and melted butter (make sure the butter has cooled so it doesn’t kill the yeast).
Mix on low speed until a shaggy dough forms, about 2 minutes. Scrape down the sides of the bowl as needed.
Increase speed to medium and knead for 6-8 minutes, adding the remaining ½ – 1 cup flour gradually as needed. Add flour slowly—you may not need all of it.
Hand Kneading Alternative: Combine ingredients in a large bowl, stir until a shaggy dough forms, then turn out onto a floured surface. Knead by hand for 10-12 minutes, incorporating flour as needed.
Step 3: Check Dough Consistency
The finished dough should be:
- Smooth and elastic
- Slightly tacky but not sticky (it shouldn’t stick to your fingers when pressed)
- Pulling away cleanly from the bowl sides
- Able to be stretched thin enough to see light through it (windowpane test)
Windowpane Test: Pinch off a small piece of dough and gently stretch it between your fingers. If it stretches thin enough to become translucent without tearing, the gluten is properly developed.
If the dough is too sticky, add flour 1 tablespoon at a time. If too dry and stiff, add water 1 teaspoon at a time.
Step 4: First Rise (Bulk Fermentation)
Lightly grease a large, clean bowl with cooking spray or a drizzle of oil.
Form the dough into a smooth ball and place it in the greased bowl, turning once to coat all sides with oil.
Cover the bowl tightly with plastic wrap or a damp kitchen towel.
Place in a warm, draft-free location and let rise until doubled in size, approximately 1½ – 2 hours.
Best Rising Spots:
- Inside a turned-off oven with the light on
- On top of the refrigerator
- In a microwave with a cup of hot water
- Near (not on) a sunny window
How to Tell If Doubled: The dough should have visibly expanded. When you poke it with a floured finger, the indentation should remain (not spring back immediately).
Step 5: Punch Down and Divide
Once doubled, punch down the dough by pressing your fist into the center. This deflates the dough and redistributes the yeast for a finer crumb.
Turn the dough out onto a lightly floured surface.
Using a bench scraper or sharp knife, divide the dough into 24 equal pieces.
For Even Rolls: First divide the dough in half, then each half into quarters, then each quarter into three pieces. This ensures consistent sizing.
Alternatively, weigh the total dough and divide by 24 for precision. Each piece should be approximately 2-2.5 oz (55-70g).
Step 6: Shape the Rolls
Working with one piece at a time, shape each into a smooth ball:
- Flatten the dough piece slightly with your palm
- Pull the edges toward the center, pinching to seal
- Flip seam-side down
- Cup your hand over the dough ball and roll in circular motions on an unfloured surface, using the friction to create surface tension
- The finished roll should be smooth and taut on top with a sealed seam on the bottom
Shaping Tips:
- Don’t flour the surface too much—a little friction helps create tension
- Keep unused dough covered to prevent drying
- If dough springs back aggressively, let it rest 5 minutes and try again
Step 7: Arrange in Pan
Grease a 9×13 inch baking pan (or two 9-inch round cake pans) with butter or cooking spray.
Arrange the shaped rolls in the pan, spacing them about ½ inch apart (they’ll expand to touch during rising and baking, creating pull-apart rolls).
For a 9×13 pan: 4 rows of 6 rolls For 9-inch round pans: 7-8 rolls around the edge, 4-5 in the center (12 per pan)
Step 8: Second Rise
Cover the pan(s) loosely with plastic wrap or a clean kitchen towel.
For Same-Day Baking: Let rise in a warm place for 1 – 1½ hours, until the rolls have doubled in size, are puffy, and are touching each other.
For Overnight Refrigerator Rise: Cover tightly with plastic wrap and refrigerate for 8-18 hours. The cold slows the yeast, allowing the rolls to rise slowly overnight. Remove from refrigerator and let sit at room temperature for 1-1½ hours before baking.
When ready, the rolls should be visibly puffed and pressing against each other. If you gently press a roll with your finger, it should slowly spring back.
Step 9: Bake the Rolls
Preheat your oven to 375°F (190°C). Position a rack in the center of the oven.
Remove plastic wrap from the rolls.
For extra golden tops, brush the rolls gently with half of the melted butter before baking.
Bake for 18-22 minutes, until the tops are golden brown and the internal temperature reaches 190°F (88°C).
Visual Cues:
- Tops are evenly golden brown
- Rolls sound hollow when tapped
- Edges are set and pulling slightly from the pan
Rotate the pan halfway through baking for even browning.
Step 10: Butter and Serve
Remove the pan from the oven and immediately brush the hot rolls generously with the remaining melted butter. The butter will soak in beautifully.
If desired, sprinkle with flaky sea salt while the butter is still wet.
Let cool in the pan for 5-10 minutes (if you can wait!).
Serve warm in a cloth-lined basket to keep them cozy. Provide softened butter, honey butter, or jam on the side.
🧊 Make-Ahead Freezer Method
This is where the magic happens—perfect fresh rolls with almost no day-of work!
Method 1: Freeze After Shaping (Recommended)
- Complete steps 1-7 (through shaping and arranging in pan)
- Cover the pan tightly with plastic wrap, then aluminum foil
- Freeze for up to 1 month
- To Bake: Remove from freezer, uncover, and let thaw and rise at room temperature for 4-5 hours (or overnight in the refrigerator plus 1 hour at room temperature)
- Bake as directed
Method 2: Flash Freeze Individual Rolls
- Complete steps 1-6 (through shaping)
- Place shaped rolls on a parchment-lined baking sheet, not touching
- Freeze until solid, about 2 hours
- Transfer frozen rolls to freezer bags
- To Bake: Place frozen rolls in greased pan, cover, and let thaw and rise overnight in refrigerator, then 1-2 hours at room temperature. Bake as directed.
Method 3: Par-Bake and Freeze
- Complete all rising steps and bake for only 15 minutes (rolls should be set but still pale)
- Cool completely, then wrap tightly and freeze
- To Serve: Bake frozen rolls at 375°F for 10-12 minutes until golden
🎬 Video Tutorial
Watch a step-by-step video guide for making perfect homemade dinner rolls:
💡 Pro Tips for the Perfect Dinner Rolls
- Temperature Matters: Yeast is alive and temperature-sensitive. Liquid between 105-115°F activates yeast; above 140°F kills it. Always use a thermometer.
- Room Temperature Ingredients: Cold eggs and butter slow down the yeast and affect gluten development. Set out eggs and butter 30-60 minutes before starting.
- Don’t Over-Flour: It’s tempting to add extra flour if dough is sticky, but too much flour makes dense, dry rolls. A slightly tacky dough is ideal.
- Be Patient with Rising: Don’t rush the rise. Under-proofed rolls will be dense and may not bake evenly. The dough should truly double in size.
- Create Surface Tension: When shaping, the key to beautiful round rolls is surface tension. The outside should be smooth and taut.
- The Poke Test: To check if rolls have risen enough, gently poke the dough. If the indentation slowly springs back but doesn’t fully disappear, they’re ready.
- Brush Twice: Butter before baking creates a golden crust; butter after baking creates that irresistible sheen and flavor.
- Tent If Browning Too Fast: If rolls are browning on top before fully baked, tent loosely with foil for the remaining baking time.
- Freeze for Convenience: The freezer method produces rolls nearly indistinguishable from fresh. Don’t be afraid to make a double batch.
- Serve Warm: Rolls are best served warm. If made ahead and stored at room temperature, warm in a 300°F oven for 5-10 minutes before serving.
🗄️ Storage Tips
Room Temperature Storage (Baked Rolls):
- Cool completely before storing
- Place in airtight container or zip-top bag
- Store at room temperature for up to 3 days
- Reheat in 300°F oven for 5-10 minutes to refresh
Refrigerator Storage (Unbaked Dough):
- After first rise, punch down and shape
- Cover tightly and refrigerate for up to 24 hours
- Let come to room temperature (1-2 hours) before baking
Refreshing Day-Old Rolls:
- Wrap in foil and warm at 300°F for 10 minutes
- Sprinkle lightly with water before wrapping for extra softness
- Microwave option: Wrap in damp paper towel, microwave 15-20 seconds
🔄 Variations to Try
- Honey Wheat Rolls: Replace 2 cups all-purpose flour with whole wheat flour. Substitute honey for half the sugar. Add 1 tablespoon vital wheat gluten for lift.
- Garlic Herb Rolls: Add 2 teaspoons garlic powder to the dough. After baking, brush with garlic butter (melted butter + minced garlic + fresh herbs).
- Rosemary Sea Salt Rolls: Fold 2 tablespoons fresh minced rosemary into the dough. Top with flaky sea salt and rosemary sprigs before baking.
- Parmesan Pull-Apart Rolls: Roll each ball in melted butter, then in grated Parmesan before placing in pan. Sprinkle more Parmesan on top.
- Cinnamon Roll-Style Dinner Rolls: Roll dough into rectangle, brush with butter, sprinkle with cinnamon sugar, roll up and slice. (Like cinnamon rolls but less sweet—perfect for ham!)
- Everything Bagel Rolls: After brushing with butter, top with everything bagel seasoning before baking.
- Jalapeño Cheddar Rolls: Fold 1 cup shredded sharp cheddar and ¼ cup diced pickled jalapeños into the dough before shaping.
- Potato Rolls: Replace 1 cup flour with 1 cup instant mashed potato flakes (dry). Adds extra tenderness and slight sweetness.
- Hawaiian Sweet Rolls: Add an extra ¼ cup sugar, 2 tablespoons pineapple juice, and ½ teaspoon vanilla extract to the dough.
- Cloverleaf Rolls: Instead of one ball, place 3 small balls together in each muffin cup for an elegant pull-apart presentation.
❓ Frequently Asked Questions
My yeast didn’t foam. What went wrong? Either the yeast is dead (expired) or the liquid was too hot or too cold. Check the expiration date on your yeast and use a thermometer to ensure liquid is 105-115°F. Start over with fresh yeast.
Why are my rolls dense and heavy? Common causes include: too much flour, under-kneading, not enough rising time, liquid that was too hot (killing the yeast), or expired yeast. Ensure dough is tacky, knead until smooth and elastic, and let it truly double before moving on.
Can I make these without a stand mixer? Absolutely! Mix ingredients in a large bowl until a shaggy dough forms, then knead by hand on a lightly floured surface for 10-12 minutes until smooth and elastic.
How do I know when the dough has risen enough? The dough should visibly double in size. The poke test helps: press a floured finger ½ inch into the dough. If the indentation stays, it’s ready. If it springs back quickly, it needs more time.
Why did my rolls turn out flat? The dough may have over-proofed (risen too long and collapsed), or there wasn’t enough surface tension when shaping. Practice the shaping technique and watch your rising times carefully.
Can I use instant yeast instead of active dry? Yes! Instant yeast (also called rapid-rise or bread machine yeast) can be mixed directly into the dry ingredients without proofing first. It also works slightly faster.
Why did my rolls spread sideways instead of rising up? This indicates the dough was too wet or over-proofed. Add flour if dough seems very sticky, and don’t let the second rise go too long.
Can I make fewer rolls? Yes, simply halve the recipe. Alternatively, freeze half the shaped rolls for another time.
What if I don’t have time for two rises? You can skip the first rise and let the shaped rolls rise once for 2-3 hours. The texture will be slightly less refined, but they’ll still be delicious.
🍽️ Serving Suggestions
Warm dinner rolls are versatile and complement nearly any holiday meal.
Best Butter Companions:
- Plain softened unsalted butter (classic)
- Honey butter (equal parts butter and honey)
- Garlic herb butter (butter + minced garlic + parsley)
- Cinnamon honey butter (butter + honey + cinnamon)
- Maple butter (butter + maple syrup)
- Pumpkin spice butter (seasonal!)
Perfect Pairings:
- Glazed holiday ham (make mini sandwiches!)
- Roast turkey and gravy (for sopping)
- Prime rib and au jus
- Beef bourguignon
- Soups and stews (perfect for dunking)
- Salads (a warm roll rounds out the meal)
Presentation Ideas:
- Serve in a cloth-lined basket to keep warm
- Arrange in a spiral pattern on a wooden board
- Place a small ramekin of softened butter in the center of the roll basket
- Add a sprig of rosemary for festive garnish
- Use a warming drawer to keep rolls toasty throughout dinner
Leftover Ideas:
- Bread pudding
- Croutons for salads or stuffing
- French toast bake
- Mini sliders or sandwiches
- Breadcrumbs (dry out and pulse in food processor)
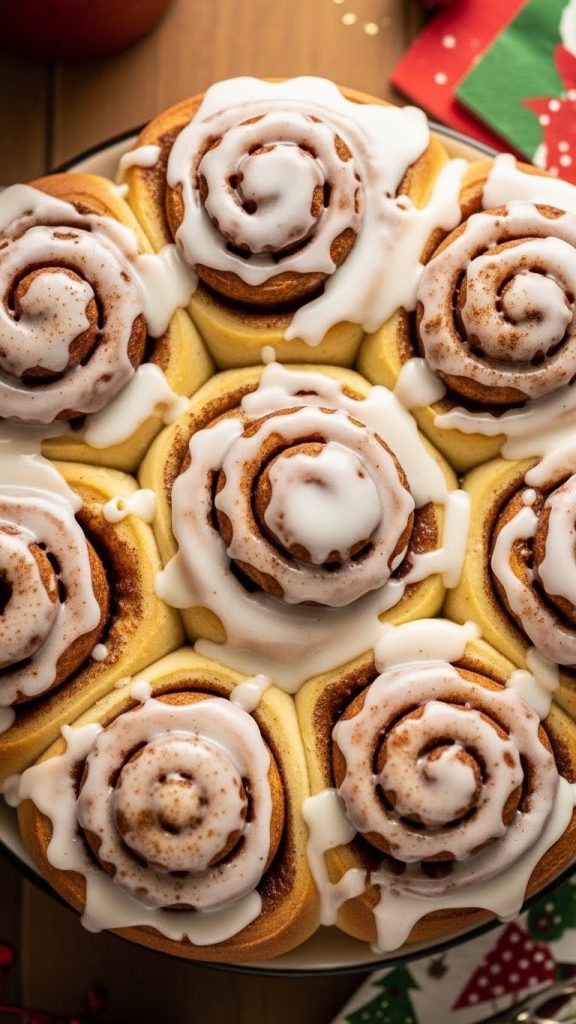
8. Overnight Cinnamon Rolls with Cream Cheese Frosting
If waking up to the intoxicating aroma of freshly baked cinnamon rolls isn’t a Christmas morning tradition in your home, it’s about to become one. These Overnight Cinnamon Rolls are the stuff of holiday dreams—impossibly soft, pillowy dough swirled with gooey cinnamon-sugar butter and topped with a luscious cream cheese frosting that melts into every warm crevice. The genius? You do all the work on Christmas Eve, let the rolls rise slowly in the refrigerator overnight, and simply pop them in the oven Christmas morning. Within 30 minutes of waking, your kitchen will smell like a bakery, and you’ll be the hero of the holiday. Pajamas, hot coffee, and homemade cinnamon rolls—this is what Christmas morning should be.
📋 Recipe Card: Overnight Cinnamon Rolls with Cream Cheese Frosting
Prep Time: 45 minutes
First Rise: 1½ – 2 hours
Overnight Chill: 8-12 hours (refrigerator)
Morning Rise: 1 – 1½ hours
Bake Time: 25-30 minutes
Total Time: 12-16 hours (mostly hands-off)
Yield: 12 large rolls
Difficulty: Moderate
Ingredients
For the Dough:
- 1 cup whole milk, warmed to 110°F (43°C)
- 2¼ teaspoons (1 packet) instant or active dry yeast
- ½ cup granulated sugar, divided
- 4½ cups all-purpose flour, plus more for dusting
- 1 teaspoon salt
- ½ cup (1 stick) unsalted butter, softened
- 2 large eggs, at room temperature
- 1 teaspoon pure vanilla extract
For the Cinnamon-Sugar Filling:
- ¾ cup packed dark brown sugar
- ¼ cup granulated sugar
- 2 tablespoons ground cinnamon
- ¼ teaspoon ground nutmeg (optional)
- Pinch of salt
- ½ cup (1 stick) unsalted butter, very soft (almost melted)
For the Cream Cheese Frosting:
- 8 oz cream cheese, softened
- ¼ cup (½ stick) unsalted butter, softened
- 2 cups powdered sugar, sifted
- 1 teaspoon pure vanilla extract
- 2 tablespoons heavy cream or milk
- Pinch of salt
Optional Add-Ins:
- 1 cup chopped toasted pecans (for the filling)
- ½ cup raisins (for classic raisin rolls)
- 1 cup chopped apples + extra cinnamon (apple cinnamon)
- Orange zest (in dough and frosting for orange rolls)
Equipment Needed
- Stand mixer with dough hook and paddle attachment (or large bowl for hand kneading)
- Rolling pin
- 9×13 inch baking pan (or two 9-inch round pans)
- Pastry brush
- Plastic wrap
- Dental floss or sharp knife (for slicing)
- Instant-read thermometer
- Rubber spatula
- Measuring cups and spoons
- Medium mixing bowl (for filling)
Step-by-Step Instructions
Step 1: Activate the Yeast
Pour the warm milk into a small bowl or liquid measuring cup. The temperature should be between 105-115°F (40-46°C)—warm to the touch but not hot.
Add 1 tablespoon of the sugar and stir to dissolve.
Sprinkle the yeast over the surface. Stir gently and let stand for 5-10 minutes until the mixture is foamy and bubbly, with a yeasty aroma.
If using instant yeast: You can skip this step and add the yeast directly to the dry ingredients. However, proofing first confirms your yeast is active.
Step 2: Make the Dough
In the bowl of a stand mixer fitted with the dough hook, combine 4 cups of the flour, the remaining sugar (about 7 tablespoons), and salt. Stir briefly to combine.
Add the foamy yeast mixture, softened butter, eggs, and vanilla extract.
Mix on low speed until a shaggy dough forms, about 2 minutes.
Increase to medium speed and knead for 8-10 minutes. The dough should pull away from the sides of the bowl and become smooth and elastic.
Add the remaining ½ cup flour gradually, 1 tablespoon at a time, if the dough is too sticky. The ideal dough is slightly tacky but doesn’t stick to your fingers.
Hand Kneading Method: Combine all ingredients in a large bowl and stir until a shaggy dough forms. Turn out onto a floured surface and knead for 12-15 minutes, adding flour as needed.
Step 3: First Rise
Lightly grease a large clean bowl with butter or cooking spray.
Shape the dough into a smooth ball and place it in the bowl, turning to coat all sides.
Cover tightly with plastic wrap or a damp kitchen towel.
Let rise in a warm, draft-free place until doubled in size, approximately 1½ – 2 hours.
Warm Rising Spots:
- Oven with just the light on (not heated)
- On top of the refrigerator
- Near a sunny window
- Microwave with a cup of hot water inside (door closed)
Step 4: Prepare the Filling
While the dough rises, prepare the cinnamon-sugar filling.
In a medium bowl, combine:
- Dark brown sugar
- Granulated sugar
- Ground cinnamon
- Ground nutmeg (if using)
- Pinch of salt
Mix thoroughly, breaking up any brown sugar lumps. Set aside.
In a separate small bowl, have the very soft butter ready. It should be spreadable—almost at the melting point but not quite liquid.
Step 5: Roll Out the Dough
Once the dough has doubled, punch it down to deflate.
Turn the dough out onto a lightly floured surface.
Using a rolling pin, roll the dough into a large rectangle, approximately 18 inches wide by 14 inches tall, with the long side facing you. The dough should be about ¼ inch thick.
Rolling Tips:
- Start from the center and roll outward
- Rotate the dough occasionally to maintain the rectangular shape
- If the dough springs back stubbornly, let it rest for 5 minutes
- Aim for even thickness throughout—thin spots will overbake
Step 6: Add the Filling
Using a pastry brush, offset spatula, or your hands, spread the very soft butter evenly over the entire surface of the dough, leaving a ½-inch border along the far long edge.
Sprinkle the cinnamon-sugar mixture evenly over the butter, pressing gently so it adheres. Don’t be shy—use ALL of it.
Optional: If adding pecans or raisins, sprinkle them over the cinnamon sugar now.
Step 7: Roll Into a Log
Starting from the long edge closest to you, begin rolling the dough away from you into a tight log.
Use your fingers to keep the roll tight as you go. The tighter the roll, the more beautiful the spiral.
When you reach the far edge (the one with the ½-inch border), pinch the seam firmly to seal.
Gently roll the log back and forth to even out the shape. It should be approximately 18 inches long.
Position the log seam-side down.
Step 8: Slice the Rolls
Using a sharp serrated knife, trim off the uneven ends (about ½ inch from each side). Chef’s snack!
The Dental Floss Method (Cleanest Cuts):
- Slide a piece of unflavored dental floss or strong thread under the log where you want to cut
- Cross the two ends over the top of the log
- Pull the ends in opposite directions—the floss will slice cleanly through
Knife Method: Use a sharp serrated knife with a gentle sawing motion. Avoid pressing down, which compresses the rolls.
Cut the log into 12 equal pieces, each approximately 1½ inches thick.
Step 9: Arrange in Pan
Generously grease a 9×13 inch baking pan with butter or cooking spray. For easy removal, line the bottom with parchment paper.
Arrange the 12 rolls in the pan, cut-side up, in a 3×4 pattern. Space them evenly—they will expand to fill the pan.
Alternative Pan Options:
- Two 9-inch round cake pans (6 rolls each) for a prettier presentation
- Cast iron skillet for rustic charm and crispy edges
- Individual muffin tin cups for portion control
Step 10: Overnight Refrigerator Rise
Cover the pan tightly with plastic wrap, pressing the wrap directly onto the rolls to prevent drying.
Add a layer of aluminum foil over the plastic wrap for extra protection.
Refrigerate for at least 8 hours, or up to 18 hours. Overnight (10-12 hours) is ideal.
The Science: The cold temperature slows yeast activity dramatically, allowing for a long, slow rise that develops more complex flavors while making your Christmas morning effortless.
Step 11: Christmas Morning – Warm Rise
Remove the pan from the refrigerator.
Remove the foil and plastic wrap.
Let the rolls sit at room temperature in a warm spot for 1 – 1½ hours. They will puff up and the rolls will begin touching each other.
Don’t Skip This Step: Cold rolls straight into the oven will bake unevenly and won’t achieve the fluffy texture you want.
About 30 minutes before baking, preheat your oven to 350°F (175°C).
Step 12: Bake the Rolls
Once the rolls have puffed and are touching, they’re ready to bake.
Place the pan in the center of the preheated oven.
Bake for 25-30 minutes, until the tops are golden brown and the center rolls are cooked through.
Visual Cues:
- Golden brown tops (not pale, not dark)
- Filling bubbling slightly at edges
- Rolls feel set when gently pressed
- Internal temperature of 190°F (88°C) in center roll
If the tops are browning too quickly before the centers are done, tent loosely with foil for the remaining bake time.
Step 13: Make the Cream Cheese Frosting
While the rolls bake (or the night before), prepare the frosting.
In a stand mixer fitted with the paddle attachment (or using a hand mixer), beat the softened cream cheese and butter on medium speed until completely smooth and creamy, about 2-3 minutes.
Add the sifted powdered sugar, vanilla extract, heavy cream, and salt.
Beat on low speed initially (to prevent sugar explosion), then increase to medium-high. Beat for 2-3 minutes until light, fluffy, and smooth.
Consistency Check: The frosting should be thick but spreadable. If too thick, add cream 1 teaspoon at a time. If too thin, add more powdered sugar.
Frosting can be made up to 3 days ahead and refrigerated. Bring to room temperature and re-whip before using.
Step 14: Frost and Serve
Remove the rolls from the oven and let them cool in the pan for 5 minutes. (This brief rest makes frosting easier and allows rolls to set.)
While the rolls are still warm (but not screaming hot), dollop generous spoonfuls of cream cheese frosting over the top.
Use an offset spatula or the back of a spoon to spread the frosting, letting it melt into all the nooks and crannies.
The key: Frost while warm so the frosting gets slightly melty and gooey, but not so hot that it completely liquefies.
Serve immediately while warm and gooey. These are best enjoyed fresh from the oven!
🎬 Video Tutorial
Watch a step-by-step video guide for making perfect overnight cinnamon rolls:
💡 Pro Tips for the Perfect Cinnamon Rolls
- Soft Butter for Filling: The filling butter should be extremely soft—almost at the melting point. This ensures even spreading without tearing the dough.
- Room Temperature Ingredients: Eggs, butter for the dough, and cream cheese for frosting should all be at room temperature for proper incorporation.
- Don’t Over-Flour: Too much flour makes dense, dry rolls. The dough should be slightly tacky. Resist the urge to add extra.
- Roll Tightly: A tight roll creates beautiful spirals and keeps the filling from leaking. Use your fingers to maintain tension as you roll.
- Dental Floss is Magic: Cutting with dental floss creates perfect slices without compressing the delicate dough. Game-changer!
- Don’t Over-Proof: If rolls over-rise, they may collapse during baking. They should be puffy and touching, but not dramatically overflowing the pan.
- Frost While Warm: The sweet spot is 5 minutes out of the oven—warm enough for the frosting to get slightly melty, but not so hot it completely runs off.
- Use Dark Brown Sugar: Dark brown sugar has more molasses, which adds deeper flavor and extra gooeyness to the filling.
- Make Extra Frosting: There’s no such thing as too much cream cheese frosting. Make 1.5x if your family loves it extra thick.
- The Center Test: The center roll is always the last to cook. Check it specifically—if it’s done, they’re all done.
🗄️ Storage Tips
Refrigerator Storage (Unbaked, Overnight Method):
- Rolls can remain in the refrigerator for up to 18 hours
- Beyond 18 hours, the yeast may over-proof and rolls may become sour
- Keep tightly covered to prevent drying
Room Temperature Storage (Baked):
- Store in an airtight container for up to 2 days
- Keep frosting on top—it acts as a protective layer
- Warm in microwave for 15-20 seconds before serving
Refrigerator Storage (Baked):
- Store frosted rolls in airtight container for up to 5 days
- Cream cheese frosting should be refrigerated if storing longer than 2 days
- Bring to room temperature or warm before serving
Make-Ahead Frosting:
- Prepare up to 5 days ahead
- Store in airtight container in refrigerator
- Bring to room temperature and re-whip before using
Reheating:
- Microwave: Individual rolls, 15-20 seconds on high
- Oven: Cover pan with foil, warm at 300°F for 10-15 minutes
- Best results: Reheat unfrosted, then add fresh frosting
🔄 Variations to Try
- Caramel Pecan Sticky Buns: Pour caramel sauce (1 cup brown sugar + ½ cup butter + ¼ cup cream, simmered) into the pan before adding rolls. Top with chopped pecans. Invert after baking for gooey caramel top.
- Orange Sweet Rolls: Add 1 tablespoon orange zest to the dough. Replace cinnamon filling with orange sugar (sugar + orange zest). Make orange frosting (add orange zest and juice to cream cheese frosting).
- Maple Bacon Cinnamon Rolls: Add crumbled cooked bacon to the filling. Top with maple glaze (powdered sugar + maple syrup) instead of cream cheese frosting.
- Apple Pie Cinnamon Rolls: Add 1 cup finely diced apples tossed with cinnamon to the filling. Use caramel drizzle on top.
- Pumpkin Spice Rolls: Add ½ cup pumpkin puree and 1 teaspoon pumpkin pie spice to the dough. Use brown butter cream cheese frosting.
- Chocolate Cinnamon Rolls: Add ½ cup mini chocolate chips to the filling. Drizzle with chocolate ganache in addition to (or instead of) cream cheese frosting.
- Nutella Stuffed Rolls: Spread Nutella instead of butter for the filling. Omit cinnamon sugar. Top with vanilla glaze and chopped hazelnuts.
- Red Velvet Cinnamon Rolls: Add 2 tablespoons cocoa powder and red food coloring to the dough. Use classic cream cheese frosting.
- Eggnog Cinnamon Rolls: Replace milk in dough with eggnog. Add nutmeg to filling. Make eggnog frosting (add eggnog and nutmeg to frosting).
- Cinnamon Roll Bites: Cut log into 24 smaller pieces. Bake in a muffin tin for individual portions.
❓ Frequently Asked Questions
Can I make these same-day without the overnight rise? Yes! After shaping, let the rolls rise at room temperature for 1½ – 2 hours until doubled. Then bake as directed. The flavor won’t be quite as developed, but they’ll still be delicious.
Why did my filling leak out during baking? This usually happens when the roll isn’t tight enough, the butter was too warm (melted), or the seam wasn’t sealed properly. Keep the roll tight and the butter spreadable but not liquid.
My rolls are dense and heavy. What happened? Common causes include too much flour, under-kneading, not enough rising time, or dead yeast. Ensure the dough is tacky, knead until smooth and elastic, and let it truly double.
Can I use active dry yeast instead of instant? Yes! Active dry yeast needs to be proofed first (which this recipe does). Instant yeast can skip proofing but works fine with it too. They’re interchangeable in equal amounts.
Why didn’t my rolls rise in the refrigerator? Cold rising is very slow—you may not see dramatic puffing overnight. The real rise happens during the 1-1½ hours at room temperature before baking. If there’s zero rise, your yeast may be dead.
Can I freeze the dough before shaping? Yes, after the first rise, punch down, wrap tightly, and freeze for up to 1 month. Thaw overnight in the refrigerator, then roll, fill, shape, and proceed with the overnight method.
How do I prevent the edges from overbaking? If edge rolls are browning faster than center rolls, tent the entire pan loosely with foil for the last 10 minutes of baking.
Can I make the cream cheese frosting ahead? Absolutely! Make it up to 5 days ahead and refrigerate. Let it come to room temperature and give it a quick whip before using.
Why is my frosting grainy? The powdered sugar wasn’t sifted, or the cream cheese was too cold. Always sift powdered sugar and ensure cream cheese is fully softened.
Can I use this dough for other shapes? Yes! This enriched dough works for dinner rolls, braided bread, monkey bread, or any sweet roll variation.
🍽️ Serving Suggestions
Cinnamon rolls are the star of Christmas morning, but they deserve a beautiful supporting cast.
Complete Christmas Morning Spread:
- Fresh fruit (berries, clementines, sliced bananas)
- Scrambled eggs or breakfast casserole
- Crispy bacon or sausage links
- Yogurt parfaits
- Fresh-squeezed orange juice
- Hot coffee and tea
- Hot chocolate for the kids
Beverage Pairings:
- Strong black coffee (cuts the sweetness)
- Chai tea latte (complements the cinnamon)
- Cold milk (classic!)
- Hot apple cider
- Eggnog (for extra indulgence)
- Mimosas for the adults
Presentation Ideas:
- Serve directly from the baking pan for cozy, family-style appeal
- Transfer to a cake stand for a more elegant presentation
- Pull the center roll out first and place it on top for the “star”
- Add a dusting of extra cinnamon on top of the frosting
- Garnish with fresh rosemary sprigs for a festive touch
Toppings Bar:
- Extra cream cheese frosting
- Caramel sauce
- Chopped toasted pecans
- Mini chocolate chips
- Maple syrup
- Fresh berries
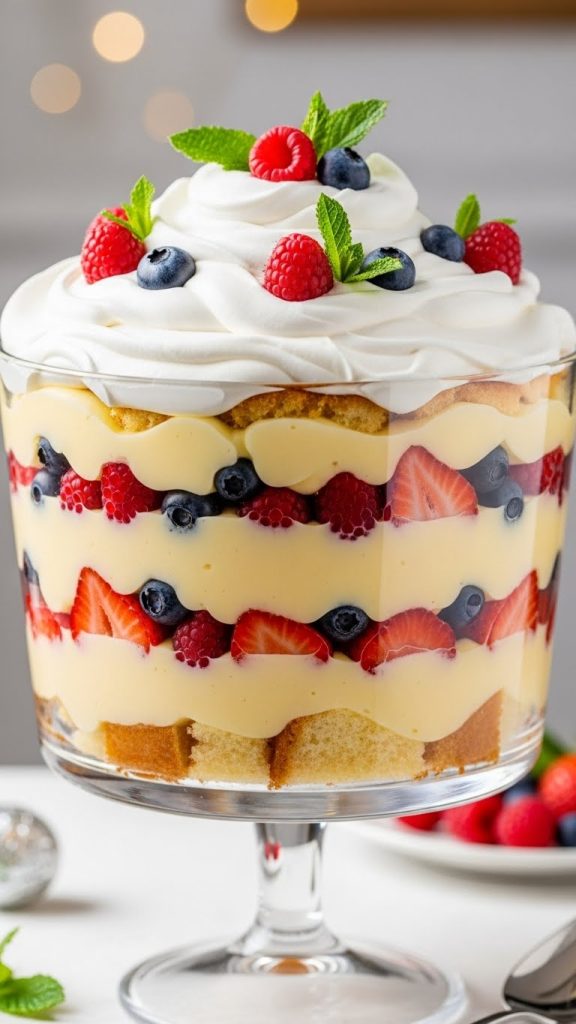
9. Classic English Trifle
Few desserts are as effortlessly elegant or as perfectly suited for holiday entertaining as a Classic English Trifle. Layers of tender sponge cake soaked in sherry, silky homemade custard, vibrant berry compote, and clouds of fresh whipped cream come together in a stunning glass bowl that showcases each glorious stratum. But here’s the real magic: this showstopping dessert actually needs to be made ahead. The overnight rest allows the flavors to meld, the cake to soften into the custard, and everything to set into spoonable perfection. Assemble it one to two days before Christmas, and you’ll have a dessert that looks like you spent hours in the kitchen—when really, you spent that time wrapping presents and sipping cocoa. That’s the kind of holiday cooking we love.
📋 Recipe Card: Classic English Trifle
Prep Time: 45 minutes
Custard Cooking Time: 15 minutes
Chilling Time: 8-24 hours (overnight)
Total Time: 9-25 hours (mostly hands-off)
Servings: 12-16 servings
Difficulty: Easy-Moderate
Ingredients
For the Cake Layer:
- 1 store-bought pound cake (12-16 oz) or homemade sponge cake
- ½ cup cream sherry, sweet Marsala, or amaretto (or orange juice for alcohol-free)
- 2 tablespoons raspberry or strawberry jam (optional, for extra moisture)
For the Custard (Crème Anglaise):
- 2 cups whole milk
- 1 cup heavy cream
- 6 large egg yolks
- ¾ cup granulated sugar
- 3 tablespoons cornstarch
- 2 teaspoons pure vanilla extract
- Pinch of salt
For the Berry Layer:
- 2 lbs mixed berries (fresh or frozen): raspberries, strawberries, blueberries, blackberries
- ½ cup granulated sugar
- 2 tablespoons fresh lemon juice
- 1 tablespoon cornstarch mixed with 2 tablespoons water (slurry)
- Zest of 1 lemon (optional)
For the Whipped Cream:
- 2 cups heavy whipping cream, very cold
- ¼ cup powdered sugar, sifted
- 1 teaspoon pure vanilla extract
- 2 tablespoons instant vanilla pudding mix (optional, for stability)
For Garnish:
- Fresh berries (raspberries, strawberries, blueberries)
- Fresh mint leaves
- Toasted sliced almonds
- White chocolate curls or shavings
- Edible flowers (optional)
Equipment Needed
- Large glass trifle bowl (3-4 quart capacity) or individual glass cups
- Medium saucepan
- Whisk
- Fine mesh strainer
- Stand mixer or hand mixer
- Rubber spatula
- Plastic wrap
- Measuring cups and spoons
- Cutting board and knife
- Large mixing bowls
Step-by-Step Instructions
Step 1: Make the Berry Compote
Prepare the berries first, as they need time to cool.
If using strawberries, hull and quarter them. Leave raspberries, blueberries, and blackberries whole.
In a medium saucepan, combine the berries, sugar, and lemon juice. If using frozen berries, no need to thaw—just add them directly.
Cook over medium heat, stirring occasionally, until the berries begin to break down and release their juices, about 8-10 minutes. Gently crush some berries against the side of the pan to release more juice while leaving some whole for texture.
In a small bowl, mix the cornstarch with 2 tablespoons of water to create a slurry. Add this to the berry mixture.
Continue cooking, stirring constantly, for another 2-3 minutes until the mixture thickens slightly. It should coat the back of a spoon but still be pourable.
Remove from heat. Stir in the lemon zest if using.
Transfer to a bowl and let cool to room temperature, then refrigerate until cold, at least 1 hour. The compote will thicken further as it chills.
Make-Ahead: Berry compote can be made up to 5 days ahead and refrigerated.
Step 2: Prepare the Custard (Crème Anglaise)
This is the heart of the trifle—take your time and follow the steps carefully.
In a medium saucepan, combine the milk and heavy cream. Heat over medium heat until it just begins to steam and small bubbles form around the edges (scalding). Do not boil. Remove from heat.
In a large mixing bowl, whisk together the egg yolks, sugar, cornstarch, and salt until pale and thick, about 2 minutes. The mixture should fall in ribbons when you lift the whisk.
Temper the eggs: Very slowly drizzle about ½ cup of the hot milk mixture into the egg yolks while whisking constantly. This gradually raises the temperature of the eggs without scrambling them.
Add another ½ cup of hot milk, whisking constantly.
Now pour the tempered egg mixture back into the saucepan with the remaining milk, whisking constantly.
Return the saucepan to medium heat. Cook, whisking constantly and scraping the bottom and sides, until the custard thickens and coats the back of a spoon, about 5-8 minutes. It should reach 170-175°F (77-79°C).
The Figure-8 Test: Dip a wooden spoon into the custard, then draw your finger across the back. If the line holds without the custard running together, it’s ready.
Remove from heat immediately. Stir in the vanilla extract.
Strain the custard: Pour through a fine mesh strainer into a clean bowl to remove any lumps or bits of cooked egg.
Press plastic wrap directly onto the surface of the custard (this prevents a skin from forming).
Refrigerate until completely cold, at least 2 hours or overnight.
Make-Ahead: Custard can be made up to 3 days ahead and refrigerated.
Step 3: Prepare the Cake
While the custard and berries chill, prepare the cake layer.
If using pound cake, cut it into ½-inch thick slices, then cut each slice into cubes or triangles.
If using sponge cake or ladyfingers, separate or cut into appropriate pieces.
Cake Options:
- Store-bought pound cake (easiest)
- Store-bought angel food cake (lighter option)
- Ladyfingers (traditional)
- Homemade sponge cake
- Leftover Christmas cake or panettone
You’ll need enough cake to create 2-3 layers in your trifle bowl.
Step 4: Prepare the Sherry or Soaking Liquid
Traditional English trifle uses cream sherry, which adds a sophisticated boozy note.
Pour the sherry (or your chosen liquid) into a small bowl or liquid measuring cup for easy drizzling.
Soaking Liquid Options:
- Cream sherry (traditional British)
- Sweet Marsala (Italian alternative)
- Amaretto (almond flavor)
- Frangelico (hazelnut)
- Chambord (raspberry—pairs beautifully with berries)
- Grand Marnier (orange)
- Fresh orange juice (alcohol-free option)
- Berry syrup (from the compote, alcohol-free)
For a kid-friendly version, use fruit juice or simply skip the soaking step.
Step 5: Make the Whipped Cream
For best results, chill your mixing bowl and whisk attachment in the freezer for 15 minutes before whipping.
Pour the very cold heavy cream into the chilled bowl.
Using a stand mixer or hand mixer, beat on medium speed until the cream begins to thicken.
Add the powdered sugar and vanilla extract. If using instant pudding mix for stability (recommended if making ahead), add it now.
Increase speed to medium-high and beat until stiff peaks form. The cream should hold its shape when the whisk is lifted.
Don’t over-beat: Stop as soon as you reach stiff peaks. Over-beaten cream becomes grainy and eventually turns to butter.
Refrigerate until ready to assemble.
Stabilized Whipped Cream: Adding 2 tablespoons of instant vanilla pudding mix helps the cream hold its shape for days—perfect for make-ahead desserts.
Step 6: Assemble the Trifle – First Layer
Now comes the fun part! Clear a space in your refrigerator for the trifle bowl before you begin.
Place a layer of cake pieces in the bottom of your trifle bowl. Arrange them to cover the bottom completely, filling any gaps.
Using a spoon or pastry brush, drizzle or brush 2-3 tablespoons of sherry evenly over the cake. The cake should be moist but not swimming.
If using jam, warm it slightly and brush a thin layer over the sherry-soaked cake.
Spoon about one-third of the berry compote over the cake, spreading evenly.
Pour about one-third of the custard over the berries, spreading gently to create an even layer. The custard should be thick enough to stay in place but still spreadable.
Step 7: Assemble – Second Layer
Add another layer of cake pieces over the custard.
Drizzle with another 2-3 tablespoons of sherry.
Add another one-third of the berry compote.
Add another one-third of the custard.
Gently spread each layer to the edges of the bowl so the beautiful layers are visible through the glass.
Step 8: Assemble – Final Layer
Add a final layer of cake pieces.
Drizzle with the remaining sherry.
Add the remaining berry compote, spreading evenly.
Top with the remaining custard, smoothing the top.
Reserve some whipped cream for serving day: If assembling 2 days ahead, wait to add the whipped cream until the day of serving for best appearance.
If serving within 24 hours: Spread a thick layer of whipped cream over the custard, swirling decoratively with the back of a spoon or offset spatula. Alternatively, pipe the cream in rosettes using a piping bag fitted with a star tip.
Step 9: Chill Overnight
Cover the trifle bowl with plastic wrap.
Refrigerate for at least 8 hours, or up to 48 hours.
Why the Rest is Essential:
- The sherry soaks into the cake, flavoring and softening it
- The custard sets further and firms up
- The flavors meld together harmoniously
- The layers settle into each other while remaining distinct
Step 10: Garnish and Serve
Remove the trifle from the refrigerator.
If you haven’t added the whipped cream yet, add it now—spread or pipe it over the top.
Garnish beautifully:
- Arrange fresh berries in the center or around the edge
- Tuck fresh mint leaves between berries
- Scatter toasted sliced almonds
- Add white chocolate curls or shavings
- Dust lightly with powdered sugar
- Add edible flowers for extra elegance
Serving: Use a large serving spoon to scoop deep into the trifle, ensuring each serving contains all the layers.
Serve in glass bowls or cups to showcase the layers.
Trifle is best served cold directly from the refrigerator.
🎬 Video Tutorial
Watch a step-by-step video guide for making a beautiful English trifle:
💡 Pro Tips for the Perfect Trifle
- Glass is Essential: Use a clear glass trifle bowl or individual glass cups. The whole point is seeing those gorgeous layers!
- Chill Each Component: Cold custard, cold compote, and cold cream layer much more neatly than room-temperature components.
- Don’t Rush the Custard: Temper the eggs slowly and whisk constantly. Scrambled eggs in your custard is a tragedy. If it happens, strain vigorously and no one will know.
- Strain the Custard: Even if you think it’s perfect, strain it. This ensures a silky-smooth texture.
- Layer to the Edges: Push each layer all the way to the glass so the stripes are visible. This is where the “wow factor” comes from.
- Dry Cake is Better: Day-old or slightly dried-out cake absorbs the sherry and custard better than fresh, soft cake.
- Don’t Over-Soak: The cake should be moistened, not swimming. Too much liquid makes the trifle soggy and difficult to serve.
- Stabilize Your Cream: Adding a little instant pudding mix keeps the whipped cream from weeping—essential for make-ahead desserts.
- Garnish Last Minute: Add fresh berries and mint just before serving for the freshest appearance.
- Trust the Rest: The trifle genuinely improves after a day in the refrigerator. Patience is rewarded.
🗄️ Storage Tips
Refrigerator Storage (Assembled):
- Cover tightly with plastic wrap
- Store for up to 3 days
- The texture improves in the first 24 hours, then gradually softens
- Add whipped cream top and garnishes fresh if storing longer than 24 hours
Freezing:
- Trifle does not freeze well due to the cream and custard
- Berry compote can be frozen for up to 3 months
- Baked cake layers can be frozen, wrapped tightly, for up to 2 months
Leftovers:
- Store leftover trifle covered in the refrigerator
- Best consumed within 2 days
- The texture will soften but the flavor remains delicious
- Leftover trifle makes an excellent “mess” parfait—embrace the chaos!
🔄 Variations to Try
- Chocolate Trifle: Use chocolate pound cake, chocolate custard (add 4 oz melted dark chocolate to the custard), chocolate shavings, and cherry compote.
- Tiramisu Trifle: Use ladyfingers soaked in espresso and Kahlúa. Replace custard with mascarpone cream (mascarpone + sugar + whipped cream). Dust with cocoa powder.
- Lemon Berry Trifle: Make lemon curd instead of custard (or use store-bought). Add extra lemon zest to the berries. Use limoncello as the soaking liquid.
- Tropical Trifle: Use coconut cake, passion fruit curd, layers of mango and pineapple, and coconut whipped cream. Soak with rum.
- Gingerbread Trifle: Use cubed gingerbread cake, vanilla custard with extra cinnamon, apple-pear compote, and caramel drizzle.
- Black Forest Trifle: Use chocolate cake, cherry compote (with kirsch), vanilla custard, and chocolate shavings.
- Strawberries and Cream Trifle: Use only strawberries for a classic summer version. Add strawberry jam between layers.
- Eggnog Trifle: Add nutmeg and rum extract to the custard. Use bourbon as the soaking liquid. Perfect for Christmas!
- Pumpkin Trifle: Use spice cake, pumpkin custard (add pumpkin puree and pumpkin pie spice to custard), gingersnap crumbles, and maple whipped cream.
- Individual Trifle Cups: Layer in wine glasses, mason jars, or small glass cups for elegant individual servings.
❓ Frequently Asked Questions
Do I have to use alcohol? No! While sherry is traditional and adds wonderful flavor, you can substitute fresh orange juice, apple juice, berry syrup, or simply omit it entirely.
My custard is lumpy. What went wrong? The eggs likely scrambled from adding the hot milk too quickly or cooking at too high a temperature. Always temper slowly and keep the heat at medium. Strain the custard to remove lumps—it will still taste great.
Can I use instant custard or pudding? Absolutely! For a shortcut, use instant vanilla pudding or Bird’s Custard powder. The texture will be slightly different but still delicious and much faster.
Why did my trifle become soupy? Too much soaking liquid, overly ripe berries with too much juice, or under-thickened custard can cause this. Ensure your custard and compote are properly thickened before layering.
What’s the best trifle bowl to use? A footed glass trifle bowl (3-4 quart capacity) with straight or slightly sloped sides shows off layers best. Alternatively, use a large glass punch bowl or individual glass cups.
Can I make this completely the day before? Yes! Trifle is meant to be made ahead. Assemble 24-48 hours before serving. Add the whipped cream topping and fresh garnishes day-of for best appearance.
What if I don’t have a trifle bowl? Use any clear glass container: a large glass mixing bowl, individual wine glasses, mason jars, or even a glass baking dish (though you’ll lose the side view).
How do I transport a trifle? Keep it refrigerated until the last moment. Transport in a cooler with ice packs. Add delicate garnishes after arrival.
Can I use whipped topping (Cool Whip) instead of whipped cream? Yes, it works and is more stable. However, fresh whipped cream tastes noticeably better. Stabilized whipped cream (with pudding mix) offers the best of both worlds.
🍽️ Serving Suggestions
Trifle is a stunning dessert that needs little accompaniment, but consider these pairings:
Beverage Pairings:
- Dessert wine (Moscato, late-harvest Riesling)
- Port or cream sherry
- Champagne or Prosecco
- Coffee or espresso
- After-dinner tea
Complementary Desserts (for a dessert table):
- Shortbread cookies
- Biscotti for dipping
- Fresh fruit platter
- Chocolate truffles
- Cheese and crackers
Presentation Ideas:
- Serve from the trifle bowl at the table for dramatic effect
- Use a glass cake stand under the bowl for height
- Surround the base with fresh greenery, berries, or flowers
- Provide a large silver serving spoon
- Have extra berries and cream in separate bowls for topping
Portion Guide:
- A 3-quart trifle serves 12-16 people generously
- Individual trifle cups (8 oz each) serve 1 person
- Trifle is rich—moderate portions are satisfying
🎄 Make-Ahead Timeline
For a stress-free Christmas dessert:
2-3 Days Before Christmas:
- Make the berry compote; refrigerate
- Make the custard; refrigerate
- Bake or purchase cake
Christmas Eve:
- Cut the cake into cubes
- Assemble all layers in the trifle bowl (without whipped cream top)
- Cover and refrigerate overnight
Christmas Day:
- Make whipped cream fresh
- Add whipped cream topping to trifle
- Garnish with fresh berries and mint
- Keep refrigerated until serving
After Christmas Dinner:
- Present your stunning, make-ahead masterpiece!
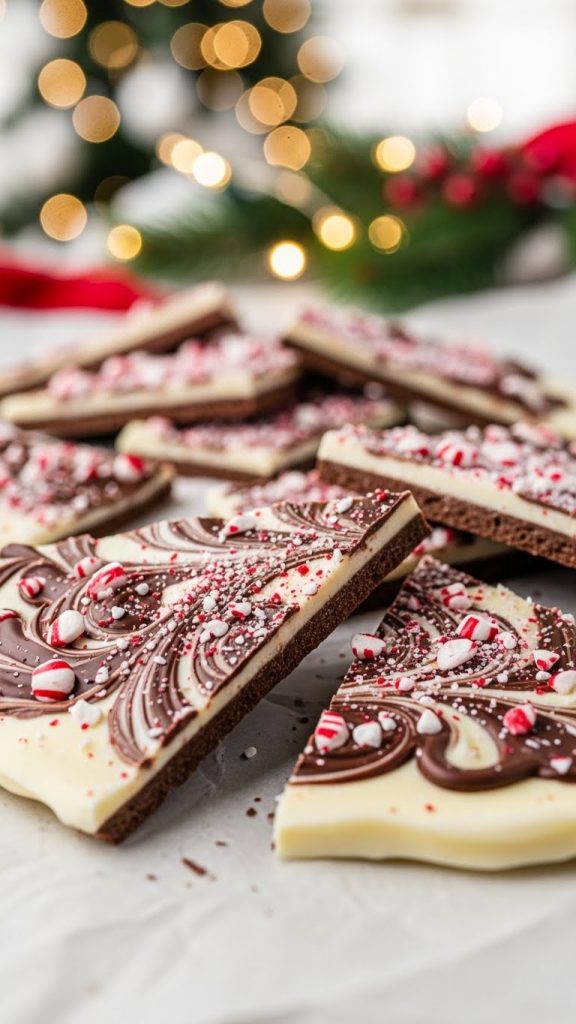
10. Classic Peppermint Bark
If there’s one holiday treat that captures the essence of Christmas in a single bite, it’s Peppermint Bark. Those gorgeous layers of rich dark chocolate and creamy white chocolate, generously studded with crushed candy canes, deliver the perfect combination of cool peppermint crunch and melt-in-your-mouth chocolate bliss. But here’s what makes this recipe a holiday hero: it takes just 20 minutes of hands-on time, requires no baking whatsoever, and can be made weeks in advance. Break it into rustic shards, pile it into a festive tin, and you’ve got homemade gifts for teachers, neighbors, and coworkers—or simply keep it all for yourself (we won’t judge). This is make-ahead Christmas cooking at its most delicious.
📋 Recipe Card: Classic Peppermint Bark
Prep Time: 20 minutes
Chocolate Melting Time: 10 minutes
Setting Time: 1-2 hours
Total Time: 2-3 hours (mostly hands-off)
Yield: Approximately 1½ lbs (about 24 pieces)
Difficulty: Very Easy
Ingredients
For the Dark Chocolate Layer:
- 12 oz high-quality semi-sweet or dark chocolate (60-70% cacao), chopped
- 1 tablespoon coconut oil or vegetable shortening (optional, for smoother texture)
- ¼ teaspoon peppermint extract (optional, for extra peppermint flavor)
For the White Chocolate Layer:
- 12 oz high-quality white chocolate, chopped
- 1 tablespoon coconut oil or vegetable shortening (optional)
- ½ teaspoon peppermint extract
- 1-2 drops red or pink food coloring (optional, for pink swirl)
For the Topping:
- 6-8 full-sized candy canes or 1 cup peppermint candies, crushed
- 2 tablespoons red and white sprinkles (optional)
- Flaky sea salt (optional, for sophisticated contrast)
Equipment Needed
- Rimmed baking sheet (13×18 inch half-sheet pan recommended)
- Parchment paper or silicone baking mat
- Microwave-safe bowls or double boiler
- Rubber spatula
- Offset spatula or back of spoon
- Zip-top plastic bag and rolling pin (for crushing candy canes)
- Sharp knife or mallet
- Measuring cups and spoons
Step-by-Step Instructions
Step 1: Prepare Your Workspace
Line a rimmed baking sheet (half-sheet pan works perfectly) with parchment paper or a silicone baking mat. Ensure the parchment lays flat with no wrinkles.
For thicker bark, use a smaller pan (9×13 inch). For thinner, snappier bark, use a full half-sheet pan.
Gather all ingredients and equipment before you begin. Once chocolate is melted, you’ll need to work efficiently.
Clear space in your refrigerator for the baking sheet to fit flat.
Step 2: Crush the Candy Canes
Unwrap the candy canes and place them in a large zip-top plastic bag. Seal the bag, pressing out excess air.
Using a rolling pin, meat mallet, or the bottom of a heavy pan, crush the candy canes into various-sized pieces.
Texture Tip: Aim for a mix of sizes—some fine powder for color distribution, some medium pieces for texture, and some larger chunks for visual appeal and crunch.
Alternatively, pulse candy canes briefly in a food processor, being careful not to over-process into powder.
Set aside in two portions: about ¾ of the crushed candy for topping, and ¼ reserved for mixing into the white chocolate (optional).
Step 3: Chop the Chocolate
Proper chocolate preparation is crucial for smooth melting.
Using a sharp knife, chop both the dark chocolate and white chocolate into small, uniform pieces (about ¼-inch). Smaller pieces melt more evenly and reduce the risk of burning.
Chocolate Quality Matters:
- Use high-quality chocolate (Ghirardelli, Guittard, Lindt, Valrhona)
- Avoid chocolate chips—they contain stabilizers that prevent smooth melting
- Check the label: real chocolate lists cocoa butter as an ingredient
- For white chocolate, look for “white chocolate” not “white confectionery coating”
Place dark and white chocolate in separate microwave-safe bowls.
Step 4: Melt the Dark Chocolate
Microwave Method (Recommended):
Add coconut oil or shortening to the dark chocolate (if using).
Microwave at 50% power in 30-second intervals, stirring thoroughly between each interval.
Continue until the chocolate is about 80% melted with some small pieces remaining.
Remove from microwave and stir continuously. The residual heat will melt the remaining pieces. This prevents overheating.
Double Boiler Method:
Fill a medium saucepan with 1-2 inches of water. Bring to a gentle simmer.
Place the chocolate in a heat-proof bowl that fits snugly on top of the saucepan without touching the water.
Stir frequently until melted and smooth.
Critical Warning: Do not let any water or steam get into the chocolate. Even a single drop will cause the chocolate to seize (become grainy and clumpy).
If using peppermint extract in the dark layer, stir it in now.
Step 5: Spread the Dark Chocolate Layer
Immediately pour the melted dark chocolate onto the prepared baking sheet.
Using an offset spatula or the back of a spoon, spread the chocolate into an even layer, approximately ¼-inch thick.
Work toward the edges, creating a rough rectangle. The edges don’t need to be perfect—rustic is beautiful!
Don’t Spread Too Thin: If the layer is too thin, the bark will be fragile and break into tiny pieces. Aim for about ¼-inch thickness.
Step 6: Set the Dark Chocolate
Place the baking sheet in the refrigerator.
Chill for 15-20 minutes, until the dark chocolate is set but not completely hardened. It should be firm to the touch but still slightly tacky.
Why Not Fully Set? A slightly tacky surface helps the white chocolate layer adhere better. If the dark chocolate is rock-hard, the layers may separate.
Room Temperature Alternative: If you prefer, let the chocolate set at cool room temperature for 30-45 minutes instead of refrigerating. This results in shinier chocolate.
Step 7: Melt the White Chocolate
White chocolate requires extra care—it scorches easily!
Add coconut oil or shortening to the white chocolate (highly recommended for white chocolate, as it tends to be thicker).
Microwave Method:
Microwave at 50% power in 20-second intervals (shorter than dark chocolate!).
Stir thoroughly between each interval.
Stop while some pieces remain and stir until completely smooth.
Double Boiler Method:
Use barely simmering water—white chocolate is very heat-sensitive.
Stir constantly and remove from heat as soon as melted.
Stir in the peppermint extract.
Optional Pink Swirl: Reserve 2-3 tablespoons of melted white chocolate in a separate small bowl. Add 1-2 drops of red or pink food coloring and stir.
If mixing crushed candy cane into the white chocolate, fold in the reserved ¼ portion now.
Step 8: Add the White Chocolate Layer
Remove the baking sheet from the refrigerator.
Pour the melted white chocolate over the set dark chocolate layer.
Using an offset spatula, spread the white chocolate evenly over the entire dark chocolate surface. Work quickly before the white chocolate begins to set.
For the Pink Swirl Effect:
Drizzle the pink-tinted chocolate in lines or swirls over the white chocolate.
Use a toothpick or knife to drag through the pink lines, creating a marbled effect.
Step 9: Add the Toppings
Work quickly while the white chocolate is still wet!
Immediately sprinkle the crushed candy canes evenly over the entire surface. Use most of your crushed candy—be generous!
Gently press the candy pieces into the white chocolate with your fingertips or the back of a spatula. This ensures they adhere and don’t fall off later.
Add any additional toppings:
- Red and white sprinkles
- A light sprinkle of flaky sea salt
- Additional mini candy cane pieces
- Crushed Oreos for cookies and cream variation
- Chopped nuts
Step 10: Final Setting
Refrigerate the baking sheet for 1-2 hours, or until the chocolate is completely firm and set.
Alternatively, let set at cool room temperature for 2-4 hours for the best chocolate sheen (refrigeration can cause slight blooming).
The bark is ready when it feels completely solid and makes a snapping sound when you tap it.
Step 11: Break into Pieces
Remove the bark from the refrigerator.
Let it sit at room temperature for 5 minutes to temper slightly (this prevents shattering into too-small pieces).
Lift the entire bark off the baking sheet using the parchment paper.
Breaking Methods:
- Hands: Break by hand into irregular, rustic shards (traditional and charming)
- Knife: Score with a sharp knife, then snap along the lines for more uniform pieces
- Drop Method: Lift the bark and drop it onto the counter from a few inches—it will break naturally
Aim for pieces roughly 2-3 inches in size, though variation is part of the charm.
Step 12: Store and Gift
Layer the bark pieces between sheets of parchment paper or wax paper in an airtight container.
Store in a cool, dry place or refrigerate for longer storage.
For Gifting:
- Place in decorative tins or boxes
- Fill cellophane bags tied with festive ribbon
- Arrange in mason jars with holiday labels
- Stack in paper candy cups inside gift boxes
- Create bark “bouquets” in decorative mugs
Attach a gift tag with storage instructions: “Store in a cool place. Best enjoyed within 2 weeks.”
🎬 Video Tutorial
Watch a step-by-step video guide for making perfect peppermint bark:
💡 Pro Tips for the Perfect Peppermint Bark
- Quality Chocolate is Everything: Don’t skimp! Use real chocolate, not chocolate chips or candy melts. The flavor and texture difference is dramatic.
- Low and Slow Melting: Chocolate burns easily. Always use low power and short intervals. Patience prevents disaster.
- No Water—Ever: Even a tiny drop of water will cause chocolate to seize into a grainy, unusable mess. Ensure all equipment is completely dry.
- Timing is Key: Add toppings while the chocolate is still wet, but not too hot (or candy canes will melt). Work efficiently!
- Room Temperature for Shine: Chocolate set at room temperature has a better sheen than refrigerated. If you have time and a cool room, skip the fridge.
- The Tacky Test: The dark chocolate should be set but slightly tacky before adding white chocolate. This creates good layer adhesion.
- Press in Toppings: Don’t just sprinkle—gently press candy pieces into the chocolate so they stick permanently.
- Crush Candy Last Minute: Crushed candy canes can get sticky if left sitting too long. Crush them just before you need them.
- Use Coconut Oil: A tablespoon of coconut oil makes the chocolate easier to spread and gives it a smoother, more professional finish.
- Embrace Imperfection: Rustic, hand-broken bark looks homemade and charming. Perfect uniformity isn’t the goal!
🗄️ Storage Tips
Room Temperature Storage:
- Store in an airtight container in a cool, dry place
- Keep away from heat and sunlight
- Lasts 2-3 weeks
- Layer pieces between parchment paper to prevent sticking
Refrigerator Storage:
- Wrap well to prevent absorbing odors
- Store for up to 1 month
- Let come to room temperature before serving for best flavor and texture
- May develop slight “bloom” (white coating)—harmless but less pretty
Freezer Storage:
- Wrap tightly in plastic wrap, then aluminum foil
- Place in freezer-safe container or bag
- Freeze for up to 3 months
- Thaw in refrigerator, then bring to room temperature
Humidity Warning:
- Candy canes can become sticky in humid conditions
- If humidity is an issue, store bark in the refrigerator
- In very humid climates, consume within 1 week
Chocolate Bloom:
- White streaks or spots (bloom) can appear if chocolate wasn’t tempered properly or experienced temperature changes
- Bloom is purely cosmetic—the bark is still safe and delicious to eat
🔄 Variations to Try
- Triple Chocolate Bark: Add a layer of milk chocolate between the dark and white layers. Three times the chocolate, three times the love!
- Dark Chocolate Peppermint Bark: Skip the white chocolate entirely. Use only dark chocolate and top with crushed candy canes and a drizzle of melted white chocolate.
- Cookies and Cream Bark: Replace candy canes with crushed Oreo cookies. Add a few mini Oreos on top.
- Salted Caramel Bark: Drizzle caramel sauce over the white chocolate layer. Top with flaky sea salt and skip the candy canes.
- Mocha Bark: Add 1 tablespoon instant espresso powder to the dark chocolate. Top with chocolate-covered espresso beans.
- Matcha White Chocolate Bark: Add 1 tablespoon matcha powder to the white chocolate for a green tea twist. Top with crushed freeze-dried raspberries.
- S’mores Bark: Top with mini marshmallows, crushed graham crackers, and extra chocolate drizzle. Torch the marshmallows lightly if desired!
- Candy Cane Crunch Bark: Add Rice Krispies cereal to both layers for extra crunch.
- Nutty Peppermint Bark: Add chopped toasted almonds or hazelnuts to the dark chocolate layer. Top with more nuts and candy canes.
- Birthday Cake Bark: Add sprinkles and a drop of cake batter extract to the white chocolate. Top with more sprinkles and crushed birthday cake Oreos.
- Pumpkin Spice Bark: Replace peppermint with pumpkin pie spice. Top with candied pecans and white chocolate drizzle.
- Raspberry Dark Chocolate Bark: Top dark chocolate with freeze-dried raspberries, white chocolate drizzle, and pistachios.
❓ Frequently Asked Questions
Why did my chocolate seize up and become grainy? Water got into the chocolate—even a tiny drop from a wet spoon or steam can cause this. Ensure all equipment is completely dry. Unfortunately, seized chocolate cannot be fixed for bark, but you can use it for hot chocolate or baking.
Can I use chocolate chips? It’s not recommended. Chocolate chips contain stabilizers that help them hold their shape, but they don’t melt as smoothly. If you must use chips, add extra coconut oil to improve flow.
Why is my white chocolate layer not setting? White chocolate sets slower than dark chocolate. Give it more time—up to 2 hours refrigerated or 4 hours at room temperature. Also ensure you used real white chocolate, not white candy coating.
The layers are separating. What went wrong? The dark chocolate was probably too hard when you added the white chocolate. The dark layer should be set but still slightly tacky for best adhesion.
Can I make this without peppermint? Absolutely! Plain chocolate bark is delicious. Top with any combination of nuts, dried fruit, pretzels, sprinkles, sea salt, or candies.
Why does my bark have white streaks on it? This is called “bloom” and happens when chocolate isn’t tempered or experiences temperature fluctuations. It’s cosmetic only—the bark is still perfectly safe and delicious.
How do I temper chocolate? For bark, tempering isn’t strictly necessary (especially if refrigerating). But for the shiniest result, melt only ⅔ of the chocolate, remove from heat, and stir in the remaining ⅓ until smooth. This “seed” method helps create stable crystals.
Can I use candy melts instead of real chocolate? Yes, for convenience. Candy melts are easier to work with and don’t require tempering, but the taste and texture aren’t as good. Use them if gifting to someone who won’t know the difference!
Why are my candy canes sticky/melting? Either the chocolate was too hot when you added them, or humidity is affecting them. Add candy canes when chocolate is just barely still wet, and store in a dry place.
🍽️ Serving Suggestions
Peppermint bark is perfect for gifting, but it also shines at holiday gatherings.
Holiday Dessert Table Display:
- Arrange bark shards on a tiered serving stand
- Mix with other holiday candies in a glass candy jar
- Display on a festive platter with fresh mint sprigs
- Create a “bark board” with multiple bark varieties
Gifting Ideas:
- Fill decorative tins or boxes
- Package in cellophane bags with ribbon
- Layer in mason jars with festive lids
- Stack in Chinese takeout boxes with tissue paper
- Arrange in holiday mugs or bowls as part of the gift
- Create “bark bundles” with multiple flavors
Serving Pairings:
- Hot chocolate (place a piece in the mug!)
- Coffee or espresso
- Peppermint tea
- After-dinner digestif
- Ice cream (as a topping)
Creative Uses:
- Crush and sprinkle over ice cream sundaes
- Chop and fold into cookie dough
- Use as a hot chocolate stirring stick
- Top cupcakes or cakes
- Crumble over cheesecake

11. Classic Gingerbread Cookies
Is there anything more quintessentially Christmas than the warm, spicy aroma of gingerbread wafting through the house? These Classic Gingerbread Cookies are the stuff of holiday legend—perfectly crisp edges giving way to a slightly chewy center, a symphony of warm spices dancing on your tongue, and just the right amount of molasses sweetness. Whether you’re cutting out traditional gingerbread men, snowflakes, stars, or building an elaborate gingerbread house, this foolproof recipe delivers every time. And here’s the beauty: the dough actually improves when made ahead, with flavors that deepen and intensify over time. Make the dough up to a week in advance, freeze baked cookies for a month, and decorate whenever the holiday spirit strikes. This is make-ahead magic at its most delicious.
📋 Recipe Card: Classic Gingerbread Cookies
Prep Time: 30 minutes
Chill Time: 2 hours (minimum) to overnight
Bake Time: 8-12 minutes per batch
Decorating Time: Variable
Total Time: 3-4 hours (plus decorating)
Yield: 36-48 cookies (depending on size)
Difficulty: Easy-Moderate
Ingredients
For the Cookie Dough:
- 3½ cups all-purpose flour, plus more for rolling
- 1 tablespoon ground ginger
- 2 teaspoons ground cinnamon
- 1 teaspoon ground cloves
- ½ teaspoon ground nutmeg
- ¼ teaspoon ground allspice
- 1 teaspoon baking soda
- ½ teaspoon salt
- ¾ cup (1½ sticks) unsalted butter, softened
- ¾ cup packed dark brown sugar
- 1 large egg, at room temperature
- ½ cup unsulphured molasses (not blackstrap)
- 2 teaspoons pure vanilla extract
- 1 teaspoon fresh lemon zest (optional, brightens flavor)
For the Royal Icing:
- 4 cups powdered sugar, sifted
- 3 tablespoons meringue powder
- 5-6 tablespoons warm water
- 1 teaspoon vanilla extract or clear vanilla (for white icing)
- Gel food coloring (as desired)
Optional Decorating Supplies:
- Sprinkles, sanding sugar, nonpareils
- Edible glitter or luster dust
- Mini M&Ms or candy buttons
- Red Hots or cinnamon candies
- Small candies for gingerbread house decoration
- Edible markers
Equipment Needed
- Stand mixer with paddle attachment (or hand mixer)
- Large mixing bowl
- Whisk (for dry ingredients)
- Rolling pin
- Gingerbread cookie cutters (various shapes)
- Baking sheets
- Parchment paper or silicone baking mats
- Wire cooling rack
- Plastic wrap
- Piping bags and tips (for decorating)
- Small offset spatula
- Measuring cups and spoons
Step-by-Step Instructions
Step 1: Mix the Dry Ingredients
In a large bowl, whisk together:
- All-purpose flour
- Ground ginger
- Ground cinnamon
- Ground cloves
- Ground nutmeg
- Ground allspice
- Baking soda
- Salt
Whisk thoroughly to ensure the spices and leavening are evenly distributed throughout the flour. This prevents spice “hot spots” in your cookies.
Spice Freshness Note: For the most flavorful gingerbread, use fresh spices. Ground spices lose potency after about 6 months. Give them a sniff—they should be aromatic and pungent.
Set the dry ingredients aside.
Step 2: Cream the Butter and Sugar
In the bowl of a stand mixer fitted with the paddle attachment (or using a hand mixer), beat the softened butter on medium speed until creamy, about 1 minute.
Add the dark brown sugar and beat on medium-high speed for 2-3 minutes until light and fluffy. Scrape down the sides of the bowl as needed.
Why Dark Brown Sugar? Dark brown sugar contains more molasses than light brown sugar, adding deeper flavor and extra moisture to your cookies. Don’t substitute light brown sugar or white sugar.
Step 3: Add Wet Ingredients
Reduce the mixer speed to low.
Add the egg and beat until combined, about 30 seconds.
Add the molasses, vanilla extract, and lemon zest (if using). Beat until the mixture is smooth and uniform in color.
Molasses Matters:
- Use unsulphured molasses (mild, sweet) for classic gingerbread flavor
- Light molasses produces milder cookies
- Dark molasses creates more robust, slightly bitter cookies
- Never use blackstrap molasses—it’s too bitter and intense
The mixture may look slightly curdled at this point. That’s normal—the flour will bring it together.
Step 4: Combine Wet and Dry
With the mixer on low speed, gradually add the flour mixture to the butter mixture, about 1 cup at a time.
Mix until just combined after each addition. Scrape down the sides and bottom of the bowl to ensure no flour pockets remain.
The dough will be thick, slightly sticky, and should pull away from the sides of the bowl. It will firm up significantly during chilling.
Don’t Overmix: Once the flour is incorporated, stop mixing. Overworked dough develops too much gluten, resulting in tough cookies.
Step 5: Shape and Chill the Dough
Turn the dough out onto a clean work surface.
Divide the dough in half.
Shape each half into a flat disk, approximately 1 inch thick. Flat disks chill faster and are easier to roll than thick balls.
Wrap each disk tightly in plastic wrap.
Refrigerate for at least 2 hours, or preferably overnight.
Why Chilling is Essential:
- Firms up the butter so cookies hold their shape
- Hydrates the flour for better texture
- Allows flavors to develop and deepen
- Makes the dough much easier to roll and cut
Make-Ahead Option: Refrigerate dough for up to 1 week, or freeze for up to 3 months.
Step 6: Prepare for Rolling and Cutting
When ready to bake, preheat your oven to 350°F (175°C).
Line baking sheets with parchment paper or silicone baking mats.
Remove one disk of dough from the refrigerator. If the dough is too hard to roll, let it sit at room temperature for 5-10 minutes to soften slightly. It should be firm but pliable.
Lightly flour your work surface and rolling pin.
Step 7: Roll Out the Dough
Place the dough disk on the floured surface.
Roll the dough from the center outward, rotating it occasionally to maintain an even thickness and prevent sticking.
Roll to approximately ¼-inch thickness for classic gingerbread cookies that are crisp yet slightly chewy.
Thickness Guide:
- ⅛ inch: Very crisp, snappy cookies (ideal for gingerbread houses)
- ¼ inch: Classic texture—crisp edges, slightly chewy center
- ⅜ inch: Softer, chewier cookies
If the dough becomes too soft or sticky while rolling, slide it onto a baking sheet and refrigerate for 10 minutes.
Alternative Rolling Method: Roll dough between two sheets of parchment paper to prevent sticking without adding extra flour.
Step 8: Cut Out Shapes
Dip your cookie cutters in flour to prevent sticking.
Cut shapes as close together as possible to minimize scraps.
Use a thin offset spatula or butter knife to carefully transfer cutouts to the prepared baking sheets.
Space cookies about 1 inch apart—gingerbread spreads minimally, but needs some breathing room.
Gather and Re-roll Scraps:
- Gently gather the dough scraps and press together
- Re-roll once for more cookies
- Avoid re-rolling more than twice, as the dough becomes tough
- Final scraps can be baked as “ugly cookies” for the baker’s treat!
Repeat with the second disk of dough.
Step 9: Bake the Cookies
Place one baking sheet at a time in the center of the preheated oven.
Bake for 8-12 minutes, depending on cookie size and thickness:
- Small cookies (2-inch): 8-9 minutes
- Medium cookies (3-4 inch): 10-11 minutes
- Large cookies (5+ inch): 11-12 minutes
- Gingerbread house panels: 12-15 minutes
Visual Cues for Doneness:
- Edges are set and slightly firm
- Cookies appear matte (not shiny)
- Slight puffing in the center
- Light golden color on edges (not brown)
The cookies will seem soft when you first remove them—they firm up significantly as they cool. Don’t overbake!
Step 10: Cool Properly
Remove the baking sheet from the oven.
Let the cookies cool on the baking sheet for 5 minutes. They’re very delicate when hot and will break if moved too soon.
Using a spatula, carefully transfer the cookies to a wire cooling rack.
Cool completely before decorating—at least 30 minutes. Warm cookies will melt the royal icing.
Step 11: Prepare the Royal Icing
While the cookies cool, make the royal icing.
In the bowl of a stand mixer fitted with the paddle attachment, combine:
- Sifted powdered sugar
- Meringue powder
- 5 tablespoons warm water
- Vanilla extract
Beat on low speed until combined, then increase to medium-high.
Beat for 5-7 minutes until the icing is bright white, thick, and holds stiff peaks when the beater is lifted.
Icing Consistency:
- Stiff/Piping Consistency: For outlines, details, and writing. Holds peaks. Use as-is.
- Flooding Consistency: For filling in large areas. Add water 1 teaspoon at a time until the icing flows like honey and settles flat within 10 seconds.
Cover the bowl with a damp towel while working to prevent drying.
Step 12: Decorate the Cookies
Divide icing into small bowls and tint with gel food coloring as desired.
Transfer icing to piping bags fitted with small round tips (Wilton #2 or #3 for outlining, larger for flooding).
Basic Decorating Technique:
- Outline: Pipe a border around the edge of the cookie using stiff icing. Let set for 1-2 minutes.
- Flood: Fill the outlined area with flooding consistency icing. Use a toothpick to spread and pop air bubbles.
- Detail: Once the base layer is dry (2-4 hours or overnight), add details with stiff icing—faces, buttons, swirls, etc.
Simple Decorating Ideas:
- Just outline with white icing for an elegant look
- Dip in flooding icing and add sprinkles while wet
- Use a single color of icing with contrasting details
- Make simple dots, lines, and zigzags
- Press candies into wet icing
Step 13: Dry and Store
Let decorated cookies dry completely at room temperature for 8-24 hours. Royal icing needs time to harden.
Test by gently touching the icing—it should be completely hard, not tacky.
Once dry, store decorated cookies in a single layer in an airtight container, or layer between sheets of parchment paper.
Store at room temperature for up to 2 weeks (decorated) or freeze undecorated cookies for up to 1 month.
🎬 Video Tutorial
Watch a step-by-step video guide for making and decorating perfect gingerbread cookies:
💡 Pro Tips for the Perfect Gingerbread Cookies
- Fresh Spices = Better Flavor: Stale spices make flat-tasting gingerbread. If your spices are more than 6 months old, replace them.
- Don’t Skip the Chill: Chilling isn’t optional. It firms the dough, develops flavor, and ensures cookies hold their shape. Overnight is best.
- Measure Flour Correctly: Too much flour makes dry, tough cookies. Spoon flour into the measuring cup and level with a knife (don’t pack it down).
- Roll Evenly: Uneven thickness means uneven baking. Use rolling pin guides or ruler sticks for consistent results.
- Cold Dough, Warm Oven: Work with one dough disk at a time, keeping the other refrigerated. Warm dough spreads and loses detail.
- Flour Your Cutters: Dip cutters in flour before each cut to ensure clean release.
- Bake One Sheet at a Time: For most even baking, use the center rack with one sheet. Multiple sheets can lead to uneven browning.
- They Firm as They Cool: Gingerbread cookies will seem soft from the oven—that’s correct! They set up as they cool. Overbaked cookies will be hard as rocks.
- Cool Completely Before Decorating: Warm cookies + royal icing = melty mess. Patience!
- Make Icing in Small Batches: Royal icing dries quickly. Make what you need and keep it covered with a damp towel.
Decorated Cookie Storage:
- Store at room temperature in airtight container
- Layer between parchment paper to protect icing
- Keep for up to 2 weeks
- Do NOT freeze decorated cookies—icing becomes sticky when thawed
Royal Icing Storage:
- Press plastic wrap directly onto surface
- Refrigerate for up to 2 weeks
- Re-beat before using (add water if too thick)
🔄 Variations to Try
- Chocolate Gingerbread: Replace ¼ cup flour with cocoa powder. Reduce spices slightly. Decorate with white icing for stunning contrast.
- Soft and Chewy Gingerbread: Increase molasses to ¾ cup, reduce flour to 3 cups, and bake for only 7-8 minutes. Skip the chill for soft, cake-like cookies.
- Gingerbread Sandwich Cookies: Spread cream cheese frosting, Nutella, or marshmallow fluff between two cookies.
- Glazed Gingerbread: Skip royal icing. Instead, drizzle with a simple glaze (powdered sugar + milk + vanilla).
- Gingerbread Biscotti: Shape dough into logs, bake, slice, and bake again for crunchy dipping cookies.
- Spiced Orange Gingerbread: Add 1 tablespoon orange zest to the dough. Use orange juice in the icing.
- Maple Gingerbread: Replace half the molasses with maple syrup. Top with maple glaze.
- Swedish Pepparkakor: Thinner, crispier Scandinavian ginger snaps. Roll to ⅛-inch thick and bake until very crisp.
- Gingerbread Truffles: Crush cookies and mix with cream cheese. Roll into balls and dip in white chocolate.
- Gingerbread People Pops: Insert lollipop sticks before baking. Decorate and wrap in cellophane for gifts.
- Stained Glass Gingerbread: Cut small shapes from centers, fill with crushed hard candies, and bake until candy melts into “glass.”
❓ Frequently Asked Questions
Why did my cookies spread too much? The dough wasn’t chilled enough, the butter was too soft, or the oven temperature was too low. Always use thoroughly chilled dough and verify oven temp with a thermometer.
Why are my cookies tough and hard? You likely added too much flour or overmixed the dough. Measure flour carefully and mix only until just combined.
Can I make the dough in advance? Yes! Dough improves with time. Make it up to 1 week ahead and refrigerate, or freeze for up to 3 months.
Why did my cookies lose their shape? Warm dough is the usual culprit. Keep dough cold, and if it softens while cutting, pop the cutouts in the freezer for 10 minutes before baking.
Can I use light brown sugar instead of dark? You can, but the flavor will be less deep and molasses-forward. Stick with dark brown sugar for authentic gingerbread taste.
What’s the difference between molasses types? Light molasses is mild and sweet; dark molasses is more robust; blackstrap is very bitter (don’t use it). Unsulphured molasses (any darkness) is recommended.
How do I know when the cookies are done? Edges should be set and matte, not shiny. The centers may look slightly underdone—that’s okay! They firm up as they cool. When in doubt, pull them out slightly early.
Can I use this recipe for a gingerbread house? Absolutely! Roll the dough slightly thicker (⅜ inch) and bake a few minutes longer until very firm. The dough holds its shape well for construction.
Why is my royal icing grainy? The powdered sugar wasn’t sifted, or the icing wasn’t beaten long enough. Always sift sugar and beat for at least 5-7 minutes.
Can kids help with this recipe? Yes! Rolling, cutting shapes, and decorating are perfect activities for kids. Supervise around the oven and let them focus on the creative parts.
🍽️ Serving Suggestions
Gingerbread cookies are versatile—perfect for eating, gifting, and decorating.
Cookie Display Ideas:
- Arrange on a tiered serving stand
- Fill a decorative tin or cookie jar
- Hang from a ribbon on the Christmas tree
- Display on a festive platter with greenery
- Stack in a clear glass jar
Cookie Exchange Ready:
- Package 6-8 cookies in clear cellophane bags
- Tie with festive ribbon
- Add a gift tag with the recipe
- Include a “Best by” date
Activities:
- Gingerbread decorating party (bake cookies ahead, provide icing and toppings)
- Christmas cookie exchange contribution
- Hang from ribbon on the tree as edible ornaments
- Leave for Santa on Christmas Eve
- Gingerbread house building competition
Beverage Pairings:
- Hot chocolate with whipped cream
- Warm apple cider
- Eggnog
- Coffee or chai latte
- Cold milk
Dessert Upgrades:
- Crumble over vanilla ice cream
- Use as a cheesecake crust
- Layer in a trifle with gingerbread custard
- Make ice cream sandwiches
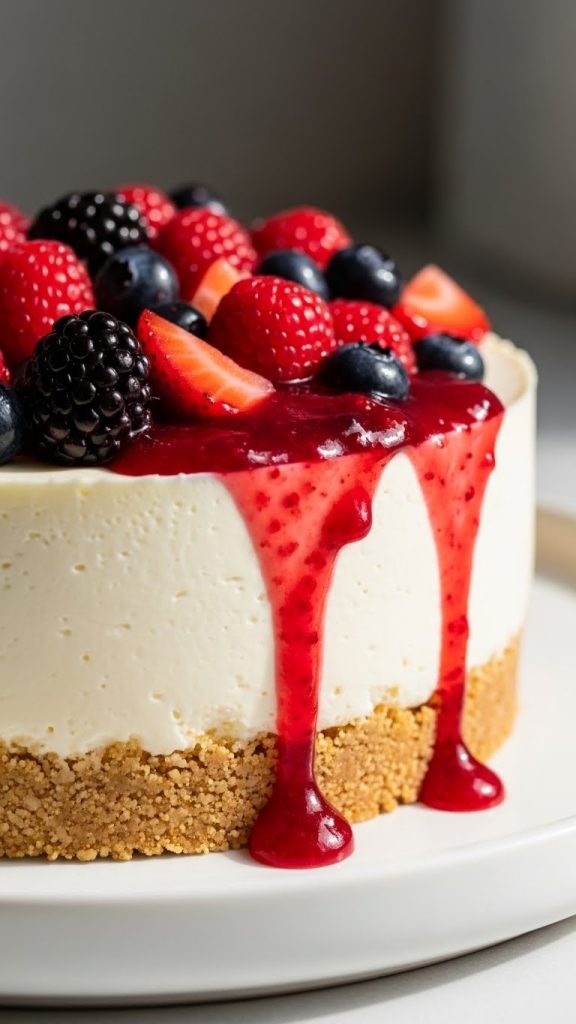
12. No-Bake Cheesecake with Berry Topping
After the chaos of Christmas cooking—the turkey, the sides, the appetizers—the last thing you want is to fuss over a finicky baked dessert. Enter the No-Bake Cheesecake, the elegant finale your holiday meal deserves without any of the stress. This silky-smooth, creamy dream of a dessert features a buttery graham cracker crust, a cloud-like filling that’s impossibly rich yet light, and a jewel-toned berry topping that makes it as gorgeous as it is delicious. Best of all? No oven required, no water baths to worry about, and no cracks to stress over. Simply mix, chill overnight, and slice into pure perfection. This is make-ahead holiday dessert at its absolute finest—prepare it up to three days before Christmas and spend your holiday actually enjoying the celebration.
📋 Recipe Card: No-Bake Cheesecake with Berry Topping
Prep Time: 25 minutes
Chill Time: 8 hours or overnight (minimum 6 hours)
Total Time: 8-9 hours (mostly hands-off)
Servings: 12-16 slices
Difficulty: Easy
Ingredients
For the Graham Cracker Crust:
- 2½ cups graham cracker crumbs (about 20 full sheets)
- ⅓ cup granulated sugar
- ½ teaspoon ground cinnamon (optional)
- Pinch of salt
- 10 tablespoons (1¼ sticks) unsalted butter, melted
For the Cheesecake Filling:
- 32 oz (four 8-oz blocks) cream cheese, at room temperature
- 1 cup powdered sugar, sifted
- 1 tablespoon fresh lemon juice
- 2 teaspoons pure vanilla extract
- Pinch of salt
- 2 cups heavy whipping cream, very cold
- ¼ cup powdered sugar (for whipped cream)
For the Berry Topping:
- 2 cups mixed fresh berries (strawberries, blueberries, raspberries, blackberries)
- ¼ cup granulated sugar
- 1 tablespoon fresh lemon juice
- 1 tablespoon cornstarch mixed with 2 tablespoons water (slurry)
- ½ teaspoon vanilla extract
Optional Garnishes:
- Fresh whole berries
- Fresh mint leaves
- White chocolate curls
- Lemon zest
- Whipped cream rosettes
- Edible flowers
Equipment Needed
- 9-inch springform pan (essential for easy removal)
- Stand mixer or hand mixer
- Large mixing bowls
- Food processor or zip-top bag and rolling pin (for crushing crackers)
- Rubber spatula
- Offset spatula
- Plastic wrap
- Measuring cups and spoons
- Medium saucepan (for berry topping)
- Fine mesh strainer (optional)
Step-by-Step Instructions
Step 1: Prepare the Springform Pan
Lightly grease the bottom and sides of a 9-inch springform pan with butter or non-stick cooking spray.
For extra insurance, line the bottom with a circle of parchment paper. This guarantees the cheesecake releases perfectly.
Springform Pan Tip: If your pan has ever leaked before, wrap the outside bottom and sides with aluminum foil as a precaution.
Step 2: Make the Graham Cracker Crumbs
If using whole graham crackers, break them into pieces and pulse in a food processor until finely ground.
Alternatively, place crackers in a large zip-top bag and crush with a rolling pin until fine crumbs form.
You need 2½ cups of fine, uniform crumbs. Crumbs that are too coarse won’t hold together; crumbs that are powdery work fine.
Crust Variations:
- Classic graham crackers (traditional)
- Chocolate graham crackers (for chocolate lovers)
- Oreo cookies, cream removed (cookies and cream)
- Gingersnaps (perfect for Christmas!)
- Biscoff cookies (caramelized flavor)
- Nilla wafers (lighter, sweeter)
Step 3: Mix the Crust
In a large bowl, combine:
- Graham cracker crumbs
- Granulated sugar
- Ground cinnamon (if using)
- Pinch of salt
Stir to combine.
Pour the melted butter over the crumb mixture.
Stir with a fork or spatula until all the crumbs are evenly moistened. The mixture should hold together when squeezed in your fist.
Test: Press a small amount between your fingers. If it clumps and holds, it’s perfect. If it’s crumbly, add a bit more melted butter.
Step 4: Press the Crust into the Pan
Transfer the crumb mixture to the prepared springform pan.
Using the bottom of a measuring cup, drinking glass, or your fingers, press the crumbs firmly and evenly into the bottom of the pan.
For a crust that goes up the sides (recommended for beautiful presentation):
- Press about ¾ of the mixture into the bottom
- Use the remaining ¼ to press up the sides, about 1-1½ inches high
- Use a straight-sided glass to compress the edge where the bottom meets the sides
Press Firmly: A loosely packed crust will crumble when sliced. Really compact those crumbs!
Refrigerate the crust for at least 15 minutes while you prepare the filling. This helps it firm up.
Optional: For an extra-sturdy crust, bake at 325°F for 10 minutes, then cool completely. This step is optional for no-bake but does create a sturdier base.
Step 5: Prepare the Cream Cheese
Room temperature cream cheese is critical. Cold cream cheese will result in a lumpy filling that won’t smooth out.
Remove the cream cheese from the refrigerator at least 1-2 hours before starting. It should be soft enough that you can easily press your finger into it.
Quick Softening Method: If you forgot to set out the cream cheese, unwrap the blocks, cut into cubes, and microwave at 50% power in 15-second intervals until softened but not melted.
Unwrap all four blocks and place in the bowl of your stand mixer fitted with the paddle attachment (or use a large bowl with a hand mixer).
Step 6: Beat the Cream Cheese Base
Beat the cream cheese on medium speed for 2-3 minutes until completely smooth and creamy, with no lumps.
Stop and scrape down the sides and bottom of the bowl several times. Lumps hiding at the bottom will haunt you later!
Add the sifted powdered sugar and beat on low speed until incorporated, then increase to medium and beat for another minute.
Add the lemon juice, vanilla extract, and pinch of salt. Beat until combined.
The mixture should be silky smooth and creamy. Taste it—this is your base flavor. Adjust sweetness or vanilla if desired.
Transfer this mixture to a separate large bowl and set aside. Clean and dry the mixer bowl for whipping cream.
Step 7: Whip the Heavy Cream
For best results, chill your mixing bowl and whisk attachment in the freezer for 10-15 minutes.
Pour the very cold heavy cream into the chilled bowl.
Begin beating on medium speed until the cream starts to thicken.
Add the ¼ cup powdered sugar.
Increase speed to medium-high and beat until stiff peaks form. When you lift the whisk, the cream should hold its shape and not droop.
Don’t Over-Beat: Stop as soon as you reach stiff peaks. Over-beaten cream becomes grainy and can turn into butter.
Step 8: Fold the Whipped Cream into Cream Cheese
This step is crucial for the light, airy texture that makes no-bake cheesecake special.
Add about ⅓ of the whipped cream to the cream cheese mixture.
Using a rubber spatula, gently fold to lighten the mixture. Stir more vigorously here—this first addition loosens the heavy cream cheese.
Add the remaining whipped cream in two additions, folding gently each time.
Folding Technique:
- Cut down through the center of the mixture with your spatula
- Sweep along the bottom of the bowl
- Fold up and over the top
- Rotate the bowl and repeat
Fold until no white streaks remain, but don’t overmix or you’ll deflate the airy whipped cream.
The final filling should be light, fluffy, and mousse-like.
Step 9: Fill the Crust
Remove the crust from the refrigerator.
Pour the cheesecake filling over the prepared crust.
Using an offset spatula or the back of a spoon, spread the filling evenly, smoothing the top.
For a perfectly flat top, hold the spatula at a low angle and smooth in one direction, rotating the pan.
For a rustic swirled top, use the back of a spoon to create decorative swirls.
Gently tap the pan on the counter a few times to release any air bubbles.
Step 10: Chill the Cheesecake
Cover the cheesecake loosely with plastic wrap (don’t let it touch the surface) or place a large inverted bowl over the pan.
Refrigerate for at least 6 hours, but preferably 8 hours or overnight.
Why So Long? The filling needs time to set firmly. A fully chilled cheesecake will slice cleanly; an under-chilled one will be soft and messy.
The cheesecake is ready when the center is firm to the touch with no jiggling.
Step 11: Prepare the Berry Topping
The berry topping can be made up to 3 days ahead and refrigerated separately.
If using strawberries, hull and quarter them. Leave other berries whole or halve larger ones.
In a medium saucepan, combine the berries, sugar, and lemon juice.
Cook over medium heat, stirring occasionally, until the berries begin to release their juices and soften, about 5-7 minutes.
In a small bowl, mix the cornstarch with 2 tablespoons water to create a slurry.
Add the slurry to the berry mixture, stirring constantly.
Continue cooking for 1-2 minutes until the mixture thickens slightly and becomes glossy.
Remove from heat and stir in the vanilla extract.
Let cool to room temperature, then refrigerate until ready to use. The topping will thicken further as it chills.
Fresh Berry Alternative: For a simpler topping, skip the cooking. Toss fresh berries with 2 tablespoons sugar and 1 tablespoon lemon juice. Let macerate for 30 minutes before spooning over the cheesecake.
Step 12: Unmold and Top the Cheesecake
When ready to serve, remove the cheesecake from the refrigerator.
Run a thin knife or offset spatula around the inside edge of the springform pan to loosen the cheesecake.
Carefully unclasp and remove the ring of the springform pan.
For the cleanest release:
- Warm the outside of the ring with a hot, damp towel for 30 seconds
- The slight warmth helps release the crust from the sides
If desired, carefully slide the cheesecake off the pan bottom onto a serving plate using two large spatulas. Alternatively, leave it on the pan bottom and place on a cake stand.
Spoon the berry topping over the center of the cheesecake, letting it cascade naturally over the edges.
Alternatively, serve the topping on the side and let guests add their own.
Step 13: Garnish and Serve
Add final garnishes:
- Arrange fresh whole berries decoratively
- Tuck fresh mint leaves around the berries
- Add white chocolate curls or shavings
- Sprinkle with lemon zest for brightness
- Pipe whipped cream rosettes around the edge
- Add edible flowers for elegance
Slicing Tips:
- Use a sharp, thin-bladed knife
- Dip the knife in hot water and wipe clean between each slice
- Cut with a single downward motion rather than sawing
- For perfect slices, chill the cheesecake in the freezer for 30 minutes before cutting
Serve cold, directly from the refrigerator.
🎬 Video Tutorial
Watch a step-by-step video guide for making the perfect no-bake cheesecake:
💡 Pro Tips for the Perfect No-Bake Cheesecake
- Room Temperature Cream Cheese is Non-Negotiable: Cold cream cheese creates lumps that no amount of beating will smooth out. Plan ahead!
- Sift the Powdered Sugar: Lumpy sugar = lumpy filling. Always sift for a silky-smooth result.
- Full-Fat Everything: Use full-fat cream cheese and heavy whipping cream. Reduced-fat versions don’t set properly and lack the rich, creamy texture.
- Don’t Skimp on Chilling: Six hours is the minimum; overnight is better. Patience rewards you with clean slices.
- Fold, Don’t Stir: Gently folding the whipped cream preserves the air bubbles that make this cheesecake light and mousse-like.
- Pack That Crust: A loosely packed crust will crumble. Really press firmly with a flat-bottomed glass or measuring cup.
- Hot Knife for Clean Slices: Dip your knife in hot water, wipe dry, and slice. Repeat between cuts for bakery-perfect slices.
- Add Toppings Just Before Serving: The berry topping is best added within a few hours of serving to keep the top looking fresh.
- Springform Pan is Essential: Don’t try to make this in a regular pie plate—you’ll never get it out cleanly.
- Taste as You Go: Before folding in the whipped cream, taste the cream cheese base. This is your chance to adjust sweetness, vanilla, or lemon.
🗄️ Storage Tips
Refrigerator Storage:
- Cover loosely with plastic wrap or store in an airtight container
- Without topping: up to 5 days
- With berry topping: up to 3 days (topping may weep slightly)
- Keep berry topping separate for best results; add before serving
Freezer Storage:
- Cheesecake freezes beautifully!
- Freeze without topping for best results
- Wrap tightly in plastic wrap, then aluminum foil
- Freeze for up to 2 months
- Thaw overnight in the refrigerator (not at room temperature)
- Add topping after thawing
Freezing Individual Slices:
- Slice the cheesecake first
- Place slices on a baking sheet and freeze until solid (1-2 hours)
- Wrap each slice individually in plastic wrap
- Store in a freezer bag
- Perfect for grabbing single servings!
Topping Storage:
- Store berry topping in a separate airtight container
- Refrigerate for up to 5 days
- Can be frozen for up to 3 months
- Thaw in refrigerator before using
🔄 Variations to Try
- Classic New York Style (No-Bake): Omit the berry topping. Serve with a simple sour cream layer (1 cup sour cream + 2 tablespoons sugar + 1 teaspoon vanilla).
- Chocolate No-Bake Cheesecake: Add 8 oz melted and cooled semi-sweet chocolate to the cream cheese base before folding in whipped cream. Use chocolate graham cracker crust.
- Oreo Cheesecake: Use crushed Oreos (with cream!) for the crust. Fold 1 cup crushed Oreos into the filling. Garnish with more Oreos.
- Pumpkin Cheesecake: Add 1 cup pumpkin puree and 1½ teaspoons pumpkin pie spice to the cream cheese base. Use gingersnap crust.
- Lemon Cheesecake: Increase lemon juice to 3 tablespoons, add 2 tablespoons lemon zest, and top with lemon curd instead of berries.
- Strawberry Swirl Cheesecake: Puree 1 cup strawberries with 2 tablespoons sugar. Swirl into the filling before chilling.
- Peanut Butter Cheesecake: Add 1 cup creamy peanut butter to the cream cheese base. Top with chocolate ganache and chopped peanuts.
- Turtle Cheesecake: Top with caramel sauce, chocolate ganache, and chopped toasted pecans.
- Key Lime Cheesecake: Replace lemon juice with key lime juice (¼ cup). Add lime zest. Top with whipped cream and lime slices.
- Eggnog Cheesecake: Add ½ cup eggnog and 1 teaspoon nutmeg to the filling. Perfect for Christmas!
- White Chocolate Raspberry Cheesecake: Add 6 oz melted white chocolate to the filling. Use raspberry topping. Garnish with white chocolate curls.
- Cheesecake Bars: Make in a 9×13 pan, chill, and cut into squares for easy serving at parties.
❓ Frequently Asked Questions
Why is my filling lumpy? The cream cheese wasn’t fully softened. Always let cream cheese come to room temperature for at least 1-2 hours. If you have lumps, try beating the mixture longer or pushing it through a fine mesh strainer.
My cheesecake won’t set. What went wrong? Either it hasn’t chilled long enough (give it more time), the whipped cream wasn’t beaten to stiff peaks, or too much liquid was added. No-bake cheesecakes need at least 6-8 hours to set fully.
Can I use Cool Whip instead of whipping cream? You can, but the texture and flavor won’t be as good. If using Cool Whip, use 4 cups (16 oz) thawed. Fold gently into the cream cheese mixture.
Why did my crust stick to the pan? The pan wasn’t greased well, or the crust wasn’t chilled long enough before filling. Always grease the pan and chill the crust before adding filling.
Can I use reduced-fat cream cheese? It’s not recommended. Reduced-fat cream cheese has more water and less fat, resulting in a softer filling that doesn’t set as well. Use full-fat for best results.
How do I prevent cracks? No-bake cheesecakes rarely crack because there’s no baking involved! If you see surface cracks, it’s likely from the filling drying out—cover properly during chilling.
Can I make this in a regular pie dish? You can, but releasing it will be messy. A springform pan is highly recommended for clean unmolding. If you must use a pie dish, accept that you’ll serve it directly from the dish.
Why is my berry topping runny? The topping wasn’t cooked enough, or not enough cornstarch was used. Return it to heat and simmer until thickened. The topping also thickens as it cools.
How far in advance can I make this? The cheesecake (without topping) can be made 3-5 days ahead. Add the berry topping within a few hours of serving for the freshest presentation.
Can I use frozen berries for the topping? Yes! Frozen berries work beautifully for the cooked topping. No need to thaw—add them directly to the saucepan. They may release more liquid, so cook a bit longer.
🍽️ Serving Suggestions
A gorgeous no-bake cheesecake deserves a beautiful presentation.
Plating Ideas:
- Serve on a white cake stand for elegant contrast
- Use a glass cake stand to showcase the layers
- Place on a festive holiday platter with greenery
- Individual slices on dessert plates with sauce drizzle
Sauce Pairings:
- Warm berry compote
- Chocolate ganache drizzle
- Caramel sauce
- Raspberry coulis
- Lemon curd
- Strawberry sauce
Accompaniments:
- Fresh whipped cream on the side
- Extra fresh berries
- Mint sprigs for garnish
- Chocolate shavings
- Cookie crumbles
- Toasted nuts
Beverage Pairings:
- Coffee or espresso
- Dessert wine (Moscato, late harvest Riesling)
- Port
- Champagne or Prosecco
- Hot tea
- After-dinner liqueur
Portion Guide:
- A 9-inch cheesecake serves 12-16 people
- For larger gatherings, make two or cut smaller slices
- No-bake cheesecake is rich—smaller portions satisfy!
🎄 Make-Ahead Timeline for Christmas
Up to 5 Days Before:
- Make the cheesecake (crust and filling)
- Cover and refrigerate
Up to 3 Days Before:
- Make the berry topping
- Refrigerate separately in an airtight container
Christmas Eve:
- Prepare any additional garnishes
- Keep cheesecake refrigerated
Christmas Day (1-2 Hours Before Dessert):
- Unmold the cheesecake
- Add berry topping
- Garnish beautifully
- Return to refrigerator until serving
After Dinner:
- Slice with a hot knife
- Serve and accept the compliments!
- Store leftovers in refrigerator