There’s something magical about the aroma of freshly baked goods wafting through the kitchen. I remember the first time I decided to make my own apple pie filling from scratch. It was a chilly fall afternoon, and I wanted to create something warm and comforting. Store-bought versions just didn’t cut it—they lacked that rich, homemade flavor I craved.
This recipe is a game-changer. It’s simple, quick, and lets you control the ingredients for a healthier, tastier result. Whether you’re filling a flaky crust, topping ice cream, or making tarts, this mix is versatile and delicious. With just a few kitchen staples like sugar, cinnamon, and cornstarch, you can whip up a batch in minutes.
What I love most is the freedom to choose the best apples for the job. Crisp, tart varieties like Granny Smith work wonders, balancing the sweetness perfectly. Plus, the process is so easy—even if you’re new to baking, you’ll feel like a pro. Stick around, and I’ll share all the tips and tricks to make this dish a staple in your kitchen.
Key Takeaways
- Create a delicious homemade alternative to canned fillings.
- Enjoy better flavor and ingredient control with this simple recipe.
- Perfect for pies, tarts, or even as an ice cream topping.
- Uses basic kitchen staples like sugar, cinnamon, and cornstarch.
- Choose quality apples like Granny Smith for the best results.
Recipe Overview
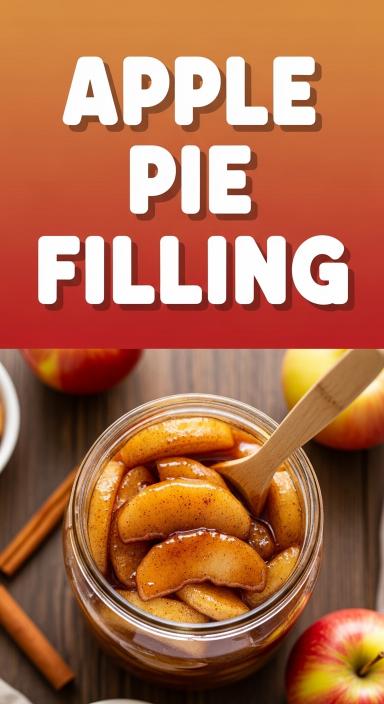
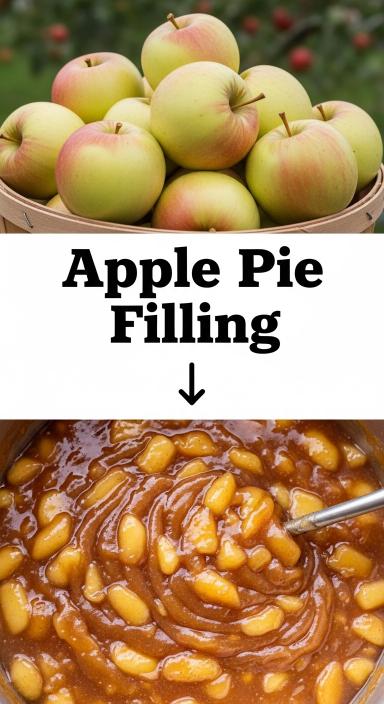
Apple Pie Filling is a sweet and warmly spiced mixture of tender apples cooked in a rich syrup made with sugar, cinnamon, and butter. This homemade filling is perfect for classic apple pies, crisps, turnovers, pastries, or as a topping for pancakes and ice cream. Making apple pie filling from scratch allows you to control the sweetness and spices while enjoying fresh, natural flavors.
Prep Time
15 minutes
Cook Time
10 minutes
Total Time
25 minutes
Servings
Makes about 4 cups
Cuisine
American
Difficulty
Easy
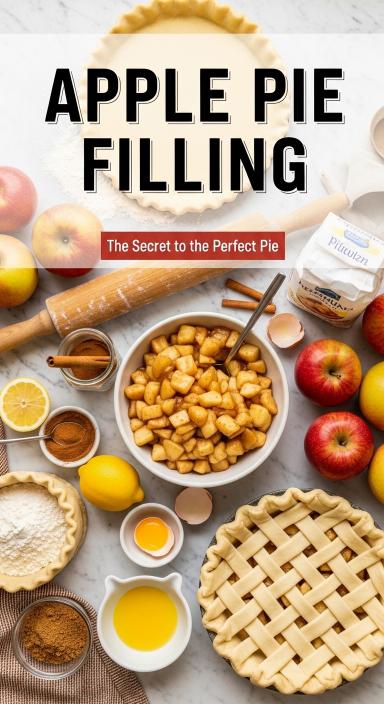
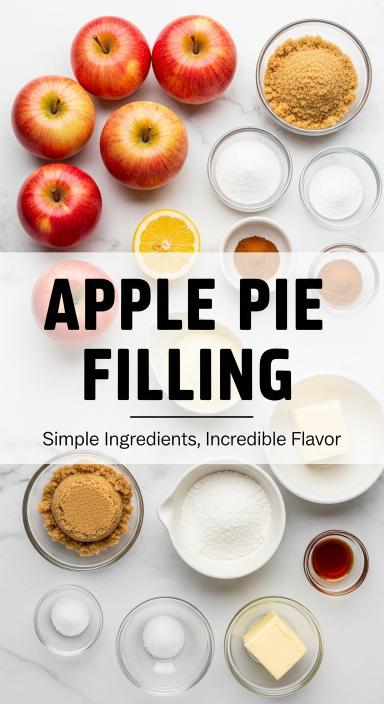
Ingredients
Main Ingredients
- 6 cups apples, peeled and sliced (about 5–6 medium apples)
- ¾ cup granulated sugar
- ¼ cup brown sugar
- ¼ cup water
- 2 tablespoons lemon juice
- 3 tablespoons cornstarch
- 1 teaspoon ground cinnamon
- ¼ teaspoon ground nutmeg
- ¼ teaspoon salt
- 1 teaspoon vanilla extract
- 1 tablespoon butter
Equipment Needed
Kitchen Tools
- Large saucepan
- Knife
- Cutting board
- Mixing bowl
- Wooden spoon or spatula
- Measuring cups and spoons
Instructions
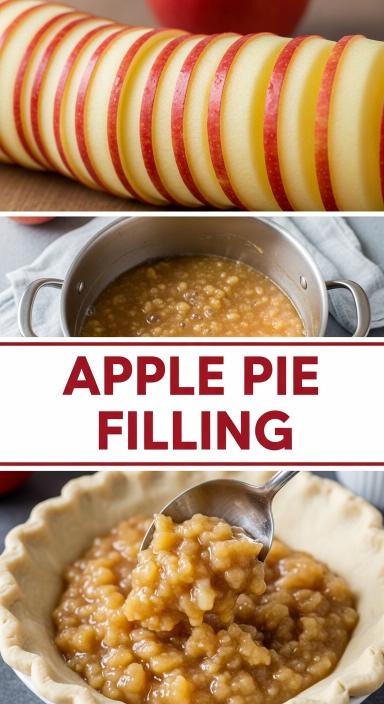
Step 1: Prepare the Apples
Peel, core, and slice the apples into thin slices. Place them in a bowl and toss with lemon juice to prevent browning.
Step 2: Make the Syrup
In a large saucepan combine the granulated sugar, brown sugar, water, cornstarch, cinnamon, nutmeg, and salt. Stir well until the mixture is smooth.
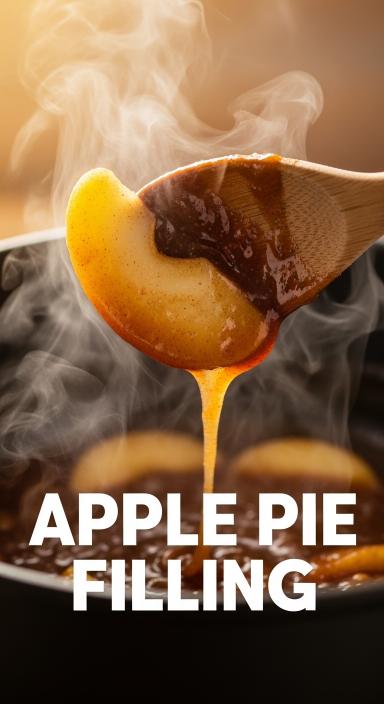
Step 3: Cook the Filling
Place the saucepan over medium heat and bring the mixture to a gentle simmer, stirring constantly. Cook until the mixture begins to thicken.
Step 4: Add the Apples
Add the sliced apples to the saucepan and stir gently to coat them with the syrup.
Cook for 6–8 minutes until the apples begin to soften but still hold their shape.
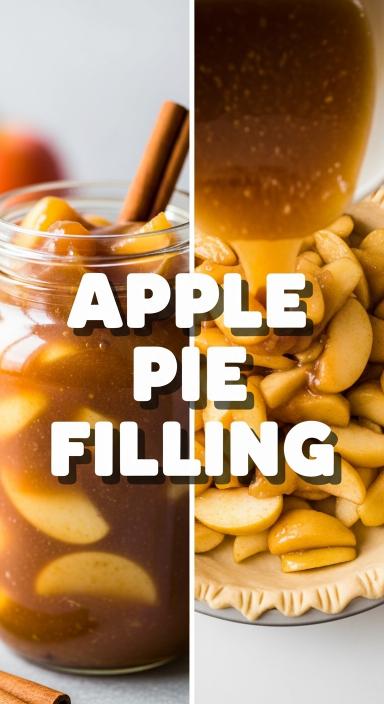
Step 5: Finish the Filling
Remove the saucepan from heat and stir in the vanilla extract and butter. Mix until the butter melts and the filling becomes glossy.
Step 6: Cool the Filling
Allow the apple pie filling to cool slightly before using it in pies or desserts.
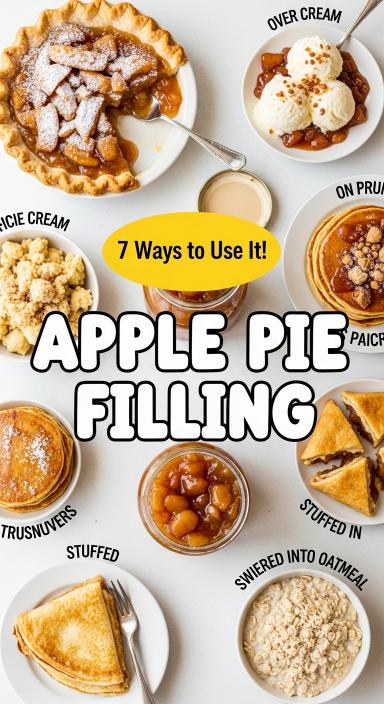
Serving Suggestions
Best Ways to Use Apple Pie Filling
This filling works well in:
- Apple pies
- Apple crisps or crumbles
- Turnovers
- Pastries
- Pancake or waffle topping
- Ice cream topping
Dessert Ideas
Use apple pie filling to make:
- Apple hand pies
- Apple cobbler
- Apple cheesecake topping
Introduction to My Apple Pie Filling Journey
The first time I made my own filling, I knew I’d never go back to store-bought. It was a simple experiment, but the results were unforgettable. The aroma of cinnamon and sugar filled my kitchen, and the vibrant flavor of freshly cooked apples was unlike anything I’d tasted before.
How I Discovered the Joy of Homemade Pie Filling
It all started with a craving for something more authentic. Canned options felt bland and overly sweet. I wanted a filling that was fresh, flavorful, and made with care. So, I grabbed a bowl, a tablespoon, and a few basic ingredients. In just a few minutes, I had a mixture that transformed my dessert game.
What stood out most was the texture. The apples were tender yet held their shape perfectly. The spices balanced the sweetness, creating a rich, comforting flavor. It was clear that homemade was the way to go.
Why I Prefer Homemade to Canned Options
Homemade filling lets you control every detail. You can choose the best apples, like Granny Smith, for a perfect balance of tartness and sweetness. The process is quick and easy, requiring just a bit of heat and a little time to cool. Plus, it’s incredibly versatile—use it in pies, tarts, or even as a topping for ice cream.
Here’s what makes homemade filling stand out:
- Freshness: No preservatives, just real ingredients.
- Flavor: Vibrant and rich, with a perfect balance of spices.
- Texture: Tender apples that hold their shape.
- Creativity: Endless ways to use it in desserts.
Making your own filling isn’t just about taste—it’s about the joy of creating something from scratch. It’s a simple process, but the results are truly rewarding.
My Personal Twist on Apple Pie Filling
Every baker has their signature touch, and mine came from a simple kitchen experiment. I wanted to create a pie filling that was uniquely mine—something that would stand out in flavor and texture. After a few trials, I found the perfect combination of ingredients and techniques that make this recipe special.
The Story Behind My Favorite Recipe
It all started with a blend of apple varieties. While Granny Smith apple provides a tart base, I mix in sweeter types for balance. This combination ensures every bite is bursting with flavor. The key is to use the best apple slices for a consistent texture.
I also tweaked the spice blend. A hint of nutmeg and a touch of allspice add depth to the classic cinnamon flavor. This small change makes a big difference in the final taste.
One of my proudest moments was experimenting with cornstarch and juice to achieve the perfect thickness. It took a few tries, but the result was worth it. The filling clings to the apple slice without being too runny or sticky.
Here’s what makes my twist stand out:
- Flavor Balance: A mix of tart and sweet apples creates a harmonious taste.
- Unique Spices: Nutmeg and allspice add a warm, complex flavor.
- Perfect Texture: Cornstarch and juice ensure the filling is just right.
Time is another crucial factor. Letting the filling simmer allows the flavors to meld beautifully. It’s a simple step, but it makes all the difference.
I invite you to try this recipe and make it your own. Whether you’re a seasoned baker or just starting, this easy apple filling will elevate your desserts to the next level.
Essential Ingredients for a Perfect Apple Pie Filling
Quality ingredients are the foundation of any great creation. When it comes to crafting a standout dish, every component plays a crucial role. From the type of fruit you choose to the spices you add, each detail matters.
Selecting the Best Fruit
For a tart and flavorful base, I always reach for Granny Smith. Their crisp texture and natural acidity balance the sweetness perfectly. If you prefer a milder taste, mixing in sweeter varieties can create a harmonious blend.
Balancing Sweetness, Spices, and Acid
Getting the flavor just right is key. I use a combination of sugar and brown sugar to add depth. A splash of lemon juice brightens the mix, while butter adds richness.
Spices are equally important. A teaspoon of ground cinnamon and a pinch of nutmeg create warmth and complexity. For the perfect consistency, I mix cornstarch with a bit of water.
Here’s what I’ve learned:
- Choose Granny Smith for a tart base.
- Balance sweetness with sugar and brown sugar.
- Add brightness with lemon juice and richness with butter.
- Use ground spices like cinnamon and nutmeg for warmth.
- Measure carefully with tablespoons, cups, and teaspoons.
With these tips, you’ll create a dish that’s rich in flavor and texture. It’s all about the details!

Mastering the apple pie filling Recipe
Creating a standout dish starts with mastering the basics, and this guide will help you perfect every step. Whether you’re a seasoned cook or a beginner, these instructions will ensure your mixture is thick, glossy, and bursting with flavor.
Step-by-Step Cooking Instructions
Begin by preparing your fruit. Peel and slice them into even pieces for consistent cooking. In a bowl, mix cornstarch with a bit of water to create a smooth paste. This will act as your thickener.
Heat a large pan over medium heat. Add the slices and stir gently. Pour in the juice and let it simmer for a few minutes. Gradually add the brown sugar, stirring constantly to avoid burning.
Once the mixture starts to bubble, reduce the heat. Add the cornstarch paste and stir until the sauce thickens. This process should take about 5-7 minutes. Remove from heat and let it cool slightly before using.
Key Techniques for a Thick and Flavorful Filling
To achieve the perfect texture, timing is crucial. Overcooking can make the fruit mushy, while undercooking leaves it too firm. Aim for tender slices that hold their shape.
Stirring consistently prevents the mixture from sticking to the pan. Adjust the heat as needed to maintain a gentle simmer. Adding the cornstarch paste at the right moment ensures a glossy, thick sauce.
Here’s a quick reference table for key steps:
| Step | Details |
|---|---|
| Prepare Fruit | Peel and slice evenly for consistent cooking. |
| Mix Thickener | Combine cornstarch with water to create a smooth paste. |
| Simmer | Cook slices with juice and brown sugar over medium heat. |
| Thicken Sauce | Add cornstarch paste and stir until glossy. |
| Cool | Let the mixture cool slightly before use. |
By following these steps and techniques, you’ll create a dish that’s rich in flavor and texture. It’s all about the details and a little patience!

Tips and Tricks to Achieve the Ideal Texture
Achieving the perfect texture for your dessert starts with a few simple tricks. Whether you’re aiming for a crisp bite or a tender result, these tips will help you avoid common pitfalls and create a dish that’s just right.
Preventing Mushy Fruit for a Crisp Bite
One of the biggest challenges is keeping your fruit from turning mushy. The key is to watch the time closely. Overcooking can break down the structure, leaving you with a soft, unappealing texture. Aim for just a few minutes of cooking to maintain a firm bite.
Using a bit of cornstarch can also help. It thickens the mixture without overcooking the fruit. Mix it with a tablespoon of water before adding it to the pan. This ensures a smooth, glossy finish.
Stirring gently is another important step. Aggressive mixing can crush the fruit, so use a light hand. This preserves the natural tartness and keeps the slices intact.
Here are a few more tips to keep in mind:
- Control the heat to maintain a gentle simmer.
- Experiment with easy apple adjustments for texture.
- Balance the spice and juice for a harmonious flavor.
- Measure ingredients like nutmeg and cornstarch accurately.
With these techniques, you’ll create a dessert that’s both visually appealing and delicious. A little attention to detail can make all the difference!
Creative Ways to Enjoy Your Apple Pie Filling
One of the best parts about making your own dessert mix is the endless possibilities it opens up. While it’s perfect for a classic dessert, there are so many other ways to enjoy it. Let’s explore some creative ideas that will take your culinary game to the next level.
Serving Ideas Beyond a Traditional Dessert
Why limit yourself to just one type of dish? This mix can be used in countless ways. Try it as a topping for ice cream or yogurt for a quick and delicious treat. It’s also fantastic on pancakes or waffles, adding a burst of flavor to your breakfast.
For a fun twist, use it in puff pastry rolls or hand pies. The buttery crust pairs perfectly with the sweet and tangy mix. You can even drizzle a bit of extra brown sugar and spice on top for a gourmet touch.
Perfect Pairings for Breakfast and Dessert
This mix isn’t just for dessert—it’s a great addition to breakfast too. Stir it into oatmeal or spread it on toast for a morning treat. The combination of sugar, butter, and lemon juice creates a flavor that’s hard to resist.
For dessert, pair it with crunchy elements like granola or nuts to balance the texture. A dash of ground cinnamon or nutmeg can enhance the flavor even more. The possibilities are endless, and every spoonful transforms a simple dish into something special.
Here are a few more ideas to inspire you:
- Use it as a filling for crepes or pastries.
- Mix it into smoothies for a fruity twist.
- Layer it with yogurt and granola for a parfait.
- Serve it alongside a scoop of vanilla ice cream.
Don’t be afraid to experiment and make it your own. With this mix, you can create something unique every time. Happy cooking!
Storing and Preparing in Advance
Planning ahead can make all the difference when it comes to enjoying your homemade creations without stress. Whether you’re preparing for a busy week or saving time for a special occasion, storing your dessert mix properly ensures it stays fresh and delicious.
Freezing and Refrigeration Tips
To keep your mixture at its best, start by cooling it evenly. Transfer it to a clean bowl and let it sit at room temperature for about 30 minutes. This step prevents condensation, which can affect the texture.
For short-term storage, refrigerate the mix in an airtight container. It will stay fresh for up to 3 days. If you’re planning to use it later, freezing is a great option. Portion it into cups or tablespoons for easy use. This method also helps with portion control.
When freezing, wrap the container tightly to avoid freezer burn. Label and date it for future reference. Thaw it overnight in the refrigerator when you’re ready to use it. This preserves the flavor and texture perfectly.
Here are a few more tips to ensure success:
- Use a smooth mixture of cornstarch and water to maintain consistency.
- Add a splash of lemon juice to keep the flavor vibrant.
- Store in smaller portions for quick, easy apple desserts.
- Reheat gently over low heat to restore the perfect texture.
With these tips, you’ll always have a ready-to-use mix that’s as fresh as the day you made it. Proper storage not only saves time but also ensures every bite is as delightful as the first.
Conclusion
Crafting something from scratch always brings a sense of pride and joy. My journey with this apple pie filling has been no exception. It’s a recipe that’s simple, quick, and far superior to canned options. The control over ingredients ensures a richer, more vibrant flavor every time.
Using quality ingredients like tart apples, a touch of sugar, and warm cinnamon makes all the difference. The process takes just a few minutes, but the results are unforgettable. Whether you’re filling a crust or topping your breakfast, this mix is incredibly versatile.
I encourage you to try this homemade version and experience the difference for yourself. Share your creations and enjoy the warmth and satisfaction that comes from baking something truly special. Happy cooking!