The smell of fresh cookies in the kitchen is amazing. I remember my first time making raspberry thumbprint cookies. It was a cold afternoon, and I wanted something to warm my heart.
As I mixed the dough and added the raspberry filling, I couldn’t wait. Soon, my kitchen felt cozy. Every cookie I made was a step towards making the best raspberry thumbprint cookies. Everyone loved them!
These cookies are not just sweet treats. They bring people together, making them perfect for any event!
Recipe Overview
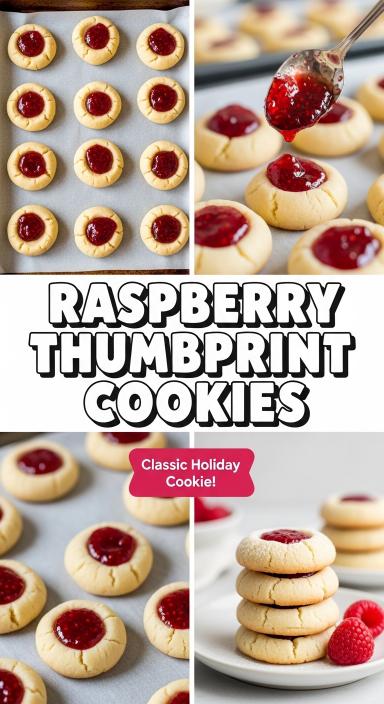
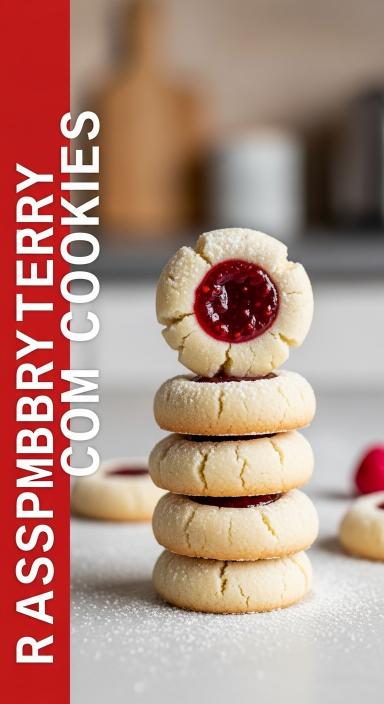
Raspberry Thumbprint Cookies are classic buttery shortbread-style cookies filled with sweet raspberry jam. These cookies have a tender texture with a lightly crisp edge and a fruity center that adds a burst of flavor. They are perfect for holiday cookie trays, afternoon tea, or anytime you want a simple yet elegant homemade treat.
Prep Time
15 minutes
Chill Time
30 minutes
Cook Time
12–15 minutes
Total Time
1 hour
Servings
24 cookies
Cuisine
American / European-inspired
Difficulty
Easy
Ingredients
For the Cookie Dough
1 cup unsalted butter, softened
⅔ cup granulated sugar
1 teaspoon vanilla extract
2 cups all-purpose flour
¼ teaspoon salt
For the Filling
½ cup raspberry jam or preserves
Optional Topping
Powdered sugar for dusting
Equipment Needed
Kitchen Tools
Mixing bowl
Electric mixer or hand mixer
Baking sheet
Parchment paper
Measuring cups and spoons
Spoon or thumb for indenting cookies
Cooling rack
Instructions
Step 1: Prepare the Dough
In a large mixing bowl, beat the softened butter and granulated sugar together using an electric mixer until the mixture becomes light and creamy.
Add the vanilla extract and mix until combined.
Step 2: Add the Dry Ingredients
Gradually add the flour and salt to the butter mixture. Mix until a soft dough forms.
Step 3: Chill the Dough
Cover the dough and refrigerate for 30 minutes. Chilling the dough helps the cookies keep their shape during baking.
Step 4: Preheat the Oven
Preheat your oven to 350°F (175°C) and line a baking sheet with parchment paper.
Step 5: Shape the Cookies
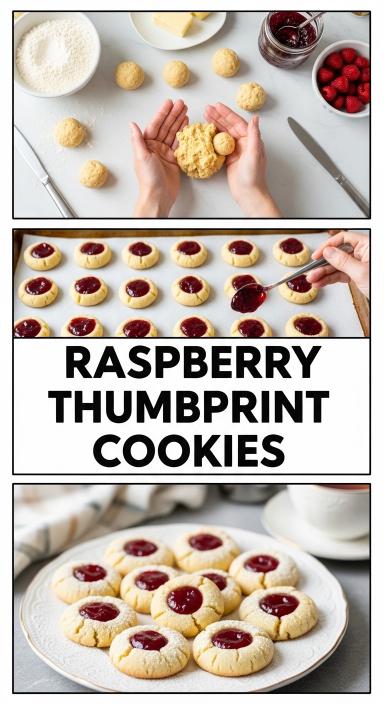
Roll the dough into 1-inch balls and place them on the prepared baking sheet about 2 inches apart.
Use your thumb or the back of a small spoon to gently press an indentation into the center of each cookie.
Step 6: Add the Jam
Fill each indentation with about ½ teaspoon raspberry jam.
Step 7: Bake the Cookies
Bake the cookies in the preheated oven for 12–15 minutes until the edges are lightly golden.
Step 8: Cool the Cookies
Remove the cookies from the oven and allow them to cool on the baking sheet for 5 minutes, then transfer them to a cooling rack.
Step 9: Serve
Once completely cooled, lightly dust the cookies with powdered sugar if desired.
Serving Suggestions
Best Ways to Serve
Serve raspberry thumbprint cookies with tea, coffee, or hot chocolate.
Perfect Occasions
These cookies are ideal for:
Holiday cookie platters
Afternoon tea
Gift boxes
Dessert trays
Pro Tips
Use Softened Butter
Butter should be soft but not melted to create the perfect cookie texture.
Prevent Cracking
If the dough cracks when pressing the thumbprint, gently smooth the edges with your fingers.
Try Different Fillings
You can substitute raspberry jam with:
Strawberry jam
Apricot preserves
Lemon curd
Chocolate spread
Storage
Room Temperature
Store cookies in an airtight container for up to 5 days.
Freezer
Freeze baked cookies for up to 2 months in a freezer-safe container.
Key Takeaways
- Raspberry thumbprint cookies are easy to make and delicious.
- This recipe combines buttery dough with a sweet raspberry filling.
- Perfect for any occasion, these cookies are great for sharing.
- Chilling the dough is key to achieving the right texture.
- Feel free to explore other filling options to mix things up.
Introduction to Raspberry Thumbprint Cookies
Raspberry thumbprint cookies are a treat that many love. They have a special spot in the middle, filled with jam or sweet spread. This makes them a hit, and I’m a fan too.
What are Thumbprint Cookies?
Thumbprint cookies are small, round treats with a special dimple. They’re perfect for filling with sweet stuff like raspberry jam. The mix of a soft cookie and a tasty center is just right.
Looking for a tasty raspberry cookies recipe? Thumbprint cookies are a great choice.
Origins of the Raspberry Thumbprint Cookie
Thumbprint cookies come from Europe, like Sweden and Poland. These places have loved them for years, sharing recipes in families. The raspberry filling adds a special flavor.
Each bite connects old traditions with today’s baking. This cookie is loved for its flexibility and timeless charm.
Ingredients Needed
To make delicious homemade raspberry cookies, you need the right ingredients. A mix of simple, high-quality items brings the best taste and texture. Here are the key parts of the tasty raspberry thumbprint cookie.
Essential Ingredients for the Dough
The base of tasty raspberry thumbprint cookies includes a few basic items. You’ll need:
- 2 cups all-purpose flour
- 1 cup granulated sugar
- 1/2 cup unsalted butter, softened
- 1 large egg
- 1 teaspoon vanilla extract
This mix makes a rich, buttery dough that’s perfect for the thumbprint shape.
Raspberry Filling Options
The filling is key for that tart taste. Here are my top picks:
- Fresh raspberries, mashed
- Frozen raspberries, thawed
- Store-bought raspberry preserves
I often pick fresh or frozen raspberries for a homemade flavor. Each choice adds a burst of taste that goes well with the cookie.
Optional Toppings and Garnishes
Make your homemade raspberry cookies even better with some tasty toppings. Consider:
- Powdered sugar for a sweet finish
- Crushed nuts for added crunch
- Chocolate drizzles for a touch of indulgence
These optional garnishes make your cookies look great and taste even better.
Equipment Required
As I get ready to bake my raspberry thumbprint cookies, the right tools are key. They help me get the perfect texture and flavor. Having the right tools makes a big difference in my baking.
Baking Tools You’ll Need
Here are the baking tools you’ll need for thumbprint cookies:
- Mixing bowls: I use different sizes for various tasks.
- A whisk: It helps mix the dough for a light texture.
- A cookie scoop: Great for making even-sized cookie dough balls.
- A rubber spatula: It’s perfect for scraping bowls and mixing without waste.
Recommended Baking Sheet Types
The right baking sheet is crucial for my raspberry thumbprint cookies. Here are some recommendations:
- Light-colored aluminum trays: They ensure even baking and prevent over-browning.
- Non-stick options: These prevent cookies from sticking, making clean-up simpler.
Instructions for Preparing the Dough
Making the perfect cookie dough is key for my raspberry thumbprint cookies. First, mix butter and sugar until it’s light and fluffy. Then, add eggs and vanilla extract for a tasty flavor.
To get a smooth dough, sift the dry ingredients before mixing them in. Letting the dough chill for at least an hour helps it keep its shape. This step prevents it from spreading too much while baking.
Step-by-Step Dough Preparation
- Cream together 1 cup of softened butter and 1 cup of sugar until fluffy.
- Add 2 large eggs and 1 teaspoon of vanilla extract, mixing until well combined.
- In a different bowl, sift together 2 cups of all-purpose flour, 1 teaspoon of baking powder, and a pinch of salt.
- Gradually incorporate the dry ingredients into the wet mixture until a dough forms.
- Cover the dough with plastic wrap and chill in the refrigerator for a minimum of one hour.
Tips for Perfect Cookie Dough
- Use room temperature ingredients to achieve a better blend.
- Don’t skip the chilling step as it significantly affects the dough’s structure.
- Measure flour accurately to avoid dense cookies.
- For added flavor, consider incorporating citrus zest or almond extract.
Chilling the Dough
Chilling the dough is a key step in making cookies. It makes the cookies better to eat. When chilled, the dough becomes firmer, making it easier to handle and preventing it from spreading too much.
Why Chilling is Important
Chilling is crucial. It makes the fats solid, giving the dough stability. This results in cookies that are perfectly shaped and have a nice crunch. They also stay chewy inside.
How Long to Chill the Dough
Chill the dough for at least an hour. If you can, chill it overnight for even better flavor. Every minute in the fridge improves the texture and taste. Make sure to wrap it well to keep it moist.
Making the Raspberry Filling
When making raspberry filling for my cookies, I often debate between homemade and store-bought. Both have their perks and can make my thumbprint cookies taste amazing.
Homemade vs. Store-Bought Filling
Making my own raspberry filling means I get freshness and control over what goes in. I just cook fresh or frozen raspberries with sugar and lemon juice until it’s thick. This way, I can tweak the sweetness to my taste.
Using store-bought jam is quicker, but it’s still tasty. I usually choose homemade for a personal touch.
Tips for the Best Raspberry Filling
To get my filling just right, I follow some key tips:
- Let the filling cool completely before adding it to the cookie dough. This keeps the dough firm and in shape.
- Adjust the sugar based on how tart the raspberries are. If they’re sour, I add a bit more sugar.
- Adding a splash of vanilla can enhance the flavor, making it even better with the raspberries.
Shaping the Cookies
Shaping my raspberry thumbprint cookies is a fun part of baking. I use different techniques to make them special. First, I scoop out equal dough portions to ensure they bake evenly.
Rolling the dough in my hands makes it smooth and round. This is key for their final look.
Forming the Dough Balls
I aim for one tablespoon of dough per cookie. This keeps them thick and delicious in the middle. I dust my hands with flour to avoid sticking.
The dough balls are now ready for the next step. This leads us to the thumbprint cookie technique.
Creating the Thumbprint Effect
To make the thumbprint, I gently press my thumb into each dough ball. This creates a well for the raspberry filling and makes each cookie unique. I love this step because it adds character to each cookie.
With the thumbprint done, I fill them with raspberry mixture. This ensures every bite is full of flavor.
Baking the Cookies
Baking raspberry thumbprint cookies needs focus and patience. I start by heating my oven to 350°F. This is the best temperature for perfect cookies. The baking time is usually 12 to 15 minutes.
I watch the cookies closely during this time. This ensures they bake evenly.
Oven Temperature and Timing
Getting the oven temperature right is key. It helps the cookies bake evenly. For raspberry cookies, the edges should be light golden and the centers soft.
Don’t worry if the centers are soft. They will firm up as they cool.
Signs That Cookies Are Done
Knowing when cookies are ready is important. Look for light golden edges. This means they are almost done.
The centers might still be soft. This is okay, as they will set as they cool. Trust your instincts and enjoy the baking process. These tips can make your raspberry cookies even better!
Cooling the Cookies
After baking, it’s key to let my raspberry thumbprint cookies cool right. This keeps them crisp and tasty for everyone. I use some tips to make sure they stay perfect.
Best Practices for Cooling
First, I move the cookies to a wire rack. This lets air get to them, stopping steam from building up. Cooling them completely on the rack keeps that crunchy texture. It also stops them from getting soggy.
Storing Baked Cookies
After cooling, I focus on storing the cookies. I use an airtight container to keep them fresh. They can stay good at room temperature for up to a week. Freezing is also a good option for longer storage. Just put them in a freezer-safe bag, and they’ll be great when thawed.
Decorating Options
Decorating raspberry cookies opens up a world of possibilities. Adding special touches boosts both looks and taste. Simple embellishments can turn your cookies into standout treats. Here are some top cookie decorating ideas.
Glazing the Cookies
A light glaze from powdered sugar and milk gives cookies a shiny look. Mix the two until smooth, then drizzle over cooled cookies. This adds sweetness without overpowering the raspberry flavor. It’s a simple yet effective way to decorate.
Adding Sprinkles or Nuts
Adding sprinkles or nuts adds texture and color. Crushed pistachios or rainbow sprinkles not only taste great but also look amazing. These additions make decorating fun and festive, perfect for any party.
Serving Suggestions
Serving raspberry cookies can be a fun experience. I love pairing them with drinks to make it special. A warm cup of tea or coffee is perfect, as it contrasts beautifully with the cookie’s fruity sweetness.
For a festive touch, try serving them with chilled sparkling lemonade or a fruity wine. It adds a nice twist to the experience.
Pairing with Beverages
At an afternoon tea, I place my raspberry cookies next to a steaming cup of Earl Grey or herbal tea. The citrus notes in the tea highlight the raspberry’s flavor. Setting up a beverage bar for guests is also a great idea.
Offer a variety of drinks like:
- Freshly brewed coffee
- Flavored teas
- Homemade lemonades
- Light wines or prosecco
Presentation Ideas
Presenting raspberry cookies in an inviting way can impress your guests. Use a decorative platter with parchment paper. Arrange the cookies neatly and add fresh raspberries and mint leaves.
This not only looks great but also adds a refreshing touch. Using colorful tableware can make the presentation even more delightful, making it a highlight of any gathering.
Variations of the Classic Recipe
Raspberry filling makes thumbprint cookies timeless. But, there’s a whole world of flavors to try. By exploring different fruit fillings, you can make thumbprint cookie variations for any taste. Using seasonal fruits adds a fresh twist to this classic treat.
Other Fruit Fillings to Try
I enjoy trying out various fruit fillings, such as:
- Strawberry jam
- Apricot preserves
- Lemon curd
- Blueberry compote
Each fruit brings its own special taste. Your favorite might change with the seasons as you find new flavors you love.
Gluten-Free Adaptations
Making gluten-free raspberry cookies is easy. I just swap regular flour for a gluten-free blend. This keeps the cookie’s texture the same but makes it safe for those with dietary needs. Common blends include:
- Brown rice flour
- Almond flour
- Tapioca flour
These changes let everyone enjoy these tasty treats, no matter their gluten sensitivity. With a little creativity, you can make your baking both fun and inclusive.
Conclusion
Our journey through raspberry thumbprint cookies has ended, but the joy they bring continues. These cookies are more than just a treat; they create special moments. The mix of buttery cookies and sweet raspberry filling is perfect for any time.
When you bake these cookies, you’re not just making a dessert. You’re also sharing joy with others. Sharing these treats with friends and family is the best way to enjoy them. It’s a chance to make memories together.
By baking raspberry thumbprint cookies, you’re spreading happiness. Every bite is a chance to feel joy. So, let’s bake and share these cookies, filling our homes with happiness.