
There’s a moment every afternoon when your energy crashes, your stomach growls, and the vending machine starts calling your name. You know that candy bar or bag of chips isn’t going to do you any favors, but when hunger strikes, convenience usually wins. What if the convenient option was also the healthy one?
Enter protein balls—the snack that changed the game for meal preppers, fitness enthusiasts, busy parents, and anyone who wants to eat better without spending hours in the kitchen. These little spheres of deliciousness require no baking, come together in minutes, and deliver the perfect combination of protein, healthy fats, and complex carbohydrates to power you through whatever your day throws at you.
The beauty of protein balls lies in their simplicity. At their core, they’re just a combination of binding ingredients (like nut butter, honey, or dates) mixed with protein sources and flavor add-ins, rolled into bite-sized portions. No oven required. No complicated techniques. Just mix, roll, refrigerate, and enjoy.
Below you’ll find 11 protein ball recipes that cover every craving—from classic peanut butter chocolate chip to exotic matcha coconut to nostalgic cookie dough. Each recipe includes detailed ingredients, step-by-step instructions, and expert tips to ensure your protein balls turn out perfectly. Make a batch on Sunday, and you’ll have grab-and-go snacks ready for the entire week. Let’s roll.
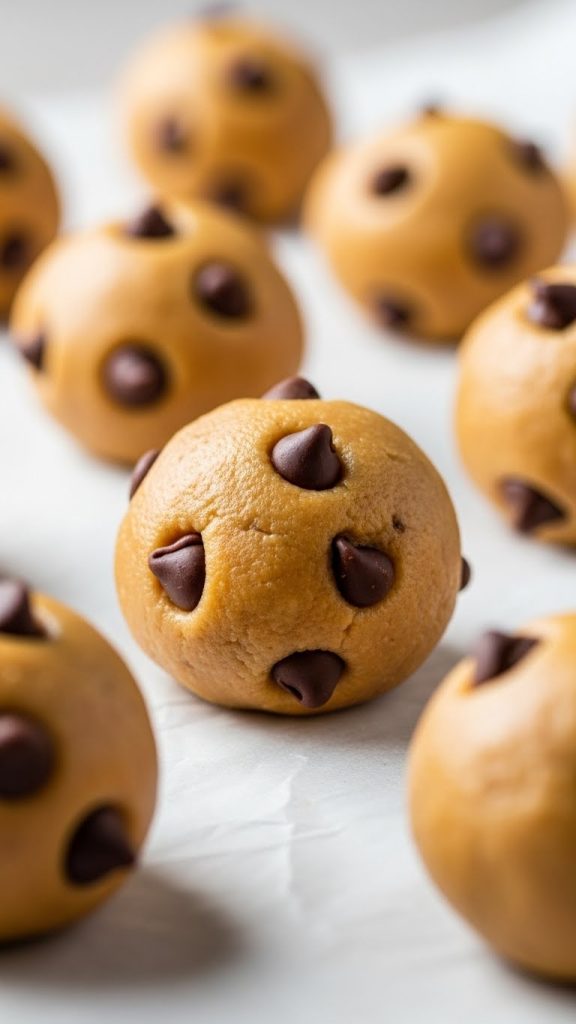
1. Classic Peanut Butter Chocolate Chip Protein Balls
This is where every protein ball journey should begin. The timeless combination of peanut butter and chocolate creates a snack that tastes like cookie dough but packs a serious nutritional punch. It’s sweet, satisfying, and takes less than 15 minutes to make. Once you master this base recipe, you’ll have the foundation to create endless variations.
Prep Time: 10 minutes | Chill Time: 30 minutes | Makes: 16-18 balls | Protein: ~5g per ball
Ingredients
- 1 cup old-fashioned rolled oats
- ½ cup creamy natural peanut butter
- ⅓ cup honey
- 1 scoop (about 30g) vanilla protein powder
- ½ cup mini chocolate chips
- 2 tablespoons ground flaxseed
- 1 teaspoon vanilla extract
- Pinch of salt
Step-by-Step Instructions
- Prepare your workspace. Line a baking sheet or large plate with parchment paper—this is where your finished balls will rest while they chill. Clear enough counter space for mixing and rolling. Having everything organized before you start makes the process smooth and efficient.
- Combine the dry ingredients. In a large mixing bowl, add the rolled oats, protein powder, ground flaxseed, and salt. Whisk or stir these together until evenly combined. Breaking up any clumps in the protein powder now prevents lumpy balls later.
- Add the wet ingredients. Add the peanut butter, honey, and vanilla extract to the bowl. If your peanut butter is cold and stiff, microwave it for 15-20 seconds to soften—this makes mixing much easier. The honey should be at room temperature for the same reason.
- Mix until a dough forms. Using a sturdy spatula or your hands, mix all ingredients together until everything is thoroughly combined. The mixture should come together into a thick, slightly sticky dough. If it seems too dry and crumbly, add another tablespoon of honey or peanut butter. If too wet and sticky, add a tablespoon more oats.
- Fold in the chocolate chips. Add the mini chocolate chips and fold them into the dough until evenly distributed throughout. Mini chips work better than regular-sized chips because they stay embedded in the balls rather than sticking out.
- Chill the dough briefly. Place the bowl in the refrigerator for 10-15 minutes. This firms up the dough slightly and makes rolling much easier. Warm, soft dough sticks to your hands and is difficult to shape into neat balls.
- Portion and roll the balls. Using a tablespoon measure or small cookie scoop, portion out approximately 1.5 tablespoons of dough per ball. Roll each portion between your palms to form a smooth, round ball. If the dough sticks to your hands, lightly dampen them with water or coat with a tiny bit of coconut oil.
- Place on prepared baking sheet. As you roll each ball, place it on the parchment-lined baking sheet, leaving a little space between each one. You should get 16-18 balls from this recipe depending on how large you make them.
- Refrigerate until firm. Place the baking sheet in the refrigerator for at least 30 minutes to allow the balls to firm up completely. Once firm, transfer to an airtight container. Store in the refrigerator for up to 2 weeks or freeze for up to 3 months.
Pro Tips
- Natural peanut butter (the kind where oil separates) works best—stir it well before measuring.
- If you don’t have protein powder, substitute with ¼ cup additional oats and 2 tablespoons powdered milk.
- For nut-free version, substitute sunflower seed butter for the peanut butter.
- Roll balls the same size for even chilling and consistent calorie counts if tracking macros.
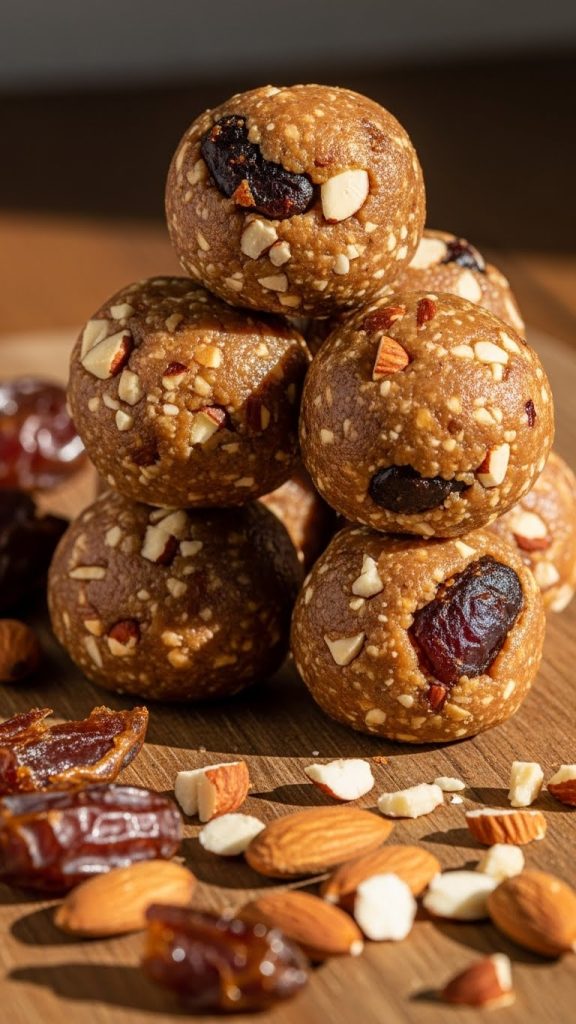
2. Almond Butter Date Energy Bites
Naturally sweetened with Medjool dates instead of honey, these energy bites have a rich, caramel-like sweetness that’s entirely from whole foods. Almond butter brings a sophisticated nuttiness that pairs beautifully with the sticky dates. These are perfect for anyone avoiding refined sugars while still craving something sweet and satisfying.
Prep Time: 15 minutes | Chill Time: 30 minutes | Makes: 14-16 balls | Protein: ~4g per ball
Ingredients
- 1 cup pitted Medjool dates (about 10-12 dates)
- ½ cup almond butter
- ¾ cup old-fashioned rolled oats
- ¼ cup raw almonds, roughly chopped
- 1 scoop vanilla or unflavored protein powder
- 2 tablespoons unsweetened shredded coconut
- 1 teaspoon vanilla extract
- ½ teaspoon cinnamon
- Pinch of sea salt
Step-by-Step Instructions
- Check your dates for freshness. Medjool dates should be soft, sticky, and pliable. If yours feel dry or hard, soak them in warm water for 10 minutes, then drain thoroughly before using. Dry dates won’t blend properly and create a crumbly mixture instead of a cohesive dough.
- Process the dates into a paste. Add the pitted dates to a food processor. Pulse 15-20 times, then process continuously for 30-60 seconds until the dates form a thick, sticky paste. You may need to stop and scrape down the sides once or twice. The paste should be mostly smooth with some small pieces remaining.
- Add the remaining ingredients to the food processor. Add the almond butter, oats, chopped almonds, protein powder, shredded coconut, vanilla extract, cinnamon, and sea salt to the food processor with the date paste.
- Process until combined. Pulse the mixture 10-15 times to start incorporating the ingredients, then process continuously until everything comes together into a thick dough, about 30-45 seconds. The mixture should hold together when squeezed. If too dry, add a tablespoon of almond butter; if too sticky, add more oats.
- Transfer to a bowl. Scrape the mixture from the food processor into a large bowl. This makes it easier to portion and roll than working directly from the processor bowl.
- Portion and roll the balls. Using a tablespoon measure, scoop out portions of the mixture. Roll each portion between your palms to form smooth, round balls. The date mixture is naturally sticky, so dampen your hands slightly if needed to prevent sticking.
- Optional: add a coating. For extra texture and presentation, roll the finished balls in additional shredded coconut, crushed almonds, or a light dusting of cinnamon. This step is optional but adds visual appeal and flavor dimension.
- Chill until firm. Place the balls on a parchment-lined baking sheet and refrigerate for at least 30 minutes. The date-based mixture firms up nicely when cold. Store in an airtight container in the refrigerator for up to 2 weeks.
Pro Tips
- Medjool dates are softer and sweeter than regular dates—they’re essential for this recipe.
- If you don’t have a food processor, you can mince the dates very finely by hand and mix everything in a bowl.
- These taste even better after a day in the fridge as the flavors meld together.
- Add 2 tablespoons of cacao nibs for a crunchy chocolate variation without added sugar.

3. Chocolate Brownie Protein Balls
Rich, fudgy, and intensely chocolatey—these protein balls taste like brownies but are packed with protein and healthy fats. Cocoa powder and chocolate protein powder create a double chocolate experience that satisfies even the most serious chocolate cravings. Keep these on hand for when you need a guilt-free chocolate fix.
Prep Time: 10 minutes | Chill Time: 30 minutes | Makes: 16-18 balls | Protein: ~6g per ball
Ingredients
- 1 cup old-fashioned rolled oats
- 1 scoop chocolate protein powder
- 3 tablespoons unsweetened cocoa powder
- ½ cup almond butter or cashew butter
- ¼ cup maple syrup
- 2 tablespoons unsweetened almond milk
- ¼ cup mini chocolate chips
- 1 teaspoon vanilla extract
- ¼ teaspoon espresso powder (optional, enhances chocolate flavor)
- Pinch of salt
Step-by-Step Instructions
- Combine the dry ingredients. In a large mixing bowl, whisk together the rolled oats, chocolate protein powder, cocoa powder, espresso powder (if using), and salt. Make sure to break up any lumps in the cocoa powder and protein powder for even distribution.
- Add the wet ingredients. Add the almond butter, maple syrup, almond milk, and vanilla extract to the bowl. The almond milk helps create a fudgier texture—don’t skip it even if the mixture seems wet enough with just the nut butter and maple syrup.
- Mix until a fudgy dough forms. Using a spatula or your hands, mix everything together until a thick, brownie-like dough forms. The mixture should be slightly sticky but hold together when pressed. If too dry, add another tablespoon of almond milk. If too wet, add more oats a tablespoon at a time.
- Fold in the chocolate chips. Add the mini chocolate chips and fold them through the dough until evenly distributed. The chocolate chips add pockets of melty chocolate that enhance the brownie experience.
- Chill the dough. Refrigerate the dough for 15-20 minutes. This makes rolling easier and helps the fudgy texture set properly. Don’t skip this step or your balls will be difficult to shape.
- Roll into balls. Using a tablespoon measure, portion out the dough and roll between your palms to form smooth balls. If the mixture sticks to your hands, lightly coat them with cocoa powder instead of water—this maintains the rich chocolate appearance.
- Optional: dust with cocoa. For an extra-fancy presentation, roll the finished balls in a light coating of cocoa powder. This gives them a truffle-like appearance and prevents them from sticking together during storage.
- Refrigerate until firm. Place on a parchment-lined baking sheet and refrigerate for at least 30 minutes until firm. Store in an airtight container in the refrigerator for up to 2 weeks. These are best eaten cold—they become even fudgier.
Pro Tips
- Espresso powder doesn’t make these taste like coffee—it intensifies the chocolate flavor.
- Use Dutch-process cocoa powder for a richer, darker chocolate flavor.
- Cashew butter creates an even fudgier texture than almond butter if you have it.
- Add a tablespoon of coconut oil for extra smooth, truffle-like texture.

4. Coconut Cashew Tropical Protein Balls
Transport yourself to a tropical island with these coconut-crusted beauties. Creamy cashew butter provides the base while shredded coconut, dried mango, and a hint of lime create an exotic flavor profile. They’re like a healthy piña colada in snack form—perfect for when you need a mental vacation.
Prep Time: 15 minutes | Chill Time: 30 minutes | Makes: 14-16 balls | Protein: ~4g per ball
Ingredients
- ¾ cup old-fashioned rolled oats
- ½ cup cashew butter
- ¼ cup honey
- 1 scoop vanilla protein powder
- ½ cup unsweetened shredded coconut, divided
- ¼ cup dried mango, finely chopped
- 2 tablespoons coconut flour
- 1 teaspoon lime zest
- ½ teaspoon vanilla extract
- Pinch of salt
Step-by-Step Instructions
- Prepare the dried mango. Using a sharp knife, chop the dried mango into very small pieces, about ¼-inch or smaller. Larger pieces will make the balls harder to roll and create uneven texture. If your mango is very sticky, spray your knife lightly with cooking spray to prevent sticking.
- Zest the lime. Using a microplane or fine grater, zest the lime to get 1 teaspoon of zest. Only zest the green outer layer—the white pith beneath is bitter. The lime zest adds a bright, fresh note that elevates the tropical flavors.
- Combine dry ingredients. In a large bowl, whisk together the oats, protein powder, ¼ cup of the shredded coconut (reserve the other ¼ cup for coating), coconut flour, lime zest, and salt.
- Add wet ingredients. Add the cashew butter, honey, and vanilla extract to the bowl. Mix thoroughly until a cohesive dough forms. Cashew butter is naturally creamy, which creates a smooth, easy-to-work-with mixture.
- Fold in the dried mango. Add the chopped dried mango and fold it through the dough until evenly distributed. The mango adds chewy pockets of tropical sweetness throughout each ball.
- Prepare the coconut coating. Place the reserved ¼ cup of shredded coconut in a shallow bowl or on a plate. For extra flavor, you can lightly toast the coconut in a dry skillet for 2-3 minutes until golden—watch carefully as it burns quickly.
- Roll and coat the balls. Using a tablespoon measure, portion out the dough and roll into balls. Immediately roll each ball in the shredded coconut, pressing gently so the coconut adheres to the surface. The coating adds texture and prevents sticking.
- Chill until set. Place the coated balls on a parchment-lined baking sheet and refrigerate for at least 30 minutes. Store in an airtight container in the refrigerator for up to 2 weeks.
Pro Tips
- Look for unsweetened dried mango to control the sugar content—sweetened versions make these too sweet.
- Swap dried mango for dried pineapple for a different tropical twist.
- Toasting the coconut coating is optional but adds incredible nutty depth.
- Add ¼ cup macadamia nuts, chopped, for extra tropical crunch.

5. Cookie Dough Protein Balls
All the nostalgic joy of sneaking cookie dough from the bowl, but without the raw egg concerns and with added protein. These taste remarkably like the real thing—buttery, sweet, and studded with chocolate chips. They’re dangerous in the best possible way because you’ll want to eat the whole batch.
Prep Time: 10 minutes | Chill Time: 30 minutes | Makes: 18-20 balls | Protein: ~5g per ball
Ingredients
- 1 cup blanched almond flour
- 1 scoop vanilla protein powder
- ¼ cup cashew butter or almond butter
- 3 tablespoons maple syrup
- 2 tablespoons melted coconut oil
- 1 teaspoon vanilla extract
- ¼ teaspoon butter extract (optional, for authentic cookie dough flavor)
- ½ cup mini chocolate chips
- ¼ teaspoon salt
Step-by-Step Instructions
- Melt the coconut oil. Measure the coconut oil and melt it in the microwave for 15-20 seconds or in a small saucepan over low heat. Let it cool slightly—you want it liquid but not hot, as hot oil can affect the texture of the protein powder.
- Combine the dry ingredients. In a large bowl, whisk together the almond flour, protein powder, and salt until well combined. Almond flour creates that authentic cookie dough texture that regular oats can’t replicate.
- Add the wet ingredients. Add the cashew butter, maple syrup, melted coconut oil, vanilla extract, and butter extract (if using). The butter extract is optional but makes these taste incredibly like real cookie dough—it’s worth finding if you can.
- Mix until a dough forms. Stir everything together until a thick, cookie dough-like consistency forms. The mixture should be scoopable but hold together when pressed. If too dry, add another tablespoon of maple syrup. If too wet, add a bit more almond flour.
- Fold in the chocolate chips. Add the mini chocolate chips and fold them through the dough. Distribute them evenly so every ball gets plenty of chocolatey goodness. This is what makes it taste like real cookie dough.
- Chill the dough. Place the bowl in the refrigerator for 15 minutes. The coconut oil will start to solidify, making the dough easier to roll. This step is important because warm dough will be too soft to shape.
- Roll into balls. Using a tablespoon measure, scoop out the dough and roll between your palms to form smooth balls. Work quickly—the warmth of your hands will soften the coconut oil.
- Final chill and storage. Place the balls on a parchment-lined baking sheet and refrigerate for at least 30 minutes until firm. Store in an airtight container in the refrigerator for up to 2 weeks. Keep them cold—they soften at room temperature.
Pro Tips
- Butter extract is the secret weapon—find it in the baking aisle near vanilla extract.
- Blanched almond flour (skins removed) creates a smoother, more cookie-dough-like texture.
- For extra authenticity, add 2 tablespoons of brown sugar instead of maple syrup.
- These must stay refrigerated—the coconut oil softens at room temperature and they’ll fall apart.
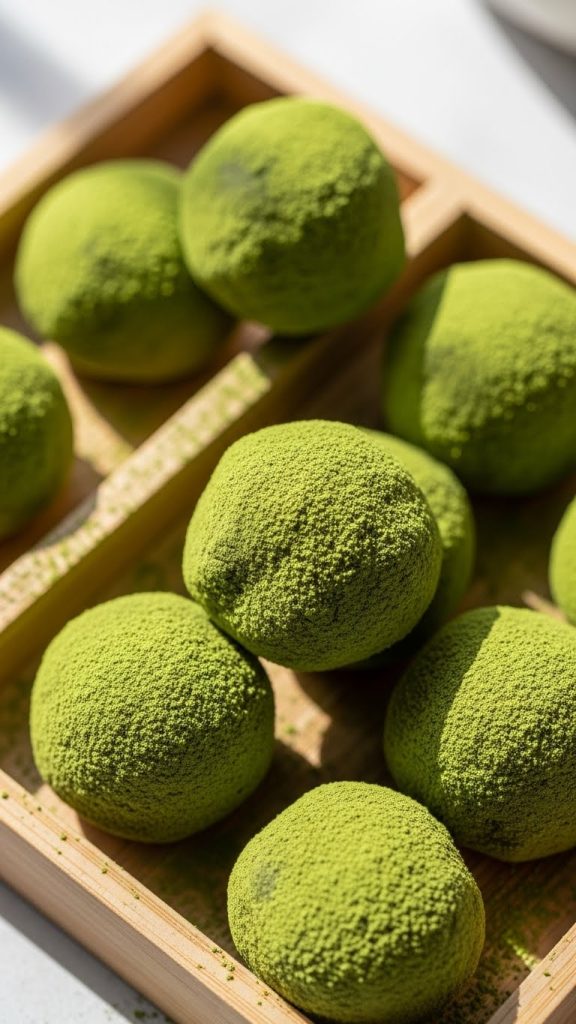
6. Matcha Green Tea Protein Balls
For the wellness warriors and green tea enthusiasts, these vibrant green energy bites deliver calm, focused energy from matcha alongside a solid protein punch. The earthy matcha flavor is balanced with creamy white chocolate chips and a touch of honey. They’re sophisticated, beautiful, and surprisingly addictive.
Prep Time: 10 minutes | Chill Time: 30 minutes | Makes: 14-16 balls | Protein: ~5g per ball
Ingredients
- 1 cup old-fashioned rolled oats
- 1 scoop vanilla protein powder
- 2 teaspoons culinary-grade matcha powder
- ½ cup cashew butter
- ¼ cup honey
- ¼ cup white chocolate chips
- 1 teaspoon vanilla extract
- Pinch of salt
- Extra matcha powder for dusting (optional)
Step-by-Step Instructions
- Sift the matcha powder. Using a fine mesh strainer or tea strainer, sift the matcha powder into a small bowl to remove any clumps. Matcha clumps easily and those clumps create bitter pockets in your finished balls. This step takes 30 seconds but makes a big difference.
- Combine dry ingredients. In a large bowl, add the rolled oats, protein powder, sifted matcha powder, and salt. Whisk together until the matcha is evenly distributed throughout—the mixture should be uniformly light green with no white or dark green streaks.
- Add wet ingredients. Add the cashew butter, honey, and vanilla extract to the bowl. Cashew butter’s mild flavor doesn’t compete with the delicate matcha taste the way stronger nut butters might.
- Mix until combined. Stir everything together until a cohesive, green-tinted dough forms. The mixture should hold together when pressed. If too dry, add another tablespoon of honey. If too wet, add a couple tablespoons more oats.
- Fold in white chocolate chips. Add the white chocolate chips and fold them through the dough. The white chocolate provides creamy sweetness that balances the earthy, slightly bitter matcha beautifully.
- Roll into balls. Using a tablespoon measure, portion out the dough and roll between your palms to form smooth, round balls. They should be a beautiful pale green color.
- Optional: dust with matcha. For extra visual impact and matcha flavor, dust the finished balls with a light coating of matcha powder. Use a fine mesh strainer to dust evenly and avoid clumps.
- Chill and store. Refrigerate on a parchment-lined baking sheet for at least 30 minutes until firm. Store in an airtight container in the refrigerator for up to 2 weeks.
Pro Tips
- Use culinary-grade matcha, not ceremonial grade—it’s more affordable and the subtle differences are lost in recipes.
- Matcha contains caffeine—about 25mg per teaspoon—so be mindful if you’re sensitive.
- Swap white chocolate for dark chocolate chips for a more intense, less sweet version.
- Add 2 tablespoons of coconut butter for extra creamy, luxurious texture.
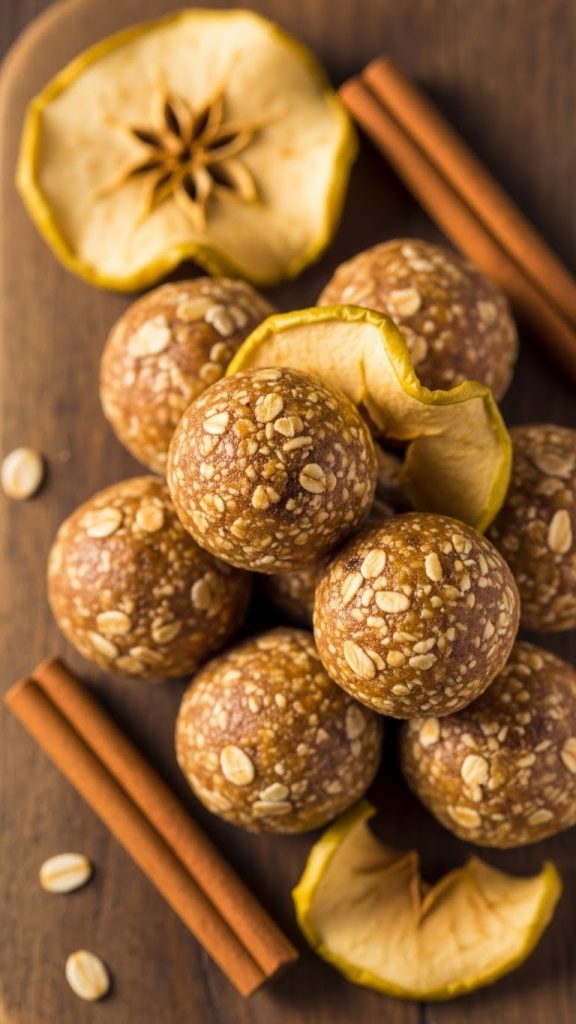
7. Apple Pie Protein Balls
Capture all the cozy, comforting flavors of homemade apple pie in a portable, protein-packed snack. Dried apples, warm cinnamon, nutmeg, and a touch of maple syrup create that classic autumn dessert taste. These are perfect for fall but honestly delicious any time you’re craving something warm and nostalgic.
Prep Time: 15 minutes | Chill Time: 30 minutes | Makes: 16-18 balls | Protein: ~4g per ball
Ingredients
- 1 cup old-fashioned rolled oats
- 1 scoop vanilla protein powder
- ½ cup almond butter
- ¼ cup maple syrup
- ½ cup dried apple rings, finely chopped
- 1 teaspoon ground cinnamon
- ¼ teaspoon ground nutmeg
- ⅛ teaspoon ground allspice
- ¼ cup chopped walnuts or pecans
- Pinch of salt
Step-by-Step Instructions
- Prepare the dried apples. Using a sharp knife, chop the dried apple rings into small pieces, about ¼-inch or smaller. The smaller the pieces, the better they’ll distribute throughout the balls. If your dried apples are very hard, soak them in warm water for 5 minutes, then drain and pat dry before chopping.
- Toast the nuts (optional but recommended). Place the chopped walnuts or pecans in a dry skillet over medium heat. Toast for 3-4 minutes, stirring frequently, until fragrant and lightly browned. Toasting intensifies the nutty flavor and adds extra crunch. Let cool before adding to the mixture.
- Combine dry ingredients and spices. In a large bowl, whisk together the oats, protein powder, cinnamon, nutmeg, allspice, and salt. These warming spices are what make these taste like apple pie—don’t reduce them.
- Add wet ingredients. Add the almond butter and maple syrup to the bowl. Mix thoroughly until a thick dough forms. The mixture should be cohesive and hold together when pressed.
- Fold in apples and nuts. Add the chopped dried apples and toasted nuts to the dough. Fold them through until evenly distributed. Every ball should have pieces of apple and nuts throughout.
- Roll into balls. Using a tablespoon measure, portion out the dough and roll between your palms. The dried apple pieces may make the surface slightly uneven—that’s okay and adds rustic charm.
- Optional: cinnamon sugar coating. For extra apple pie vibes, mix 1 tablespoon coconut sugar with ½ teaspoon cinnamon and roll the balls in this mixture. It adds a sweet, spiced exterior that enhances the apple pie experience.
- Chill and store. Refrigerate for at least 30 minutes until firm. Store in an airtight container in the refrigerator for up to 2 weeks.
Pro Tips
- Look for unsweetened dried apple rings—sweetened versions make these too sweet.
- Pecans are more traditional for apple pie flavor, but walnuts work great too.
- Add a tablespoon of apple butter (found in the jam aisle) for even more intense apple flavor.
- These are especially delicious slightly warmed in the microwave for 10 seconds.
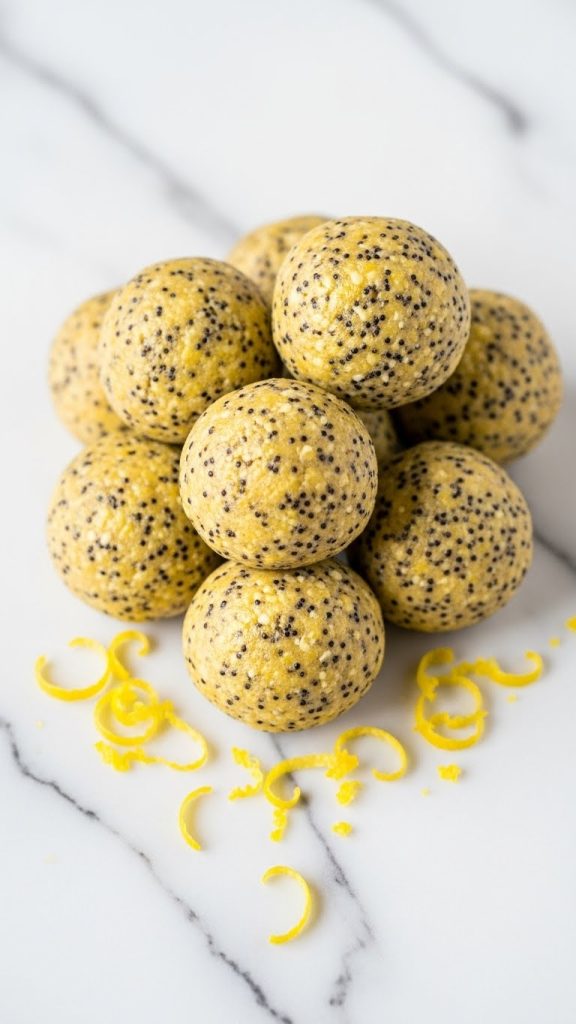
8. Lemon Poppy Seed Protein Balls
Bright, zesty, and refreshingly different from the typical chocolate or peanut butter flavors. These lemon poppy seed protein balls taste like the beloved muffin but in a healthier, portable form. The lemon zest provides vibrant citrus flavor while poppy seeds add signature crunch and visual appeal.
Prep Time: 10 minutes | Chill Time: 30 minutes | Makes: 14-16 balls | Protein: ~5g per ball
Ingredients
- 1 cup old-fashioned rolled oats
- 1 scoop vanilla protein powder
- ½ cup cashew butter or almond butter
- ¼ cup honey
- 2 tablespoons poppy seeds
- 2 tablespoons fresh lemon juice
- 1 tablespoon lemon zest (about 1 large lemon)
- ½ teaspoon vanilla extract
- Pinch of salt
Step-by-Step Instructions
- Zest and juice the lemon. Using a microplane or fine grater, zest the lemon first (it’s easier to zest before juicing). You need about 1 tablespoon of zest. Then cut the lemon in half and juice it, straining out any seeds. The combination of zest and juice provides both aromatic oils and bright acidity.
- Combine dry ingredients. In a large bowl, whisk together the oats, protein powder, poppy seeds, lemon zest, and salt. The zest goes with the dry ingredients to help distribute it evenly throughout.
- Add wet ingredients. Add the cashew butter, honey, lemon juice, and vanilla extract to the bowl. The lemon juice adds liquid, so you may need slightly less honey if your nut butter is already loose.
- Mix until combined. Stir everything together until a cohesive dough forms. The poppy seeds should be visible throughout the mixture. If too wet, add a couple tablespoons more oats. If too dry, add a bit more honey.
- Taste and adjust lemon. Taste the dough—if you want more lemon punch, add another teaspoon of zest. The lemon flavor should be prominent but not overwhelming. It should taste like a lemon poppy seed muffin.
- Roll into balls. Using a tablespoon measure, portion and roll the dough into smooth balls. The poppy seeds create a beautiful speckled appearance.
- Optional: lemon glaze drizzle. For extra lemony sweetness, mix 2 tablespoons powdered sugar with 1 teaspoon lemon juice and drizzle over the balls once they’re chilled. This mimics the glaze on lemon poppy seed muffins.
- Chill and store. Refrigerate for at least 30 minutes. Store in an airtight container in the refrigerator for up to 10 days. The lemon flavor intensifies as they sit.
Pro Tips
- Fresh lemon juice is essential—bottled lemon juice doesn’t have the same bright, fresh flavor.
- The zest contains the aromatic oils—don’t skip it or the lemon flavor will be flat.
- Cashew butter’s mild flavor lets the lemon shine better than stronger nut butters.
- Add ¼ cup dried blueberries for a lemon-blueberry variation.

9. Salted Caramel Pretzel Protein Balls
Sweet meets salty in these addictive protein balls that combine buttery caramel flavor with crunchy pretzel pieces. The combination of sweet and salty is scientifically proven to be irresistible, and these deliver that satisfaction alongside 5 grams of protein per ball. Dangerous for snacking, but in the best possible way.
Prep Time: 15 minutes | Chill Time: 30 minutes | Makes: 16-18 balls | Protein: ~5g per ball
Ingredients
- 1 cup old-fashioned rolled oats
- 1 scoop vanilla or caramel protein powder
- ½ cup almond butter or peanut butter
- ¼ cup date caramel or regular caramel sauce
- 2 tablespoons maple syrup
- ½ cup mini pretzel twists, roughly crushed
- 1 teaspoon vanilla extract
- ½ teaspoon flaky sea salt (like Maldon)
- Pinch of regular salt for the dough
Step-by-Step Instructions
- Crush the pretzels. Place the mini pretzel twists in a zip-lock bag and use a rolling pin or the bottom of a heavy pan to crush them into small pieces. You want a mix of sizes—some powder, some small chunks. Don’t pulverize them completely or you’ll lose the signature crunch.
- Combine dry ingredients. In a large bowl, mix together the oats, protein powder, and the pinch of regular salt. Whisk to combine and break up any clumps in the protein powder.
- Add wet ingredients. Add the almond butter, caramel sauce, maple syrup, and vanilla extract. The combination of caramel sauce and maple syrup creates that deep, buttery caramel flavor. If using date caramel, it adds natural sweetness without refined sugar.
- Mix until combined. Stir everything together until a thick, cohesive dough forms. The mixture should hold together when pressed. If too dry, add another tablespoon of maple syrup or caramel sauce.
- Fold in the crushed pretzels. Reserve about 2 tablespoons of crushed pretzels for topping, then fold the rest into the dough. Distribute them evenly so every ball has plenty of pretzel pieces for crunch.
- Roll into balls. Using a tablespoon measure, portion out the dough and roll between your palms. The pretzel pieces will make the surface a bit uneven—that’s okay and adds to the rustic appearance.
- Add the finishing touches. Press a few reserved pretzel pieces into the top of each ball. Finish with a pinch of flaky sea salt on top of each one. The flaky salt is essential—it provides pops of salinity that contrast with the sweet caramel.
- Chill and store. Refrigerate for at least 30 minutes. Store in an airtight container in the refrigerator for up to 1 week. Note: the pretzels will soften slightly over time, so these are best within the first few days.
Pro Tips
- Flaky sea salt is essential—regular table salt dissolves and doesn’t provide the same salty bursts.
- Make date caramel by blending soaked dates with a splash of vanilla and salt for a whole-food option.
- Gluten-free pretzels work if you need these to be gluten-free.
- These are best eaten within 3-4 days while the pretzels still have crunch.
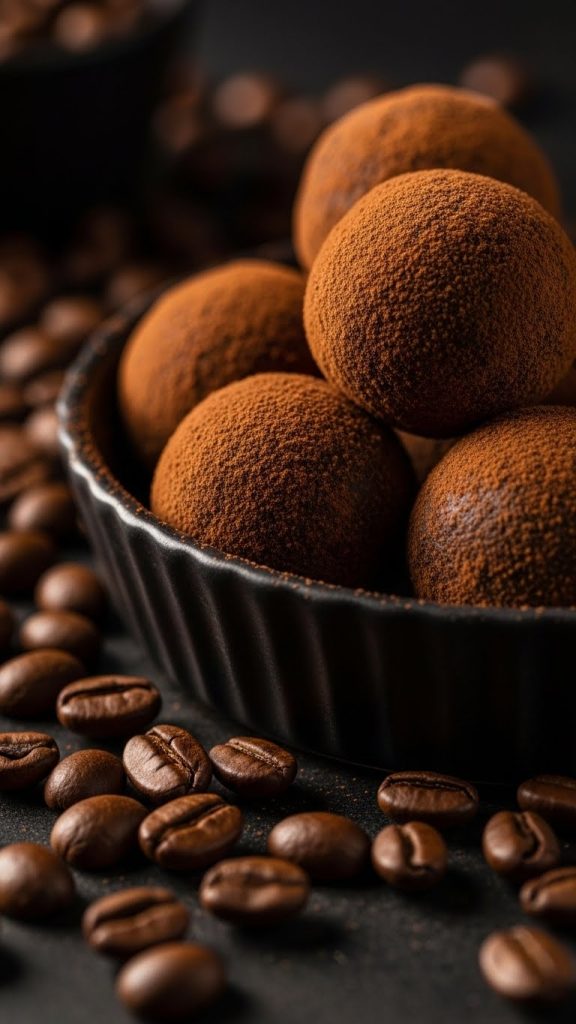
10. Mocha Espresso Protein Balls
For the coffee lovers who want their caffeine fix built into their snack, these mocha protein balls deliver rich coffee flavor alongside chocolate and a gentle energy boost. They’re like a mocha latte in bite-sized form—sophisticated, energizing, and absolutely delicious.
Prep Time: 10 minutes | Chill Time: 30 minutes | Makes: 14-16 balls | Protein: ~6g per ball
Ingredients
- 1 cup old-fashioned rolled oats
- 1 scoop chocolate or mocha protein powder
- 2 tablespoons instant espresso powder
- 2 tablespoons unsweetened cocoa powder
- ½ cup almond butter
- ¼ cup maple syrup
- 2 tablespoons brewed espresso or strong coffee, cooled
- ¼ cup dark chocolate chips
- 1 teaspoon vanilla extract
- Pinch of salt
Step-by-Step Instructions
- Brew and cool the espresso (if using liquid). If using brewed espresso, make sure it’s completely cooled to room temperature before adding to the mixture. Hot liquid can partially melt the chocolate chips and affect the texture of the dough. You can skip this and just use the instant espresso powder for convenience.
- Combine dry ingredients. In a large bowl, whisk together the oats, protein powder, instant espresso powder, cocoa powder, and salt. Make sure to break up any clumps in the cocoa powder and espresso powder.
- Add wet ingredients. Add the almond butter, maple syrup, cooled brewed espresso (if using), and vanilla extract. The double hit of coffee—both powder and brewed—creates intense, authentic mocha flavor.
- Mix until combined. Stir everything together until a thick, chocolatey-brown dough forms. The mixture should be cohesive and slightly fudgy. If too dry, add another tablespoon of maple syrup. If too wet, add more oats.
- Fold in chocolate chips. Add the dark chocolate chips and fold them through the dough. Dark chocolate complements the coffee flavor better than milk chocolate would.
- Chill the dough briefly. Refrigerate the dough for 15 minutes. This firms it up and makes rolling easier. The cocoa powder and espresso can make the dough a bit sticky.
- Roll into balls. Using a tablespoon measure, portion and roll the dough into balls. Coat your hands with a light dusting of cocoa powder if the dough sticks.
- Final chill and storage. Refrigerate for at least 30 minutes until firm. Store in an airtight container in the refrigerator for up to 2 weeks. These contain caffeine (about 20-30mg per ball), so enjoy accordingly.
Pro Tips
- Instant espresso powder is different from instant coffee—it’s more concentrated and provides stronger flavor.
- These contain real caffeine—be mindful of when you eat them if you’re sensitive to coffee.
- For a white chocolate mocha version, swap dark chips for white chocolate chips.
- Roll in cocoa powder for a truffle-like appearance and to prevent sticking.

11. Strawberry Shortcake Protein Balls
Sweet, fruity, and reminiscent of the beloved summer dessert. Freeze-dried strawberries provide intense berry flavor without adding moisture, while white chocolate chips add creamy sweetness. These taste like a strawberry milkshake in protein ball form—light, fresh, and perfectly sweet.
Prep Time: 10 minutes | Chill Time: 30 minutes | Makes: 14-16 balls | Protein: ~5g per ball
Ingredients
- 1 cup old-fashioned rolled oats
- 1 scoop vanilla protein powder
- ½ cup cashew butter
- ¼ cup honey
- ½ cup freeze-dried strawberries
- ¼ cup white chocolate chips
- 1 teaspoon vanilla extract
- 2 tablespoons unsweetened shredded coconut (optional)
- Pinch of salt
Step-by-Step Instructions
- Process the freeze-dried strawberries. Place the freeze-dried strawberries in a zip-lock bag and crush them into a mix of powder and small pieces using a rolling pin. Alternatively, pulse briefly in a food processor. You want some powder for color and flavor throughout, plus some small chunks for texture. Reserve 2 tablespoons for coating if desired.
- Combine dry ingredients. In a large bowl, mix together the oats, protein powder, crushed freeze-dried strawberries, shredded coconut (if using), and salt. The strawberry powder will tint the mixture a beautiful pink color.
- Add wet ingredients. Add the cashew butter, honey, and vanilla extract to the bowl. Cashew butter’s mild, creamy flavor lets the strawberry shine through.
- Mix until combined. Stir everything together until a pink-tinted dough forms. The mixture should hold together when pressed. Freeze-dried fruit absorbs moisture, so you may need an extra tablespoon of honey if the dough seems dry.
- Fold in white chocolate chips. Add the white chocolate chips and fold them through the dough until evenly distributed. White chocolate pairs beautifully with strawberry—it’s the classic shortcake combination.
- Roll into balls. Using a tablespoon measure, portion out the dough and roll between your palms to form smooth, pink-hued balls.
- Optional: add strawberry coating. For extra strawberry impact and visual appeal, roll the finished balls in the reserved crushed freeze-dried strawberries. This adds a beautiful pink coating and intense berry flavor on the outside.
- Chill and store. Refrigerate for at least 30 minutes until firm. Store in an airtight container in the refrigerator for up to 2 weeks. Keep them cold—the white chocolate softens at room temperature.
Pro Tips
- Freeze-dried strawberries are essential—fresh or dried strawberries add too much moisture.
- Find freeze-dried fruit in the snack aisle or with the dried fruit at most grocery stores.
- Swap strawberries for freeze-dried raspberries or mixed berries for variation.
- A teaspoon of strawberry extract (found in the baking aisle) intensifies the berry flavor even more.
Universal Tips for Perfect Protein Balls
No matter which recipe you choose, keep these essential tips in mind to ensure protein ball success every time:
Use natural nut butters. Natural nut butters (the kind where oil separates on top) create the best texture. Highly processed nut butters with added oils can make the mixture too greasy. Stir your natural nut butter well before measuring.
Don’t skip the chill time. Chilling the dough before rolling and again after rolling is essential. Cold dough is easier to shape, and chilled finished balls hold together better. Warm protein balls fall apart and stick to everything.
Adjust consistency as needed. Every batch is slightly different depending on your specific ingredients. If the dough is too dry and crumbly, add more wet ingredients (honey, nut butter, or a splash of milk). If too wet and sticky, add more oats or protein powder.
Roll with slightly damp hands. If the mixture sticks to your hands while rolling, dampen them slightly with water or coat with a tiny bit of coconut oil. For chocolate recipes, dust your hands with cocoa powder instead.
Store properly for best results. Protein balls keep for up to 2 weeks in an airtight container in the refrigerator. They can be frozen for up to 3 months—thaw in the refrigerator overnight before eating. Always keep them cold for best texture.
Use old-fashioned rolled oats. Old-fashioned rolled oats provide the best texture. Quick oats work but create a denser, less interesting texture. Steel-cut oats are too hard and won’t bind properly.
Make uniform sizes for consistency. Using a tablespoon measure or small cookie scoop ensures all your balls are the same size. This matters for even chilling and accurate nutrition information if you’re tracking macros.
Now you have 11 protein ball recipes in your arsenal to conquer afternoon slumps, fuel workouts, and satisfy sweet cravings without derailing your nutrition goals. From classic peanut butter chocolate chip to sophisticated mocha espresso to refreshing strawberry shortcake, there’s a flavor for every mood and craving. Make a batch (or two) this weekend and transform your snacking game forever.
Time to roll.