As the sun set, casting a golden hue over my kitchen, I knew it was time for a comforting meal. I looked through my recipes and found my homemade chicken cobbler. It always brings warmth to our family gatherings.
Memories flooded back of us all gathered, laughing, and the savory cobbler’s aroma filling the house. This dish, with its rich sauce and flaky biscuit topping, satisfies our taste buds and nourishes our souls. I’m excited to share how to make this crowd-pleaser, perfect for any occasion!
Key Takeaways
- Discover the definition and origin of chicken cobbler.
- Learn about the traditional ingredients that make this dish special.
- Explore different regional variations of chicken cobbler.
- Find tips for crafting the perfect biscuit topping.
- Get step-by-step instructions for the best chicken cobbler experience.
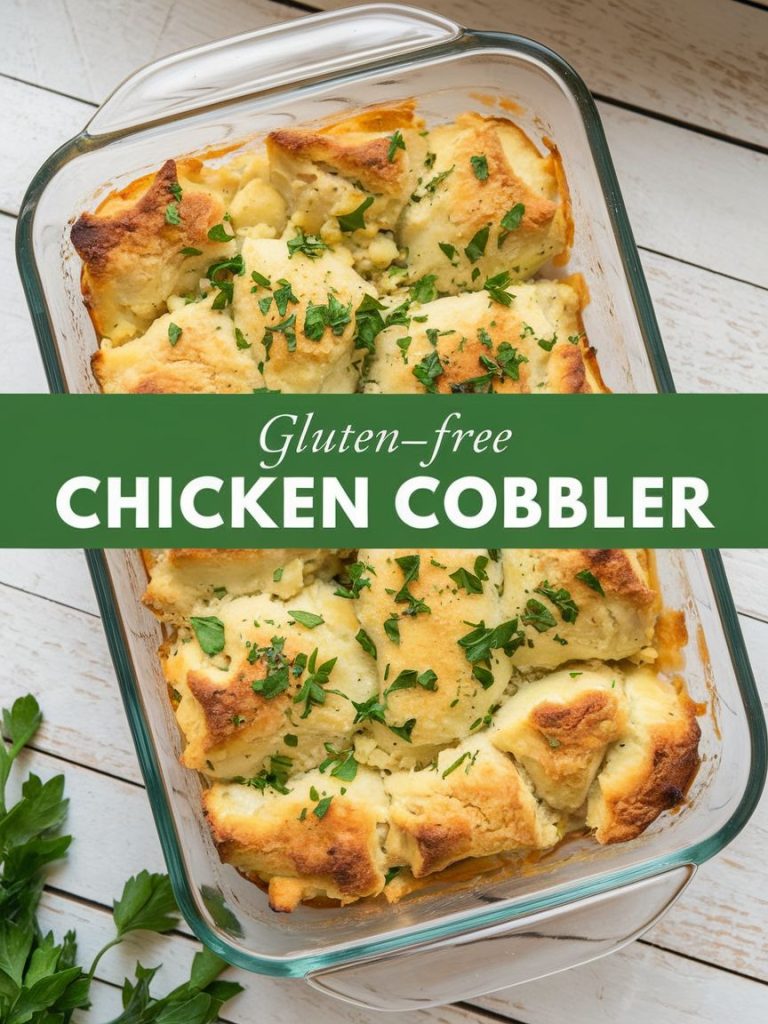
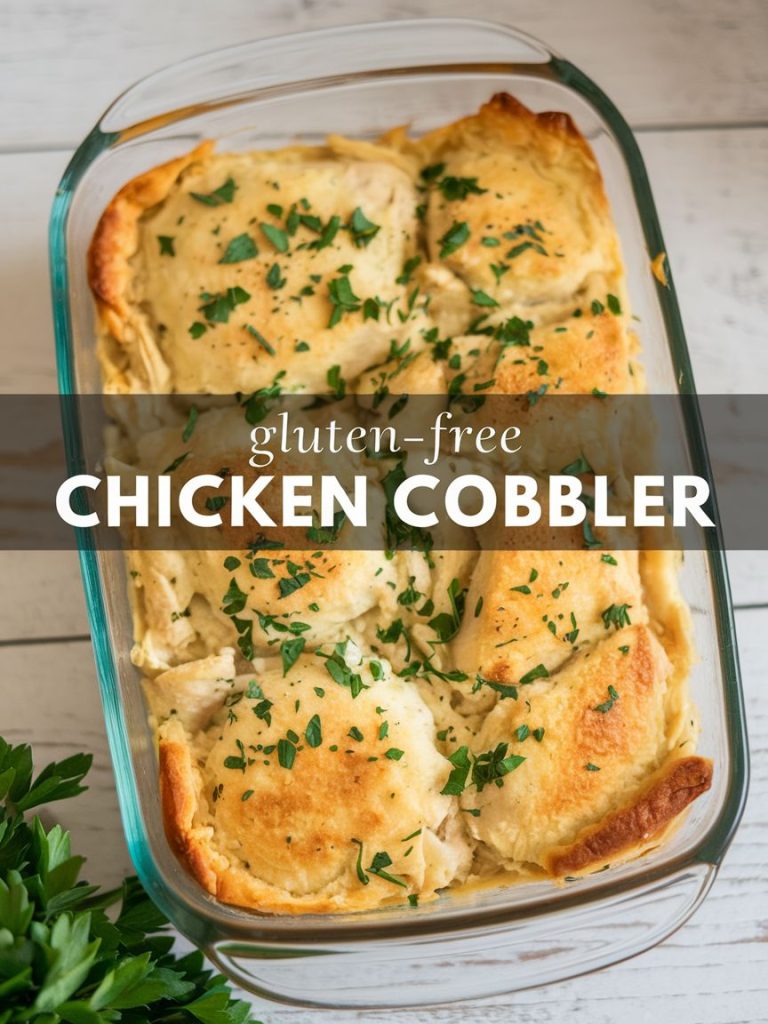
What is Chicken Cobbler?
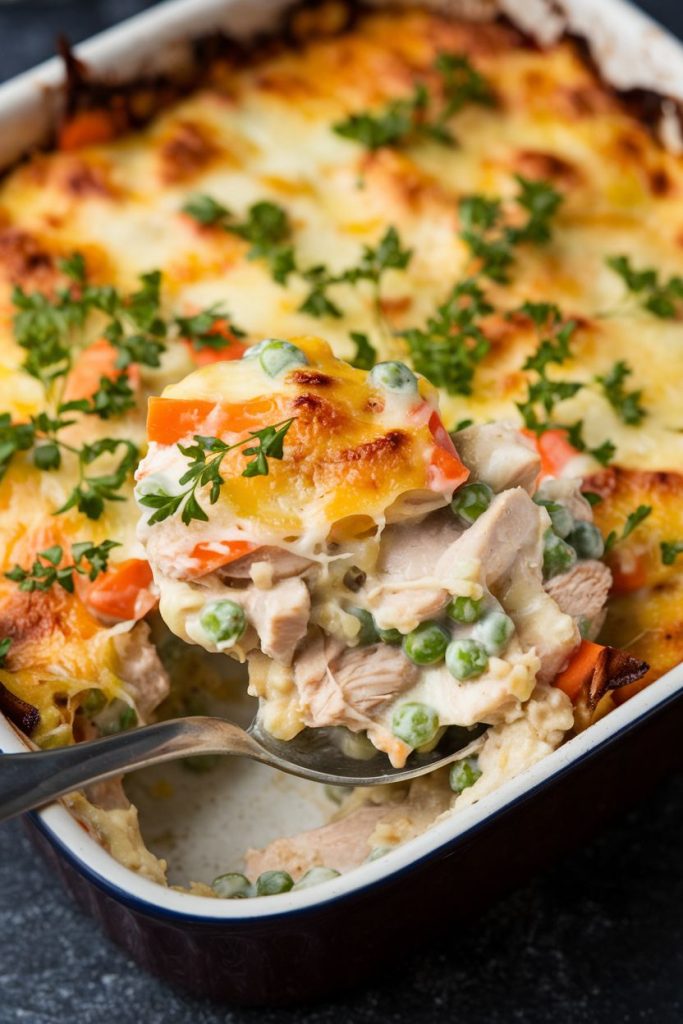
Chicken cobbler is a comfort food that warms the soul. It’s a dish filled with chicken, veggies, and a biscuit topping. Let’s explore its history and why it’s a classic favorite.
Definition and Origin
The chicken cobbler is a mix of chicken, veggies, and a biscuit on top. It started as a way to use leftovers and fresh produce. In the South, families loved it for its hearty taste.
Now, it’s a favorite in many homes. People love it for its simple yet comforting flavors.
Traditional Ingredients
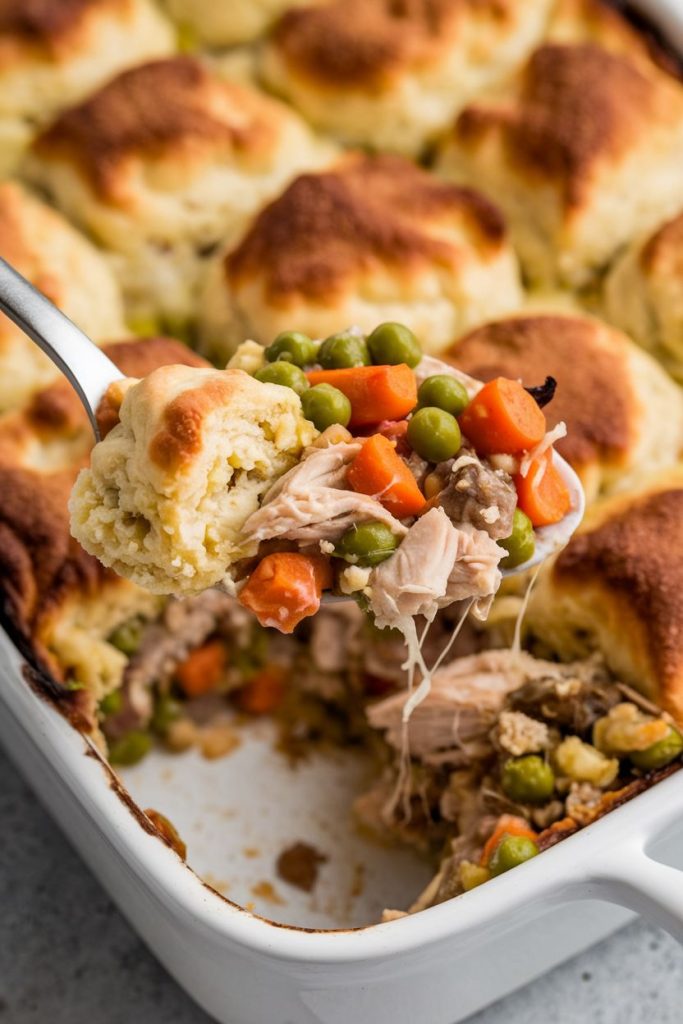
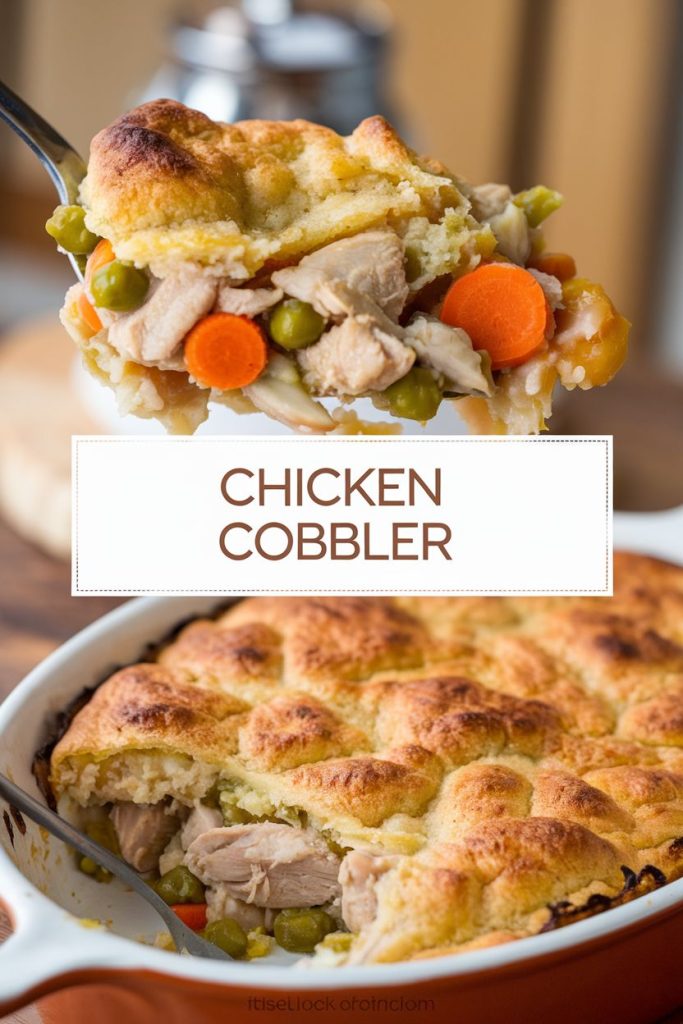
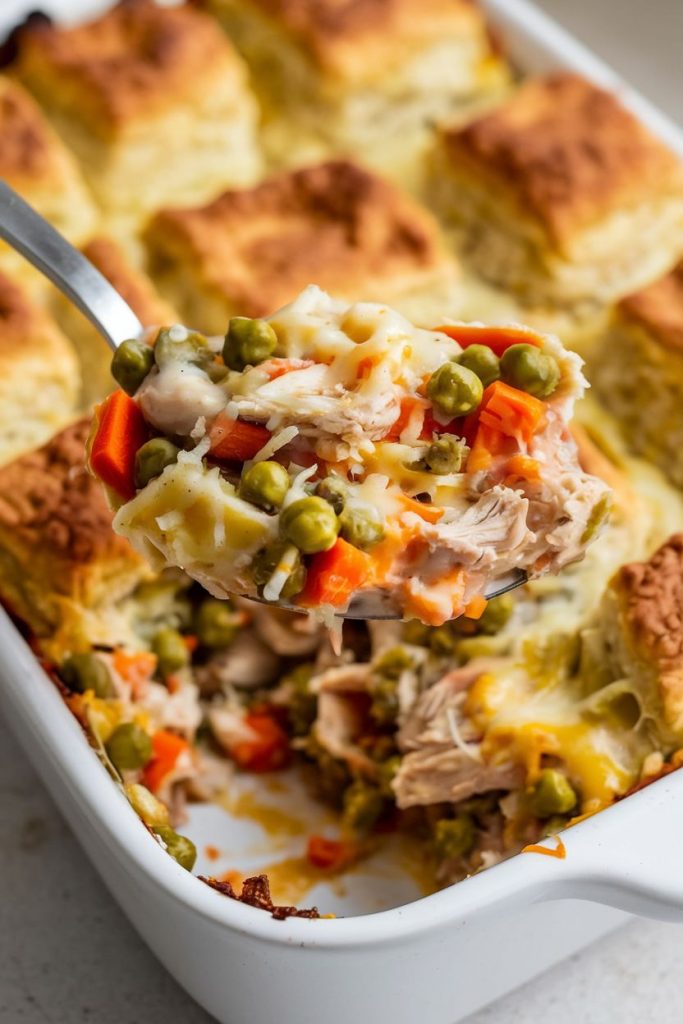
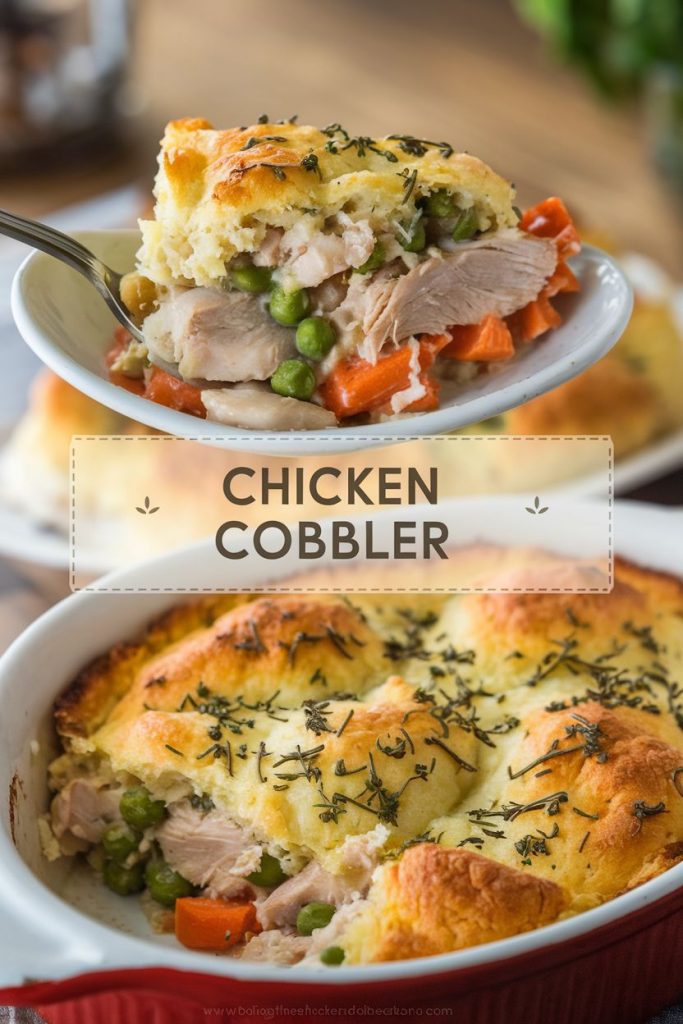
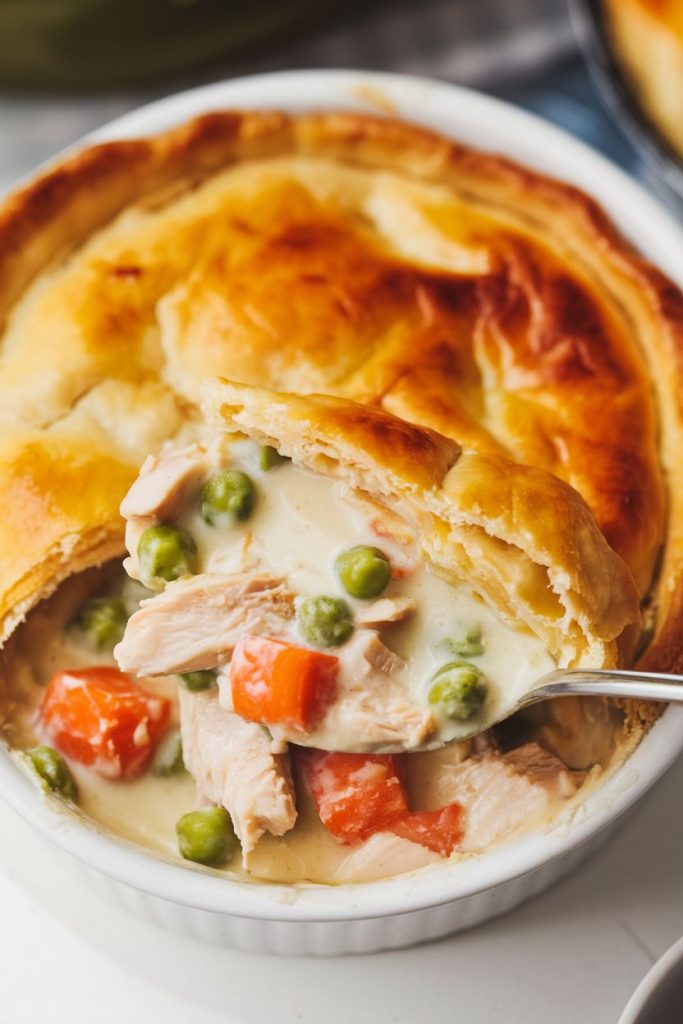
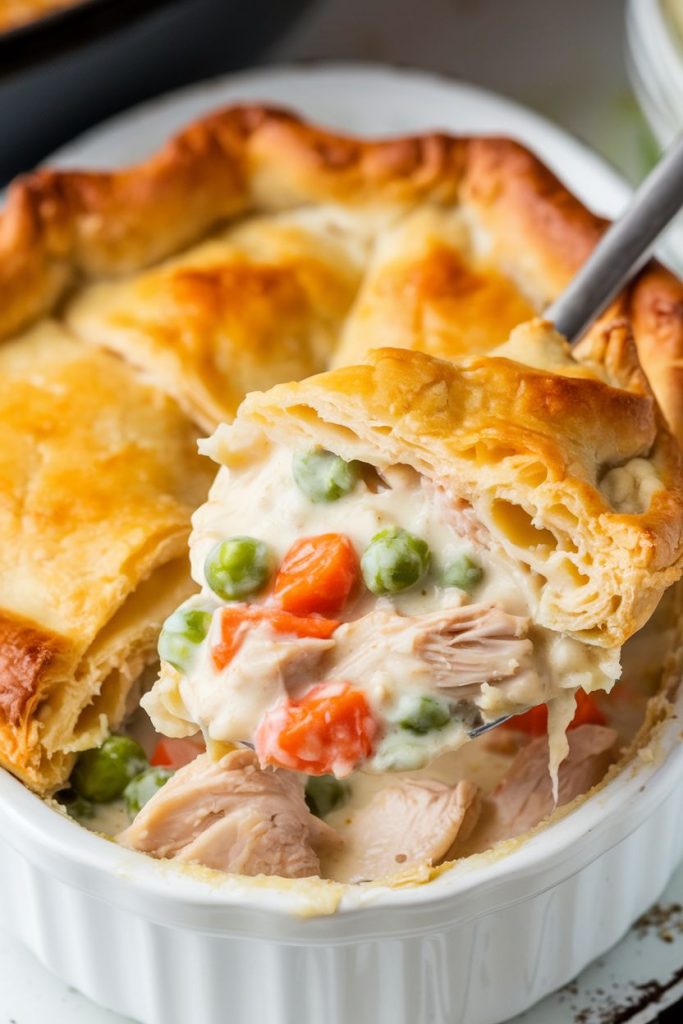
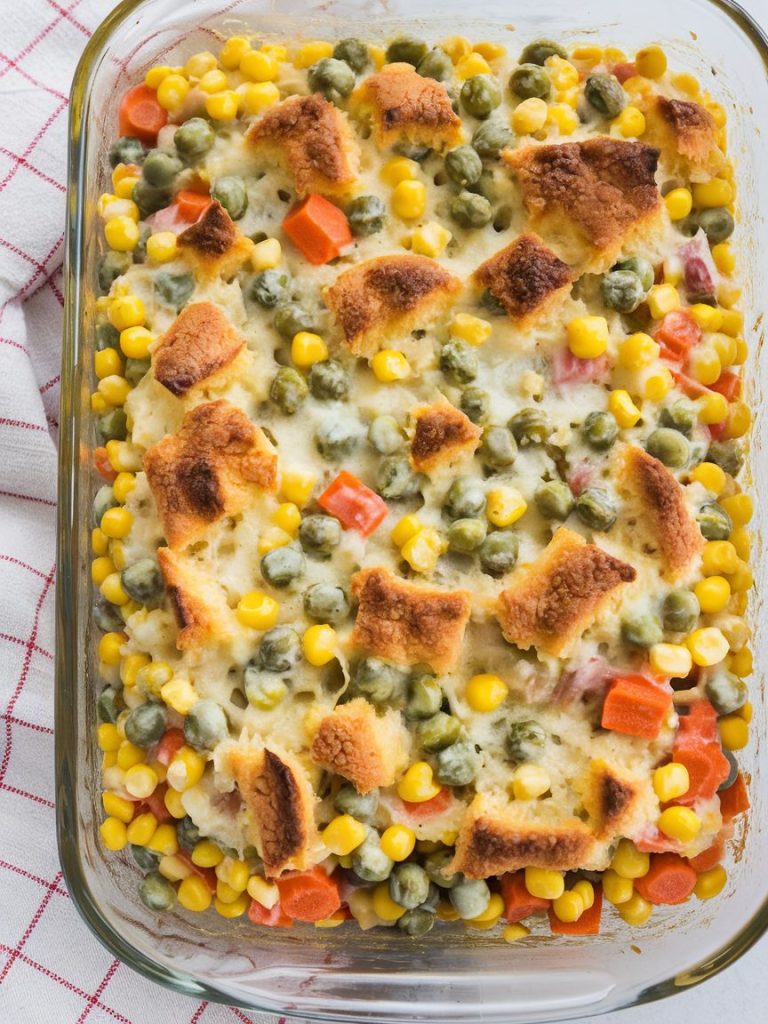
Traditional chicken cobbler has key ingredients. It includes fresh chicken, carrots, peas, and homemade biscuit dough. These parts make the dish rich and satisfying.
The mix of these ingredients creates a memorable taste. It’s a true home-cooked meal.
Variations in Different Regions
Chicken cobbler varies by region. Each area adds its own twist, using local tastes and ingredients. Some like it spicy, while others prefer it sweeter.
Trying these different versions shows the rich tradition of chicken cobbler. There’s a perfect version for everyone.
Key Ingredients for Chicken Cobbler
Making a delicious chicken cobbler starts with knowing the key ingredients. The right chicken and vegetables, plus a fluffy biscuit topping, make it special. Here’s what I look for when making my chicken cobbler.
Chicken Choices
Choosing the right chicken is key for a tasty cobbler. I prefer options that are flavorful and easy to prepare. Here are some favorites:
- Rotisserie chicken for its convenience and savory taste
- Boneless skinless chicken breasts, which are easy to shred
- Cooked chicken thighs that add a richer flavor

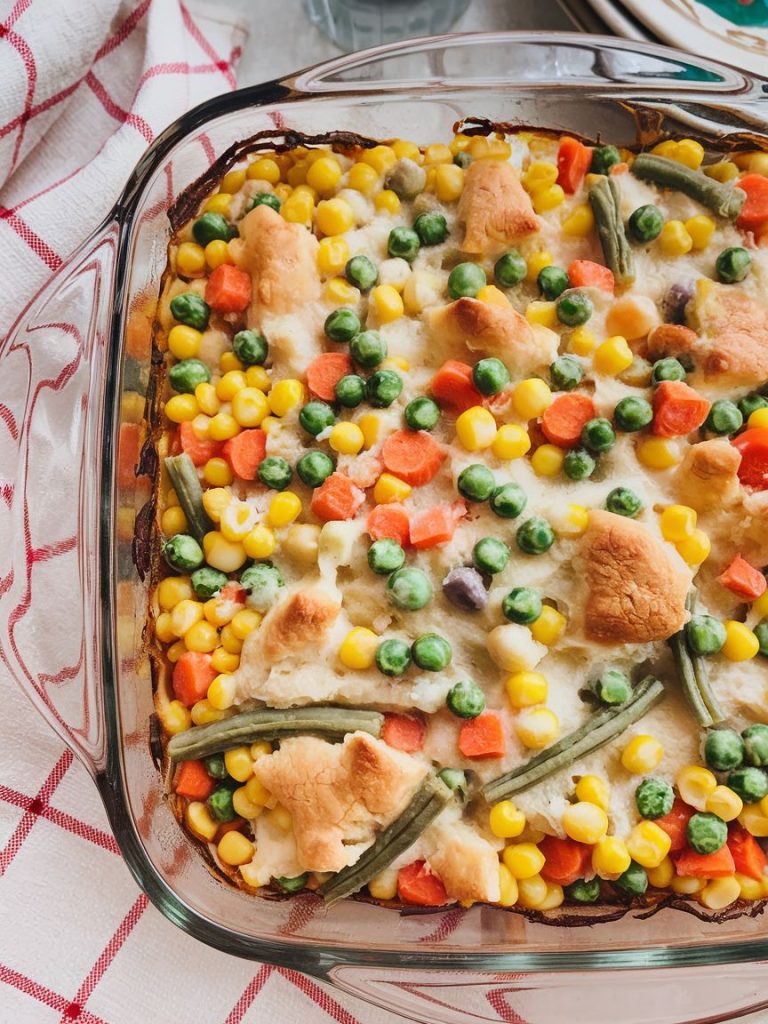
Vegetable Options
The vegetables you choose can make or break your cobbler. Here are some great options:
- Sweet peas for a pop of color and sweetness
- Carrots, cut into small pieces for excellent texture
- Corn kernels that provide a subtle crunch
- Green beans for added freshness
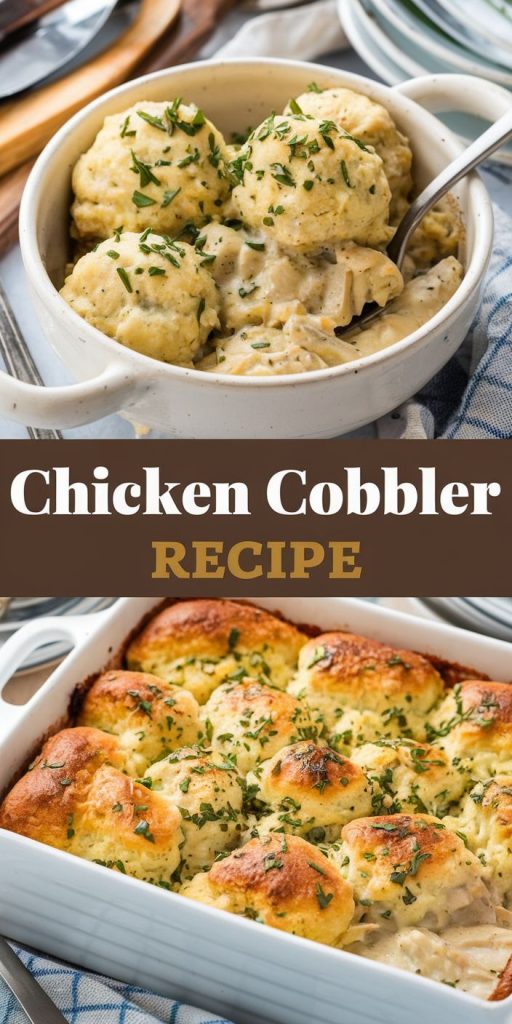
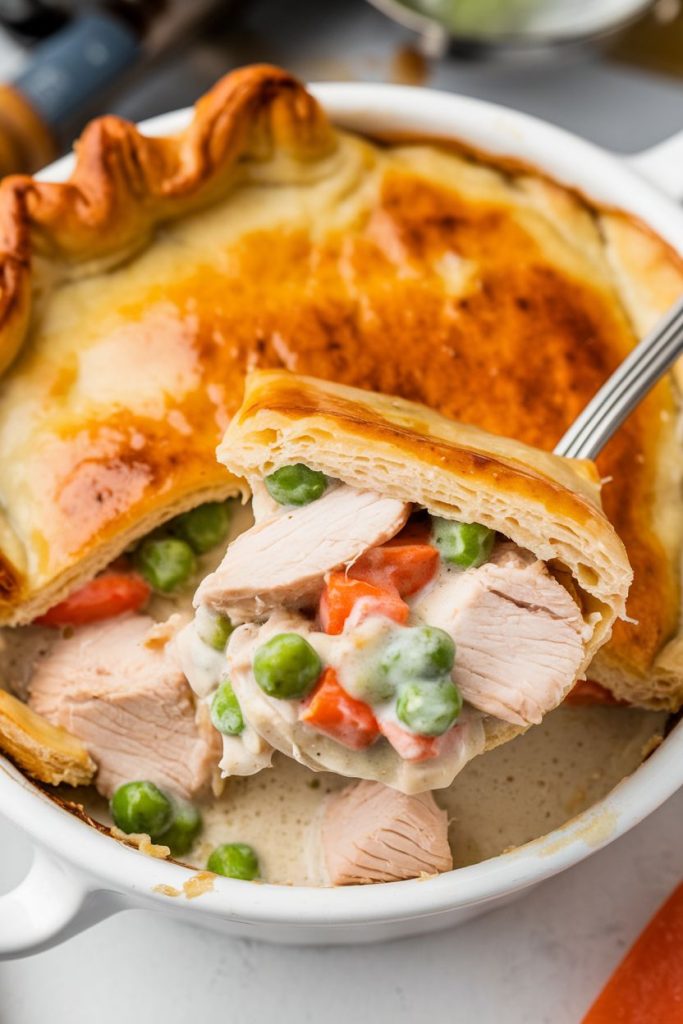
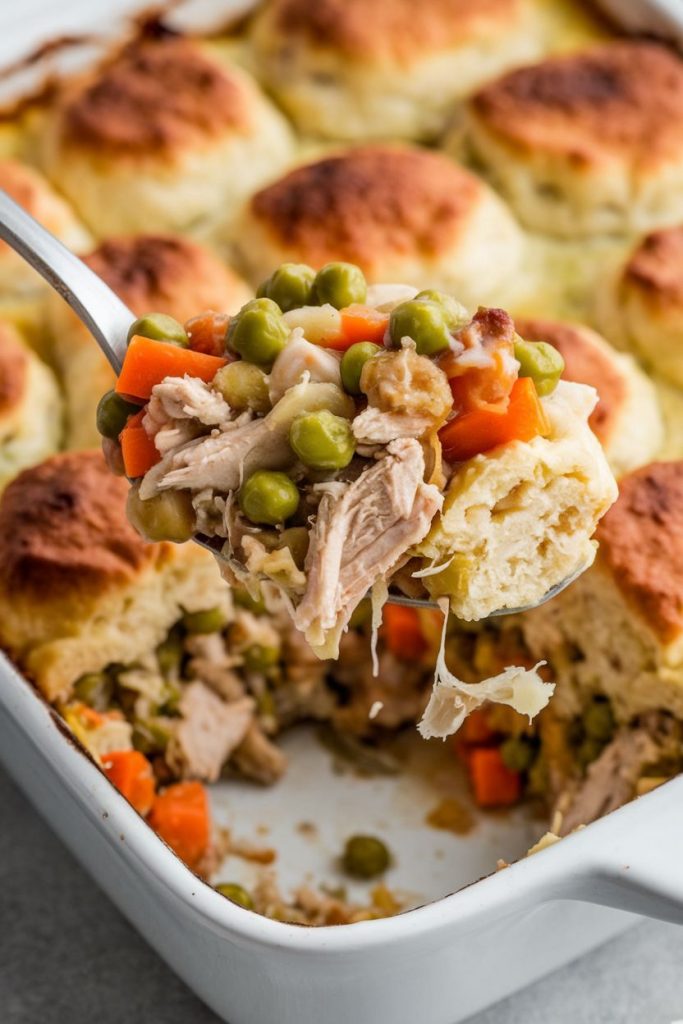
Chicken Cobbler Recipe
A warm, comforting dish with tender chicken, hearty vegetables, and a golden biscuit topping. Perfect for any family gathering!
Ingredients
For the Chicken Filling:
- 2 cups cooked, shredded or diced chicken (rotisserie, baked, or boiled)
- 1 cup frozen or fresh peas
- 1 cup diced carrots
- 1/2 cup corn kernels
- 1/2 cup green beans, chopped
- 1 small onion, finely diced
- 2 cloves garlic, minced
- 2 tablespoons butter
- 2 tablespoons all-purpose flour
- 1 1/2 cups chicken broth
- 1/2 cup heavy cream or whole milk
- 1 teaspoon salt
- 1/2 teaspoon black pepper
- 1/2 teaspoon dried thyme
- 1/2 teaspoon smoked paprika
For the Biscuit Topping:
- 1 1/2 cups all-purpose flour
- 1 tablespoon baking powder
- 1/2 teaspoon salt
- 1/2 teaspoon garlic powder (optional)
- 4 tablespoons unsalted butter, cold and cubed
- 3/4 cup milk or buttermilk
Step-by-Step Instructions
Step 1: Prepare the Chicken
- If using raw chicken, bake it at 375°F (190°C) for 25-30 minutes, season with salt, pepper, and olive oil. Let cool and shred or dice.
- If using rotisserie chicken, remove the skin and shred the meat.
- Set the chicken aside.
Step 2: Make the Filling
- In a large skillet or saucepan, melt 2 tablespoons of butter over medium heat.
- Add diced onions and garlic; sauté until soft and fragrant (about 2 minutes).
- Stir in carrots, peas, corn, and green beans. Cook for another 3-5 minutes until slightly tender.
- Sprinkle 2 tablespoons of flour over the mixture, stirring constantly for 1 minute to remove the raw flour taste.
- Slowly pour in chicken broth, stirring to prevent lumps. Add heavy cream, salt, pepper, thyme, and smoked paprika.
- Simmer for 5 minutes until thickened.
- Remove from heat and fold in the shredded chicken.
Step 3: Prepare the Biscuit Topping
- In a mixing bowl, combine flour, baking powder, salt, and garlic powder.
- Add cold butter cubes and cut them into the flour using a pastry cutter or fingers until the mixture resembles coarse crumbs.
- Pour in milk or buttermilk and stir gently until just combined. Avoid overmixing.
Step 4: Assemble the Cobbler
- Preheat the oven to 375°F (190°C).
- Pour the chicken filling into a greased 9×13-inch baking dish.
- Drop spoonfuls of the biscuit dough evenly over the filling. Leave space for steam to escape.
Step 5: Bake the Cobbler
- Place the dish in the oven and bake for 35-40 minutes, or until the biscuit topping is golden brown.
- Check the internal temperature of the filling; it should be at least 165°F (74°C).
Step 6: Serve and Enjoy
- Let the cobbler cool for 5-10 minutes before serving.
- Garnish with fresh parsley or thyme for extra flavor.
- Serve with a side salad or roasted vegetables.
Storage & Reheating Tips
- Refrigerate leftovers in an airtight container for up to 3-4 days.
- Freeze for up to 2-3 months in a freezer-safe dish.
- Reheat in a 350°F oven for 20 minutes or microwave for 2-3 minutes.
Enjoy your homemade Chicken Cobbler! 🍗🥧
Biscuit Topping Essentials
The biscuit topping is crucial for a great chicken cobbler. Here are the must-haves:
- All-purpose flour, which gives structure to the biscuits
- Baking powder to ensure a light and fluffy texture
- Unsalted butter for richness and flavor
- Milk or buttermilk to bind the mixture together
Preparing the Chicken
Getting the chicken ready for cobbler is crucial for a tasty dish. The right cooking methods can change the chicken’s texture and taste. I’ve found three methods that work well, each with its own benefits.
Cooking Methods
Here are three chicken cooking methods I recommend:
- Boiling: Boiling keeps the chicken moist and tender. It’s great for shredding. Just put the chicken in boiling water for 15-20 minutes.
- Baking: Baking gives a crispy outside. Season the chicken with olive oil and spices, then bake at 375°F for 25-30 minutes.
- Sautéing: Sautéing is quick and flavorful. Cook the chicken in a skillet with some broth or oil for about 10 minutes.
Seasoning Tips
Seasoning the chicken right is key. Here are my top seasoning tips:
- Salt and Pepper: These are essential. Season well before cooking to blend flavors.
- Herbs: Fresh herbs like thyme or parsley add a nice touch. Sprinkle them during cooking for extra flavor.
- Spices: Spices like smoked paprika or garlic powder add depth. They enhance the chicken’s flavor.
Shredding vs. Dicing
Choosing between shredding or dicing the chicken affects the cobbler’s texture. Shredded chicken mixes well with the filling, making it tender. Diced chicken offers a hearty bite and lets flavors shine. Both methods are great, so pick what you like or what you have.
| Cooking Method | Texture | Ideal Seasoning |
|---|---|---|
| Boiling | Tender and Shredable | Salt, Pepper, Herbs |
| Baking | Crispy Exterior | Salt, Olive oil, Spices |
| Sautéing | Juicy and Flavorful | Salt, Pepper, Garlic Powder |
Making the Filling
Making a tasty chicken cobbler filling is key to a great dish. Choosing the right vegetables is crucial. They add texture and flavor, making the filling rich and exciting.
Choosing the Right Vegetables
I like to pick vegetables that add color and texture. Some great choices are:
- Carrots
- Peas
- Green beans
- Corn
- Bell peppers
These veggies make the filling hearty. You can use fresh or frozen ones for great results.
Cooking Techniques
To make the filling pop, I use sautéing and simmering. Sautéing veggies in oil brings out their sweetness. Then, I add chicken and broth for simmering. This blends the flavors well.
Adding Flavor with Herbs and Spices
Adding herbs and spices makes flavoring chicken cobbler fun. My favorites are:
- Thyme
- Rosemary
- Parsley
- Garlic powder
- Paprika
By choosing the right ingredients and cooking methods, I create a standout chicken cobbler filling. It’s a mix of textures and flavors, perfect for a warm biscuit topping.
Crafting the Biscuit Topping
Making the perfect biscuit topping for chicken cobbler takes it to the next level. There are many biscuit recipes to try, each making the dish fluffier and tastier. It’s key to find both traditional and gluten-free options to please everyone’s taste.
Types of Biscuit Recipes
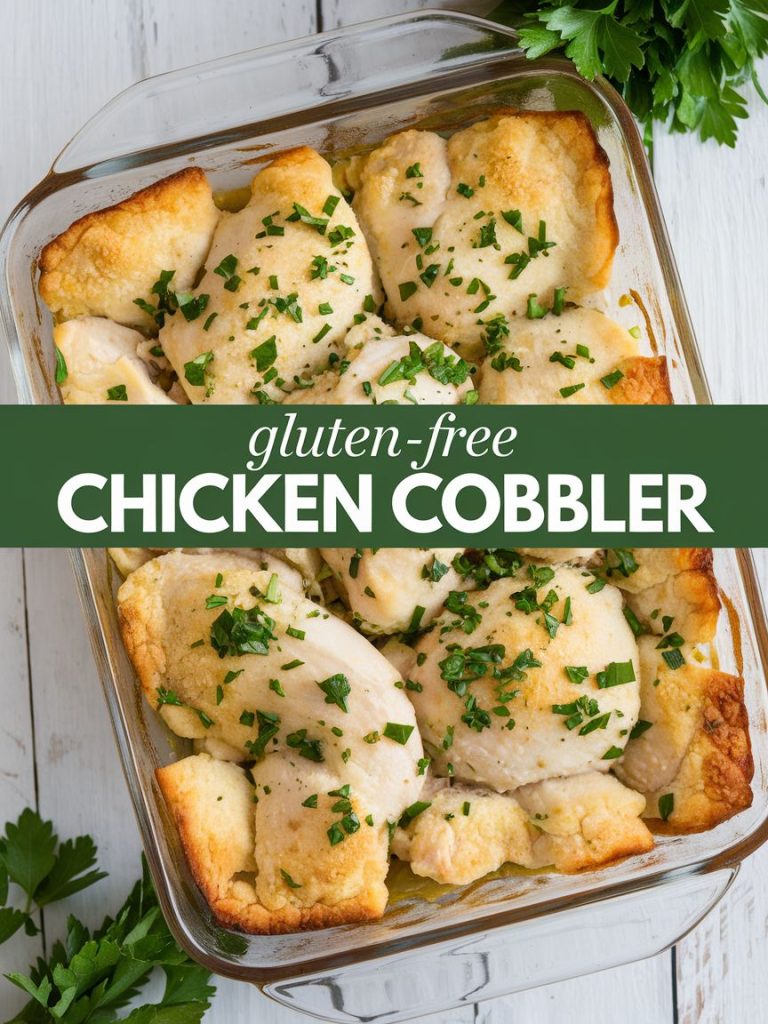
There are many biscuit recipes to choose from. Classic buttermilk biscuits offer a rich taste and soft texture. Drop biscuits are easier to make, needing less shaping. For those who can’t have gluten, almond flour or gluten-free blends make great alternatives.

Gluten-Free Alternatives
For gluten-free biscuits, trying different mixes can lead to tasty results. Using rice flour, tapioca starch, and xanthan gum helps them stay fluffy. This way, everyone can enjoy chicken cobbler without gluten worries.
Tips for Fluffy Biscuits
Getting fluffy biscuits is all about the details. Here are my best tips:
- Use cold ingredients, like butter, for a flakier biscuit.
- Don’t overmix the dough; it should still be a bit lumpy.
- Add lots of baking powder to help them rise well.
With these tips and recipes, you can make the perfect biscuit topping for chicken cobbler. Enjoy the mix of flavors and textures in this cozy dish.
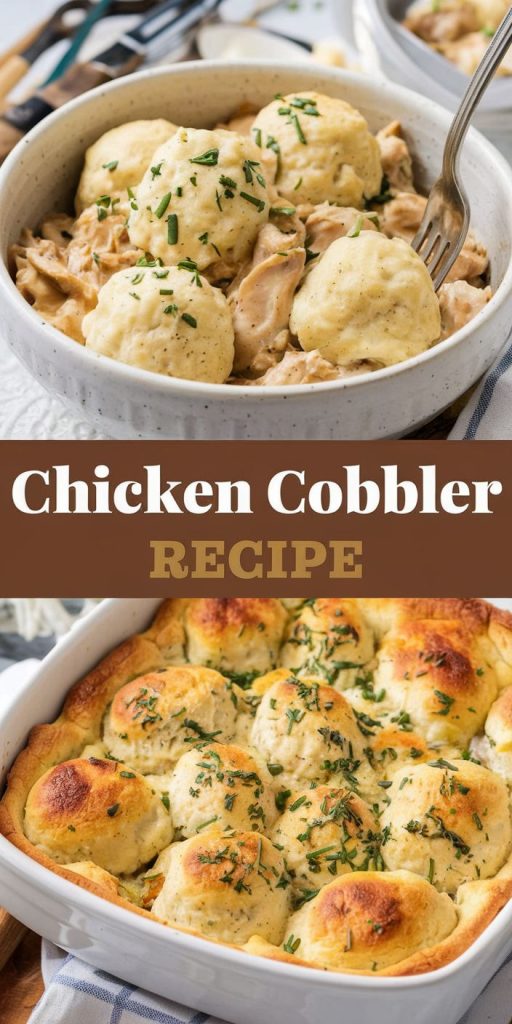
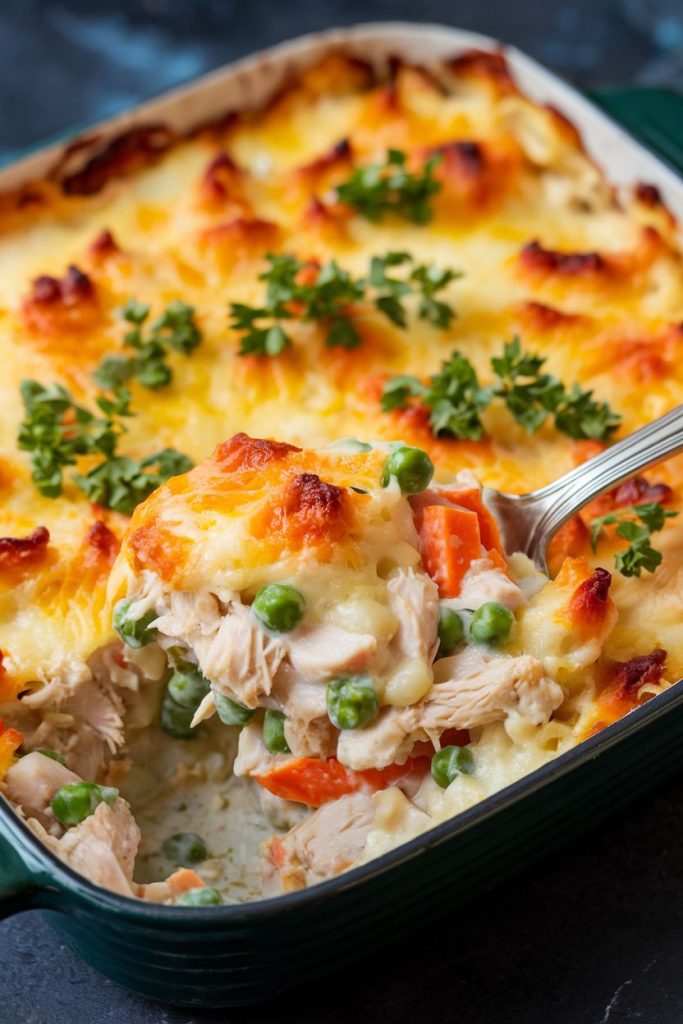
Assembling Your Chicken Cobbler
Assembling chicken cobbler is a fun part of making this comforting dish. Each layer brings its own flavor and texture. It’s important to know how to layer properly for the best taste.
I’ll share my top tips for even cooking. Plus, I’ll tell you which baking dishes work best for cobbler.
Layering Techniques
Start with the filling for chicken cobbler. I put cooked chicken and veggies at the bottom. This lets their flavors mix as it bakes. Here’s how to layer:
- Start with a layer of shredded chicken.
- Add cooked veggies like carrots, peas, and corn.
- Pour a creamy sauce over for moisture and flavor.
- Top it with biscuit dough, spreading it evenly for even cooking.
Tips for Even Cooking
Even cooking is key, but it can be tricky. Here are some tips to help:
- Leave space between biscuit pieces for steam to escape.
- Check the internal temperature; it should be at least 165°F.
- Rotate the baking dish halfway through for even heat.
Using Baking Dishes
The right baking dish is crucial for cooking time and texture. I prefer ceramic or glass dishes because they keep heat well. Here’s a comparison of options:
| Type | Best Features | Considerations |
|---|---|---|
| Ceramic | Retains heat evenly, stylish presentation | Can crack with sudden temperature changes |
| Glass | Allows for easy monitoring of browning | Heavier, must be handled with care |
| Metal | Conducts heat quickly | Can lead to uneven baking if not watched closely |
Baking Your Chicken Cobbler
Baking chicken cobbler is a fun process that turns your ingredients into a warm, comforting dish. Knowing the right baking temperature and time is key to getting it just right.
Temperature Guidelines
I preheat my oven to 375°F (190°C) when baking chicken cobbler. This temperature is good for most ovens. If you have a convection oven, try 350°F (175°C) for a golden top.
Baking Times for Different Sizes
The size of your dish affects baking time. Small servings bake in 25 to 30 minutes. Larger dishes take 40 to 50 minutes. Here’s a quick guide:
| Dish Size | Baking Time (minutes) |
|---|---|
| Individual Servings | 25 – 30 |
| Small Casserole (2-4 servings) | 35 – 40 |
| Large Casserole (6-8 servings) | 40 – 50 |
How to Know When It’s Done
It’s important to know when your chicken cobbler is done. Look for a golden-brown biscuit top and bubbling edges. A thermometer can also help; the filling should be at least 165°F (74°C). These signs will guide you to a tasty dish.
Serving Suggestions
Serving chicken cobbler can be a fun experience. I like to add the right side dishes, presentation, and condiments to make it special. Here are some ideas to make your meal unforgettable.
Side Dishes Pairings
Choosing the right sides can really make chicken cobbler shine. Here are some great options:
- Mixed green salad with vinaigrette
- Roasted seasonal vegetables
- Mashed potatoes for a creamy texture
- Steamed broccoli for a healthy crunch
Ideal Presentation Styles
How you present chicken cobbler is important. Serving it in individual ramekins or a large cast-iron skillet looks great. It also keeps the dish warm. Adding fresh herbs on top adds color and freshness.
Recommended Condiments
Adding condiments can take your chicken cobbler to the next level. Here are some great options:
- Green chili sauce for a spicy kick
- Creamy ranch dressing for dipping
- Hot sauce for those who enjoy extra heat
Storing Leftovers
After enjoying a delicious chicken cobbler, you might have leftovers. It’s important to know how to store them right. This way, your chicken cobbler stays tasty and fresh for later meals. Here are some tips I use for storing leftover chicken cobbler.
Proper Storage Techniques
First, let the chicken cobbler cool down to room temperature. This step stops it from getting soggy. Then, I put it in an airtight container. Glass or BPA-free plastic works best.
For longer storage, freeze it in a freezer-safe bag. Make sure to remove air to avoid freezer burn.
Reheating Instructions
When reheating, the right method is key. Preheat your oven to 350°F (175°C). Put the cobbler in a dish and cover it with foil. This keeps it moist.
Reheat for 20-25 minutes or until it’s 165°F (74°C). You can also microwave it, but the oven method is better for texture.
Creative Ways to Use Leftovers
There are many ways to use leftover chicken cobbler. You can mix it with sautéed veggies for a quick skillet meal. Or, turn it into taco filling or serve it over rice for a comforting bowl.
Using leftover chicken cobbler storage can spark your creativity in the kitchen.
| Storage Method | Container Type | Suggested Duration |
|---|---|---|
| Refrigerate | Airtight container | 3-4 days |
| Freezer | Freezer-safe bag | 2-3 months |
Conclusion and Final Thoughts
As we finish our chicken cobbler journey, let’s look back at the key points. This dish is not only tasty but also very flexible. You’ve learned how to pick the best chicken and veggies and make a fluffy biscuit topping.
Remember, the secret to a great chicken cobbler is the mix of flavors and textures. It’s all about balance.
I suggest you try new things with chicken cobbler. Change up the veggies or add a new herb to spice it up. This way, you can make it your own while keeping it cozy.
Now, you’re ready to take on chicken cobbler. You can stick to the classic or try something new. I’m excited for you to try this recipe. Share it with your loved ones; a homemade chicken cobbler always brings smiles!