I remember the first time I made these crispy, golden delights. It was a busy weeknight, and I needed something quick yet satisfying. That’s when I discovered the magic of combining rotisserie chicken, fresh cheese, and flour tortillas. The result? A dish that’s become a staple in my kitchen.
What makes this recipe special is its simplicity. With just a few quality ingredients, you can create a meal that’s perfect for any occasion. Whether you’re hosting a party or looking for a comforting dinner, these flautas are versatile and delicious.
Recipe Overview
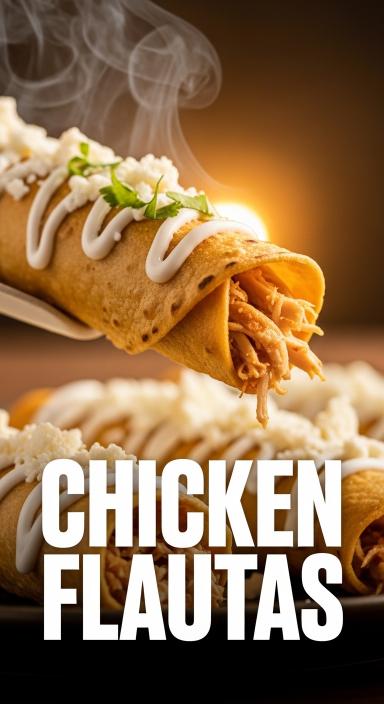
Chicken Flautas are crispy rolled tortillas filled with seasoned shredded chicken and fried until golden and crunchy. This popular Mexican dish is known for its delicious combination of savory filling and crispy texture. Flautas are typically served with fresh toppings such as shredded lettuce, sour cream, salsa, cheese, and guacamole, making them perfect for family dinners, parties, or casual gatherings.
Prep Time
20 minutes
Cook Time
15 minutes
Total Time
35 minutes
Servings
4 servings
Cuisine
Mexican
Difficulty
Easy
Ingredients
For the Chicken Filling
- 2 cups cooked shredded chicken
- ½ teaspoon salt
- ½ teaspoon black pepper
- 1 teaspoon chili powder
- ½ teaspoon cumin
- 1 teaspoon garlic powder
- ½ cup shredded cheddar or Monterey Jack cheese
For the Flautas
- 8 small flour or corn tortillas
- 1 cup vegetable oil (for frying)
Toppings
- Shredded lettuce
- Sour cream
- Salsa
- Guacamole
- Crumbled queso fresco or shredded cheese
- Chopped tomatoes
Equipment Needed
Kitchen Tools
- Large skillet or frying pan
- Tongs
- Mixing bowl
- Toothpicks (optional)
- Paper towels
- Measuring spoons
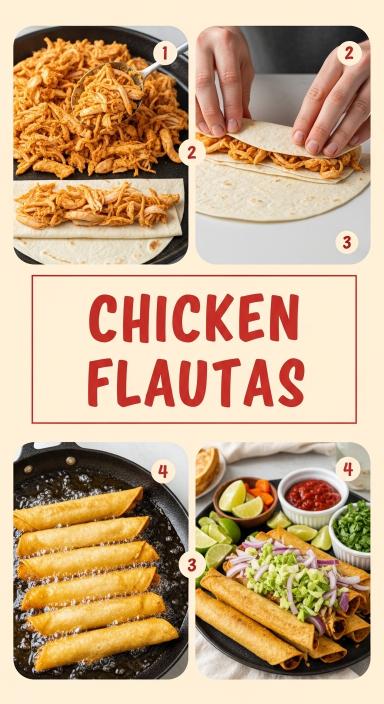
Instructions
Step 1: Prepare the Chicken Filling
In a mixing bowl combine the shredded chicken, salt, black pepper, chili powder, cumin, and garlic powder. Mix well to evenly coat the chicken with the spices.
Stir in the shredded cheese until combined.
Step 2: Warm the Tortillas
Warm the tortillas in the microwave or on a skillet for about 10–15 seconds to make them more flexible and easier to roll.
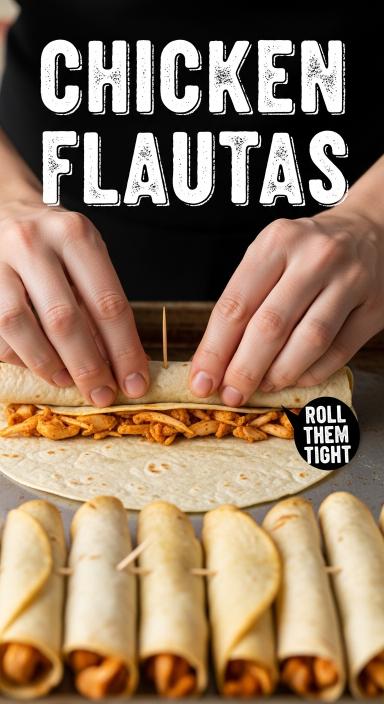
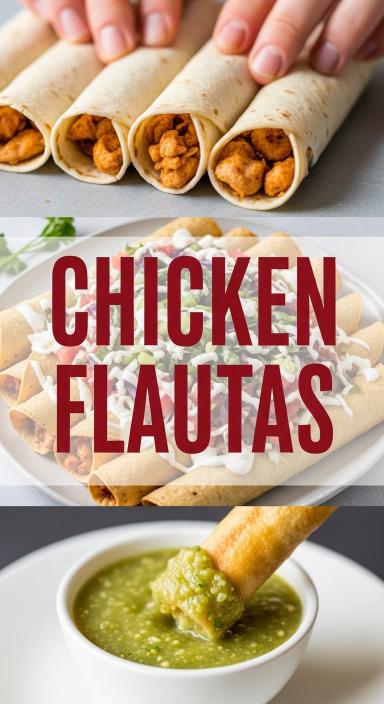
Step 3: Fill the Tortillas
Place about 2–3 tablespoons of the chicken filling along one edge of each tortilla.
Roll the tortilla tightly around the filling to form a long tube. Secure with a toothpick if needed.
Step 4: Heat the Oil
Heat vegetable oil in a large skillet over medium heat until it reaches about 350°F (175°C).
Step 5: Fry the Flautas
Place the rolled tortillas seam-side down in the hot oil. Fry for 2–3 minutes per side until they are golden brown and crispy.
Work in batches to avoid overcrowding the pan.
Step 6: Drain the Flautas
Remove the flautas from the oil and place them on paper towels to drain excess oil.
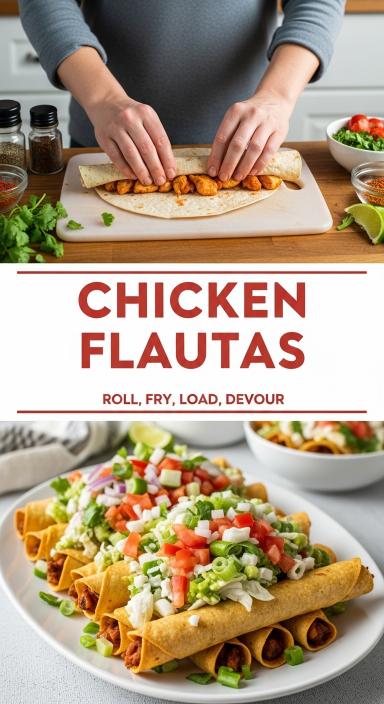
Step 7: Serve
Arrange the flautas on a plate and top with shredded lettuce, sour cream, salsa, guacamole, cheese, and tomatoes.
Serve immediately while crispy.
Serving Suggestions
Best Ways to Serve
Serve chicken flautas with:
- Mexican rice
- Refried beans
- Pico de gallo
- Fresh guacamole
Party Platter Idea
Arrange flautas on a large platter with multiple dipping sauces such as salsa verde, chipotle sauce, or queso dip.
Pro Tips
Use Rotisserie Chicken
Using store-bought rotisserie chicken saves time and adds great flavor.
Keep Tortillas Warm
Warm tortillas are easier to roll and less likely to crack.
Bake Instead of Fry
For a lighter version, brush the rolled flautas with oil and bake at 400°F (200°C) for 18–20 minutes until crispy.
Storage and Reheating
Refrigerator
Store leftover flautas in an airtight container in the refrigerator for up to 3 days.
Freezer
Freeze uncooked or cooked flautas for up to 2 months.
Reheating
Reheat in the oven at 375°F (190°C) for about 10 minutes to restore crispiness.
The key to achieving that perfect crunch lies in the cooking method. A quick fry ensures a crispy exterior while keeping the filling moist and flavorful. It’s a technique that’s easy to master, even for beginners.
This recipe is tailored for American homes, using ingredients you likely already have on hand. It’s a dish that brings people together, offering a taste of tradition with a modern twist. Ready to dive in? Let’s get started!

Key Takeaways
- This dish is simple to make with just a few quality ingredients.
- Rotisserie chicken and fresh cheese are key to its flavor.
- Perfect for both appetizers and main courses.
- Quick frying ensures a crispy, golden finish.
- Easy to follow and ideal for American kitchens.
Introduction and History
This dish has a rich history that dates back to traditional Mexican kitchens. Known for its crispy exterior and savory fillings, it’s a staple in many households. The name itself, derived from the Spanish word “flauta,” refers to its flute-like shape, making it both visually appealing and delicious.
Origins of Chicken Flautas
Rooted in Mexican cuisine, this dish has been passed down through generations. Traditionally, it was made with shredded chicken and wrapped in flour tortillas. The simplicity of the recipe allowed families to create hearty meals with minimal ingredients.
Over time, variations emerged, but the core elements remained the same. The use of fresh, quality ingredients like tomato and homemade touches kept the tradition alive. Today, it’s celebrated for its versatility and quick preparation time, often ready in just a minute.
What Makes Them Special
What sets this dish apart is its perfect balance of textures and flavors. The crispy tortilla contrasts beautifully with the tender shredded chicken inside. Unlike taquitos, which use corn tortillas, this version relies on flour tortillas for a lighter, flakier finish.
Homemade variations continue to honor the authentic flavors while allowing for personal creativity. Whether served as an appetizer or a main course, it’s a dish that brings people together.
| Feature | Flautas | Taquitos |
|---|---|---|
| Tortilla Type | Flour | Corn |
| Shape | Flute-like | Rolled |
| Texture | Crispy and flaky | Crunchy |
Essential Ingredients and Tools
Gathering the right ingredients and tools is the first step to making this dish a success. With a few key items, you can create a meal that’s both flavorful and easy to prepare. Let’s break down what you’ll need to get started.
Key Ingredients
Start with high-quality rotisserie chicken. It’s a time-saver and adds rich flavor. Monterey Jack cheese is my go-to for its creamy texture and mild taste. Soft flour tortillas are essential—they’re pliable and crisp up beautifully when cooked.
Don’t forget taco seasoning for that extra kick. A tablespoon of oil is perfect for frying, ensuring a golden, crispy finish. These ingredients work together to create a dish that’s both satisfying and delicious.
Must-Have Kitchen Tools
Having the right tools makes all the difference. A cast iron skillet is ideal for frying, providing even heat distribution. A baking sheet is handy if you prefer baking instead of frying. Toothpicks are a must for securing the tortillas while cooking.
Measuring cups and tablespoons help ensure the right balance of ingredients. These tools not only simplify the process but also guarantee consistent results every time.
| Tool | Purpose |
|---|---|
| Cast Iron Skillet | Even frying |
| Baking Sheet | Baking alternative |
| Toothpicks | Securing tortillas |
| Measuring Tools | Accurate ingredient balance |
chicken flautas Recipe: Authentic Techniques & Tips
Perfecting this dish starts with mastering a few key techniques. From preparing the filling to achieving that ideal crisp, every step matters. Let’s dive into the details to ensure your results are nothing short of amazing.
Preparing the Chicken and Tortillas
Start by seasoning the shredded chicken with taco seasoning. This step locks in flavor and ensures every bite is packed with taste. For an extra kick, mix in a tablespoon of salsa or diced tomato. The combination of spices and fresh ingredients creates a homemade touch that’s hard to beat.
Next, warm the tortillas slightly to make them pliable. This makes rolling easier and prevents cracking. Lay each tortilla flat, add a generous portion of the seasoned chicken, and sprinkle with cheese. Roll tightly and secure with toothpicks to maintain their shape during cooking.
Seasoning Secrets
The right seasoning can elevate your dish to the next level. Use a blend of spices that complement the chicken, such as cumin, paprika, and garlic powder. Adding a bit of salsa to the mix not only enhances flavor but also keeps the filling moist.
When it’s time to fry, heat the oil to the right temperature. Too hot, and the tortillas will burn; too cool, and they won’t achieve that golden brown finish. Aim for a medium heat, and fry each roll until crispy and evenly colored. This ensures a perfect texture every time.
Finally, handle the rolls with care to preserve their shape. Remove the toothpicks before serving, and enjoy the fruits of your labor. With these tips, you’ll create a dish that’s both authentic and delicious.
Step-by-Step Cooking Process
Let’s walk through the cooking process step by step to ensure every detail is perfect. From seasoning to rolling, each step is designed to help you create a dish that’s both flavorful and visually appealing. Follow along for a seamless experience.
Seasoning and Shredding the Chicken
Start by seasoning the shredded chicken with your favorite spices. I recommend a blend of cumin, paprika, and garlic powder for a rich, savory flavor. This step takes just a minute but makes a world of difference in taste.
Next, shred the chicken finely for an even texture. This ensures every bite is packed with flavor. If you’re short on time, pre-cooked rotisserie chicken works wonders. Just make sure to remove any bones and skin before shredding.
Filling and Rolling the Tortillas
Now, it’s time to fill the tortillas. Lay each one flat and add a generous portion of the seasoned chicken. Sprinkle with cheese for an extra layer of flavor. Be careful not to overfill, as this can make rolling difficult.
Roll the tortillas tightly, ensuring the filling is evenly distributed. Secure each roll with a toothpick to maintain its shape during cooking. This step is crucial for achieving that perfect, flute-like appearance.
Finally, heat your skillet to the right temperature. Medium heat works best for a crispy, golden finish without burning. Fry each roll for a minute or two, turning occasionally for even cooking. The result? A dish that’s as delicious as it is beautiful.
- Season the chicken with spices for maximum flavor.
- Shred the chicken finely for an even texture.
- Fill tortillas carefully to avoid overstuffing.
- Roll tightly and secure with toothpicks for the perfect shape.
- Maintain medium heat for a crispy, golden finish.
Perfecting Your Crispy Texture
Achieving the perfect crispy texture is the key to making this dish unforgettable. Whether you’re frying, using an air fryer, or baking in the oven, the right technique ensures a golden brown finish that’s both visually appealing and delicious.
Frying Techniques
Shallow frying is my go-to method for achieving that ideal crunch. Heat your oil to medium heat—too hot, and the exterior burns; too cool, and it won’t crisp up. Fry each roll for about a minute on each side, turning occasionally for even browning.
Using a cast iron skillet helps distribute heat evenly, ensuring consistent results. The key is to monitor the oil temperature closely. A golden brown finish is your cue that they’re ready to be removed and drained on paper towels.
Air Fryer and Oven Methods
For a healthier option, the air fryer works wonders. Preheat it to 375°F, lightly spray the rolls with oil, and cook for 8-10 minutes. The circulating air ensures a crispy exterior without the need for excess oil.
Baking in the oven is another great alternative. Preheat to 400°F, place the rolls on a baking sheet, and bake for 15-20 minutes. Flip halfway through for even crispiness. While it takes a bit longer, it’s a hands-off method that yields excellent results.
“The secret to perfect crispiness lies in balancing heat and timing. Too much oil or too little heat can ruin the texture.”
| Method | Time | Texture |
|---|---|---|
| Shallow Frying | 2-3 minutes | Crispy and golden |
| Air Fryer | 8-10 minutes | Light and crispy |
| Oven Baking | 15-20 minutes | Evenly crisp |
No matter which method you choose, the goal is the same: a crispy exterior with a moist, flavorful filling. Experiment with these techniques to find your favorite way to achieve that perfect crunch.
Mastering the Assembly Process
Mastering the assembly process is the secret to creating perfectly rolled and crispy delights. It’s all about precision and care, ensuring every step is executed flawlessly. Let’s dive into the details to make your results shine.
Rolling and Securing with Toothpicks
Start by laying out your flour tortillas on a clean surface. Warm them slightly to make them pliable, which prevents cracking. Add a tablespoon of filling, ensuring it’s evenly distributed. Overfilling can make rolling difficult, so aim for a balanced portion.
Roll the tortilla tightly around the filling, creating a flute-like shape. Use a toothpick to secure the ends, preventing them from unraveling during cooking. This step is crucial for maintaining the perfect shape and ensuring the filling stays in place.
Place the rolled tortillas on a baking sheet or plate until you’re ready to cook. This keeps them organized and prevents any accidental unrolling. Precision here ensures a professional-looking result every time.
“The key to perfect assembly is patience and attention to detail. Take your time, and the results will speak for themselves.”
After cooking, use a paper towel to pat dry any excess oil. This step ensures your dish stays crispy without being greasy. With these tips, you’ll master the assembly process and create a dish that’s both beautiful and delicious.
| Step | Tip |
|---|---|
| Warming Tortillas | Prevents cracking during rolling |
| Portioning Filling | Use a tablespoon for even distribution |
| Securing with Toothpicks | Keeps the shape intact during cooking |
| Patting Dry | Ensures a crispy, non-greasy finish |
Alternative Cooking Methods
Exploring different cooking methods can transform your dish into a culinary masterpiece. Whether you prefer the classic fry or a healthier approach, there’s a technique for everyone. Let’s dive into the pros and cons of each method to help you decide which one suits your needs.
Shallow Pan Fry vs. Deep Fry
Shallow pan frying uses less oil and is ideal for achieving a golden brown finish without excessive greasiness. It’s perfect for those who want a crispy exterior while keeping the filling moist. Heat your skillet to medium heat and fry each roll for about a minute on each side.
Deep frying, on the other hand, immerses the rolls completely in oil, resulting in an even crispier texture. However, it requires more oil and careful monitoring of the heat to avoid burning. Both methods deliver delicious results, but shallow frying is often more practical for homemade cooking.
Baking and Air Fryer Options
For a healthier alternative, consider baking or using an air fryer. Baking in the oven at 400°F for 15-20 minutes yields an evenly crisp texture. The air fryer is another excellent option, requiring just 8-10 minutes at 375°F. Both methods reduce the need for oil while maintaining that desirable crunch.
If you’re experimenting with corn tortillas, you’ll create a variation known as taquitos. These are traditionally deep-fried but can also be baked or air-fried for a lighter version. Adjust the time and heat based on your chosen method for consistent results.
| Method | Pros | Cons |
|---|---|---|
| Shallow Pan Fry | Uses less oil, easy to control | Requires frequent turning |
| Deep Fry | Even crispiness | Uses more oil, higher risk of burning |
| Baking | Healthier, hands-off | Takes longer |
| Air Fryer | Quick, less oil | Smaller batches |
Experimenting with these methods allows you to find the perfect balance of texture and flavor. Whether you’re frying, baking, or using an air fryer, the key is to monitor the heat and time for consistent, delicious results.
Serving Suggestions and Sides
Pairing your meal with the right sides and sauces can elevate the entire dining experience. A well-rounded plate not only enhances flavors but also adds visual appeal. Let’s explore some ideal accompaniments to make your dish shine.
Ideal Dipping Sauces
Dipping sauces are a must for adding extra flavor and texture. Sour cream offers a cool, creamy contrast to the crispy rolls. Guacamole brings a fresh, avocado-based richness, while salsa adds a tangy, spicy kick. For a restaurant-style experience, set up a toppings bar with these options and let everyone customize their plate.
Complementary Side Dishes
Balance your meal with vibrant side dishes. A crisp lettuce salad with a light vinaigrette is refreshing and pairs well with the savory rolls. Other options include pico de gallo, black beans, or a simple corn salad. These sides not only complement the flavors but also add color and variety to your table.
“The right sides and sauces can transform a simple dish into a feast for the senses.”
For a polished presentation, arrange the rolls on a platter with small bowls of sauces and sides. If your dips cool down, a quick warm-up in the microwave ensures they’re at the perfect temperature. These tips will help you create a balanced, restaurant-quality meal at home.
| Category | Suggestions |
|---|---|
| Dipping Sauces | Sour cream, guacamole, salsa |
| Side Dishes | Lettuce salad, pico de gallo, black beans |
| Serving Tips | Set up a toppings bar, warm dips in the microwave |
Creative Variations and Fillings
Experimenting with fillings can transform this classic dish into something entirely new. Whether you’re looking to switch up the protein or go vegetarian, there are endless possibilities to explore. Let’s dive into some creative ideas to make this recipe your own.
Protein Substitutions
If you’re tired of the usual shredded chicken, try using beef or pork for a heartier flavor. Ground beef seasoned with cumin and paprika works wonders, offering a rich and savory twist. For a lighter option, shredded turkey or even fish can be a refreshing change.
When switching proteins, adjust the seasonings to complement the new ingredient. For example, add a dash of pepper and garlic powder to enhance the flavor of beef. These small tweaks ensure a balanced taste that keeps the dish exciting.
Vegetarian Options
For a meat-free version, black beans and cheese make an excellent filling. Add a medley of sautéed vegetables like bell pepper, zucchini, and corn for extra texture and flavor. This combination not only satisfies vegetarians but also adds a burst of color to your plate.
Experiment with different types of tortillas too. Corn tortillas can be used to make taquitos, offering a slightly different texture and taste. These simple swaps allow you to cater to various dietary preferences without compromising on flavor.
“Creativity in the kitchen is all about making the recipe work for you. Don’t be afraid to try new combinations and see what works best.”
Pair your creations with a side of guacamole or salsa for a complete meal. These variations not only keep the dish fresh but also make it adaptable to different tastes and needs. The possibilities are endless—so get creative and enjoy the process!
Storing and Reheating Your Flautas
Keeping your meal fresh and flavorful is just as important as making it. Whether you’ve prepared a large batch or have leftovers, proper storage and reheating ensure every bite stays delicious. Let’s explore the best ways to preserve that perfect texture and taste.
Freezer Tips and Reheating Instructions
To store your cooked rolls, let them cool completely. Place them in an airtight container or wrap them tightly in foil. They’ll stay fresh in the refrigerator for up to three days. For longer storage, the freezer is your best friend. Layer them with parchment paper in a freezer-safe bag to prevent sticking.
When it’s time to reheat, you have several options. The microwave is quick but can make them soggy. To avoid this, use a damp paper towel and heat in short intervals, like a minute at a time. For a crispier result, the oven is ideal. Preheat to 350°F, place the rolls on a baking sheet, and bake for 10-15 minutes.
Another great method is the air fryer. Set it to 375°F and cook for 5-7 minutes. This restores the crispy texture without needing extra oil. Whichever method you choose, keep an eye on the time to avoid overcooking.
- Store in the refrigerator for up to three days or freeze for longer freshness.
- Reheat in the microwave with a damp paper towel to prevent sogginess.
- Use the oven or air fryer for a crispier finish.
- Monitor the time to ensure even heating and avoid burning.
With these tips, you can enjoy your meal anytime without losing its flavor or texture. It’s a recipe for success, whether you’re planning ahead or reheating leftovers.
Conclusion
Crafting this dish has been a journey of flavor and creativity. From mastering the roll technique to achieving that perfect medium crisp, every step brings satisfaction. Whether you fry, bake, or use an air fryer, the results are always delicious.
This recipe’s versatility shines with options like corn tortillas or alternative fillings. Pair it with fresh salsa, creamy guacamole, or a crisp lettuce salad for a complete meal. The possibilities are endless, making it perfect for any occasion.
Thank you for following along! I hope you’re inspired to try this dish at home. Don’t forget to share your feedback—I’d love to hear about your creations. Happy cooking!