
There’s something magical about a bowl of creamy potato soup on a cold day. This classic comfort food wraps you in warmth from the inside out, delivering rich, velvety goodness with every spoonful. Whether you’re seeking solace after a long day or looking for the perfect soup to serve at your next gathering, this recipe delivers restaurant-quality results right from your own kitchen.
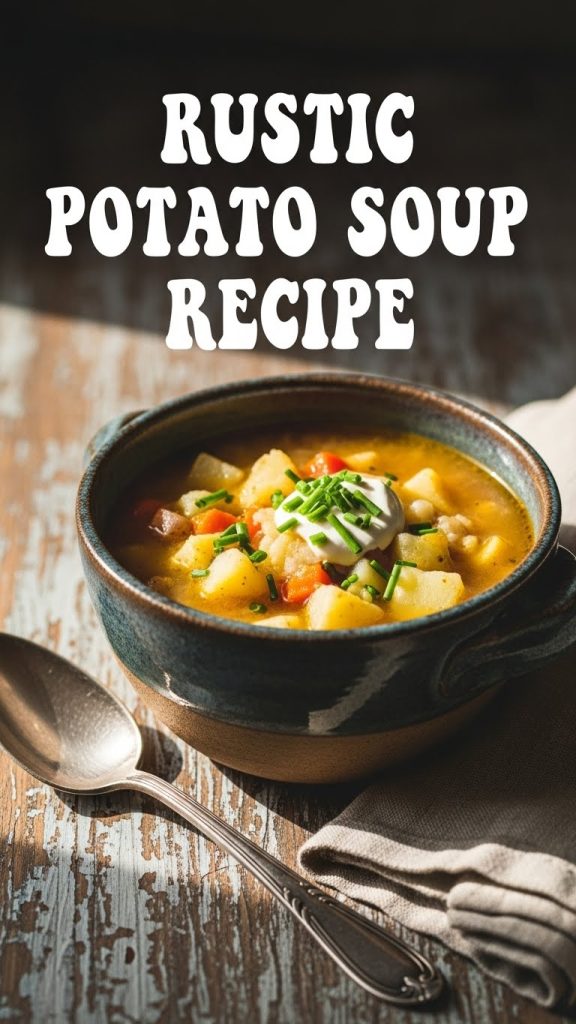
This loaded potato soup recipe takes all the beloved flavors of a loaded baked potato and transforms them into a luscious, creamy soup. Think tender chunks of potato swimming in a rich, creamy broth, studded with crispy bacon, sharp cheddar cheese, and fresh green onions. Every bite is pure comfort food heaven, and the best part is that it comes together in about 45 minutes.
What sets this potato soup apart from others is the technique. By building layers of flavor through properly sautéed aromatics, using the right ratio of broth to cream, and finishing with the perfect toppings, you’ll create a soup that’s rich without being heavy, creamy without being gluey, and absolutely packed with flavor. This is the kind of soup that becomes a family favorite, requested again and again.

Recipe Details
Prep Time: 20 minutes
Cook Time: 30-35 minutes
Total Time: 50-55 minutes
Servings: 6-8 servings
Difficulty: Easy
Course: Soup, Main Dish, Side Dish
Cuisine: American
Ingredients
For the Soup Base
- 3 pounds russet potatoes (about 6 medium potatoes), peeled and diced into ¾-inch cubes
- 8 strips thick-cut bacon
- 4 tablespoons unsalted butter
- 1 large yellow onion, diced
- 3 cloves garlic, minced
- ⅓ cup all-purpose flour
- 4 cups chicken broth (low-sodium recommended)
- 2 cups whole milk
- 1 cup heavy cream
- 1 cup sour cream
- 2 cups shredded sharp cheddar cheese, plus more for topping
- 1 teaspoon salt (adjust to taste)
- ½ teaspoon black pepper
- ½ teaspoon garlic powder
- ¼ teaspoon paprika
- ⅛ teaspoon cayenne pepper (optional)
For Serving and Toppings
- Extra shredded cheddar cheese
- Reserved crumbled bacon
- Sour cream
- 4 green onions, sliced (green parts only)
- Fresh chives, chopped
- Freshly cracked black pepper
Optional Add-Ins
- 2 stalks celery, diced
- 2 carrots, diced
- 1 cup broccoli florets
- 1 cup cauliflower florets
- 1 cup corn kernels
- 2 cups shredded rotisserie chicken
- 1 cup diced ham
- Fresh thyme or rosemary
- 1 bay leaf
- Hot sauce
Equipment Needed
- Large Dutch oven or heavy-bottomed pot (6-quart or larger)
- Large skillet (for cooking bacon)
- Cutting board and sharp knife
- Vegetable peeler
- Wooden spoon or silicone spatula
- Whisk
- Ladle
- Measuring cups and spoons
- Potato masher (optional, for chunky soup)
- Immersion blender (optional, for smoother soup)
Step-by-Step Instructions
Step 1: Cook the Bacon
Place the bacon strips in a large cold skillet and turn the heat to medium. Starting with a cold pan allows the fat to render slowly and evenly, resulting in perfectly crispy bacon without burning. Cook the bacon for 8 to 12 minutes, flipping the strips occasionally, until they reach your desired level of crispiness. The bacon should be golden brown and crispy but not burnt.
Transfer the cooked bacon to a paper towel-lined plate to drain and cool. Reserve about 2 tablespoons of the rendered bacon fat in the skillet if desired, as this can be used to add extra flavor when cooking the aromatics. Once the bacon is cool enough to handle, crumble it into small pieces and set aside. You’ll use some of the bacon in the soup and reserve the rest for topping.
Step 2: Prepare the Potatoes
While the bacon cooks, peel the russet potatoes using a vegetable peeler. Russet potatoes are ideal for potato soup because their high starch content breaks down during cooking, naturally thickening the soup and creating that classic creamy texture. Cut the peeled potatoes into ¾-inch cubes, trying to keep the pieces roughly uniform in size so they cook evenly.
Place the diced potatoes in a large bowl of cold water as you work to prevent them from browning. This step is optional but helpful if you’re working slowly or prepping ahead. When ready to use, drain the potatoes thoroughly and pat them dry with a clean kitchen towel or paper towels.
Step 3: Sauté the Aromatics
In a large Dutch oven or heavy-bottomed pot, melt the 4 tablespoons of butter over medium heat. You can add the reserved bacon fat here as well for extra flavor if desired. Once the butter is melted and foamy, add the diced onion. Cook for 5 to 6 minutes, stirring occasionally, until the onion becomes soft, translucent, and just beginning to turn golden at the edges.
Add the minced garlic to the softened onions and cook for 30 seconds to 1 minute, stirring constantly. The garlic should become fragrant but not brown. Burnt garlic turns bitter and can ruin the flavor of the entire soup, so watch it carefully and keep it moving in the pan. If you’re adding celery or carrots as optional ingredients, add them with the onions and cook until slightly softened.
Step 4: Create the Roux
Sprinkle the flour over the cooked onions and garlic. Stir constantly with a wooden spoon or whisk for about 2 minutes to cook out the raw flour taste. The mixture will become paste-like and should smell slightly nutty. This flour mixture, called a roux, is the foundation for creating a thick, creamy soup without it becoming gluey or heavy.
The roux should be a pale blonde color. If it starts to brown too much, reduce the heat slightly. A properly cooked roux ensures your soup will be smooth and silky rather than starchy or lumpy. This step is crucial for the final texture, so don’t rush through it.
Step 5: Add the Liquids
Slowly pour in the chicken broth while whisking constantly. Adding the broth gradually and whisking prevents lumps from forming in your soup. Pour in about half a cup at a time, whisking until smooth before adding more. Once all the broth is incorporated, the mixture should be smooth with no visible lumps.
Add the milk to the pot and whisk to combine. The combination of broth and milk creates a rich base that’s flavorful without being too heavy. Bring the liquid to a gentle simmer over medium heat, stirring occasionally to prevent the bottom from scorching. You should see small bubbles breaking at the surface, but it shouldn’t be at a rolling boil.
Step 6: Cook the Potatoes
Add the diced potatoes to the simmering broth mixture. Stir gently to distribute the potatoes evenly throughout the liquid. Add the salt, black pepper, garlic powder, paprika, and cayenne pepper if using. Stir to combine all the seasonings throughout the soup.
Bring the soup back to a gentle simmer and cook uncovered for 15 to 20 minutes, stirring occasionally to prevent sticking. The potatoes are done when they are fork-tender, meaning a fork slides easily into a potato cube without resistance. Some of the potatoes will start to break down around the edges, which is perfect because this helps thicken the soup naturally and creates that characteristic creamy potato soup texture.
If you’re adding optional vegetables like broccoli or cauliflower, add them during the last 5 to 8 minutes of cooking so they become tender but don’t turn mushy. Corn can be added in the last 2 to 3 minutes since it just needs to heat through.
Step 7: Achieve Your Desired Consistency
Once the potatoes are tender, you have options for achieving your preferred consistency. For a chunky soup with lots of texture, simply use a potato masher or the back of a large spoon to gently mash some of the potatoes against the side of the pot. This releases starch and thickens the soup while leaving plenty of potato chunks throughout. Mash about one-third to one-half of the potatoes for the perfect balance.
For a smoother, creamier soup, use an immersion blender directly in the pot to puree a portion of the soup. Blend for just a few seconds at a time until you reach your desired consistency. Be careful not to over-blend, as you still want some potato chunks for texture. Alternatively, transfer about 2 cups of the soup to a regular blender, blend until smooth, then return it to the pot.
For the silkiest, most elegant version, blend the entire soup until completely smooth, then return to the pot. This creates a velvety bisque-style soup that’s restaurant-worthy. Choose whichever style you prefer as all versions are delicious.
Step 8: Add the Cream and Cheese
Reduce the heat to low. Pour in the heavy cream and stir gently to incorporate. The cream adds richness and a luxurious silky texture to the soup. Let the soup simmer on low for 2 to 3 minutes to allow the cream to warm through and meld with the other flavors.
Add the sour cream by placing dollops on the surface of the soup, then stirring gently until fully incorporated. The sour cream adds a subtle tanginess that brightens the overall flavor and balances the richness of the cream and cheese. Make sure the soup is not boiling when you add the sour cream, as high heat can cause it to curdle.
Gradually add the shredded cheddar cheese, about half a cup at a time, stirring constantly until each addition is fully melted before adding more. Adding the cheese gradually and stirring constantly ensures it melts smoothly into the soup rather than clumping together. The cheese adds incredible flavor and additional creaminess to the finished soup.
Step 9: Add Bacon and Final Seasoning
Stir about two-thirds of the crumbled bacon into the soup, reserving the rest for topping individual servings. The bacon adds smoky, savory notes throughout every bite rather than just sitting on top. If you’re adding cooked chicken or ham, add it now and stir to combine, cooking just until heated through.
Taste the soup and adjust the seasonings as needed. You may want to add more salt, pepper, or a splash of hot sauce depending on your preference. The soup should be rich, creamy, and well-seasoned with a good balance of flavors. Remember that the toppings will add additional salt and flavor, so don’t over-season at this stage.
Step 10: Serve and Garnish
Ladle the hot soup into deep bowls, making sure each serving gets a good mix of broth, potato chunks, and bacon. The soup should be thick enough to coat a spoon but still pourable. If the soup seems too thick, stir in a splash of milk or broth to reach your desired consistency. If it seems too thin, simmer uncovered for a few more minutes to reduce and thicken.
Top each bowl with the reserved crumbled bacon, a generous sprinkle of shredded cheddar cheese, a dollop of sour cream, sliced green onions, and freshly cracked black pepper. The toppings not only add flavor and texture contrast but also make each bowl look absolutely beautiful. Serve immediately while piping hot.
Set out extra toppings at the table so everyone can customize their bowl to their liking. Some people love extra cheese, others prefer more bacon, and some want a big dollop of sour cream. Having options makes the meal more interactive and ensures everyone gets exactly what they want.

Pro Tips for Perfect Results
- Use the right potatoes: Russet potatoes are best for potato soup because their high starch content breaks down and naturally thickens the soup. Yukon Golds work too and hold their shape better if you prefer chunkier soup. Avoid waxy potatoes like red potatoes as they won’t break down properly.
- Don’t skip the roux: Cooking the flour in butter before adding liquids ensures a smooth, lump-free soup and removes the raw flour taste. This step is essential for creating the perfect creamy texture without any starchy aftertaste.
- Add liquids gradually: Pouring in broth and milk slowly while whisking prevents lumps from forming. Dumping all the liquid in at once makes it harder to achieve a smooth consistency.
- Keep the heat low for dairy: Add cream, sour cream, and cheese over low heat and never let the soup boil after adding dairy. High heat causes dairy to curdle and separate, ruining the texture of your soup.
- Add cheese gradually: Sprinkle cheese into the soup a little at a time, stirring constantly until melted before adding more. This prevents the cheese from clumping together and ensures smooth, even distribution.
- Shred your own cheese: Pre-shredded cheese contains anti-caking agents that prevent smooth melting. Block cheese shredded fresh melts much better and has superior flavor. It’s worth the extra few minutes.
- Use low-sodium broth: The soup reduces during cooking, concentrating the flavors and salt. Starting with low-sodium broth gives you better control over the final seasoning.
- Season at the end: Wait to do your final seasoning adjustments until after adding all ingredients. The bacon and cheese add salt, so taste before adding more.
- Let the flavors meld: If you have time, let the finished soup sit on very low heat for 10 to 15 minutes before serving. This allows all the flavors to come together and the soup will taste even better.
- Control the thickness: If your soup is too thick, thin it with additional milk or broth. If it’s too thin, simmer uncovered to reduce, or mash more potatoes against the side of the pot to release starch.
Delicious Variations to Try
- Broccoli Cheddar Potato Soup: Add 2 cups of broccoli florets during the last 8 minutes of cooking. Use extra sharp cheddar cheese and add a pinch of dry mustard for that classic broccoli cheddar flavor.
- Loaded Baked Potato Soup: This recipe already has loaded potato flavors, but you can take it further by baking the potatoes first instead of boiling them. Scoop out the flesh and use that for an even more intense baked potato flavor.
- Ham and Potato Soup: Skip the bacon and add 2 cups of diced ham instead. Use the bone from a spiral ham to make the broth for incredible depth of flavor. Perfect for using up leftover holiday ham.
- Chicken Potato Soup: Add 2 cups of shredded rotisserie chicken for extra protein. This transforms the soup into a heartier one-pot meal that’s filling enough to be the main course.
- Clam Chowder Style: Add two 6.5-ounce cans of chopped clams with their juice. Include diced celery and use half the potatoes. Skip the cheddar cheese and finish with fresh thyme for a New England-inspired variation.
- Vegetarian Version: Use vegetable broth instead of chicken broth and skip the bacon. Add smoked paprika for smokiness, or use vegetarian bacon bits. The soup is still incredibly creamy and satisfying without the meat.
- Cauliflower Potato Soup: Replace half the potatoes with cauliflower florets for a lighter version with extra vegetables. Blend for a smoother texture and add extra cheese to maintain creaminess.
- Jalapeño Popper Soup: Add diced jalapeños with the onions, use cream cheese instead of sour cream, and top with crispy fried jalapeño slices. This spicy version is addictively delicious.
- Corn Chowder Style: Add 2 cups of corn kernels (fresh, frozen, or canned) and use half the potatoes. Add diced red bell pepper for color and a pinch of smoked paprika for depth.
- Irish Style: Add chopped leeks with the onions and include chopped cabbage or kale. Use Irish cheddar cheese and top with fresh parsley. Serve with crusty soda bread on the side.
Storage Instructions
Refrigerator Storage
- Allow the soup to cool to room temperature before storing, but don’t leave it out for more than 2 hours.
- Transfer to airtight containers or a large covered pot.
- Store in the refrigerator for up to 4 to 5 days.
- The soup will thicken considerably as it cools. This is normal due to the starch in the potatoes.
- Store toppings separately to maintain their texture.
Freezer Storage
- Potato soup can be frozen, though the texture may change slightly due to the dairy content.
- For best results, freeze the soup base before adding the cream and cheese. Add dairy when reheating.
- Cool completely, then transfer to freezer-safe containers, leaving 1 inch of headspace for expansion.
- Freeze for up to 2 to 3 months for best quality.
- Thaw overnight in the refrigerator before reheating.
- Label containers with the date and contents.
Reheating Instructions
Stovetop Method (Best Results)
Transfer the desired amount of soup to a saucepan. Add a splash of milk or broth to thin the soup, as it will have thickened considerably during refrigeration. Heat over medium-low heat, stirring frequently to prevent scorching on the bottom. Heat until the soup is warmed through, about 10 to 15 minutes depending on the amount. Do not let it boil, as this can cause the dairy to separate. Taste and adjust seasonings as needed before serving with fresh toppings.
Microwave Method
Transfer a portion to a microwave-safe bowl. Add a tablespoon or two of milk to help thin the soup. Cover loosely with a microwave-safe lid or damp paper towel. Heat on medium power (50-70%) for 2 to 3 minutes, stirring halfway through. Continue heating in 30-second intervals until heated through. Stir well before serving and add fresh toppings.
Slow Cooker Method (For Large Batches)
For reheating large quantities, transfer the soup to a slow cooker. Add ½ to 1 cup of milk or broth to thin. Heat on low for 2 to 3 hours or on high for 1 to 1½ hours, stirring occasionally. This method is perfect for keeping soup warm during parties or potlucks. Keep the slow cooker on the warm setting once heated through.
From Frozen
For best results, thaw frozen soup overnight in the refrigerator before reheating using the stovetop method above. If you need to reheat from frozen, place the frozen soup in a pot over low heat, covered. As the outer edges thaw, stir to incorporate and continue heating until completely warmed through. This will take 20 to 30 minutes. Add extra milk or broth as needed and adjust seasonings before serving.
Serving Suggestions
Topping Ideas
- Crispy crumbled bacon
- Shredded sharp cheddar cheese
- Dollop of sour cream
- Sliced green onions or chives
- Freshly cracked black pepper
- Crispy fried onions or shallots
- Oyster crackers or croutons
- Fresh herbs like parsley, thyme, or dill
- Hot sauce or sriracha
- Truffle oil for an upscale touch
- Paprika or smoked paprika for color
Perfect Side Dishes
Potato soup pairs wonderfully with crusty bread for dipping. A warm baguette, artisan sourdough, or homemade dinner rolls are all excellent choices. Garlic bread or cheesy breadsticks add extra indulgence. For a lighter pairing, serve with a crisp green salad dressed with a tangy vinaigrette to balance the richness of the soup. A simple Caesar salad or mixed green salad works perfectly. For heartier meals, pair with a grilled cheese sandwich for the ultimate comfort food combination.
Bread Bowl Serving
For an impressive presentation, serve the soup in bread bowls. Purchase or bake round sourdough loaves, cut off the tops, and hollow out the center, leaving about an inch of bread on the sides and bottom. Ladle the hot soup into the bread bowl and serve. As you eat, tear pieces of the bread bowl to dip into the soup. This presentation is perfect for dinner parties and special occasions.
Beverage Pairings
This rich, creamy soup pairs well with a variety of beverages. A crisp white wine like Chardonnay or Sauvignon Blanc cuts through the richness nicely. For beer lovers, a light lager or wheat beer complements without overwhelming. For non-alcoholic options, sparkling water with lemon, iced tea, or apple cider work wonderfully. On cold evenings, serve with hot chocolate or warm apple cider for a cozy meal.
Nutrition Information
Serving Size: Approximately 1½ cups
Estimated Calories: 380-450 calories per serving
Protein: Approximately 14-18 grams per serving
Carbohydrates: Approximately 30-35 grams per serving
Fat: Approximately 24-30 grams per serving
Fiber: Approximately 3-4 grams per serving
Note: Nutritional values are estimates and will vary based on specific ingredients used, the amount of toppings added, and portion sizes. For accurate nutritional information, calculate based on your specific ingredients.
Frequently Asked Questions
Why is my potato soup gluey or gummy? This usually happens from over-blending the soup or using an incorrect potato variety. Russet potatoes work best. When blending, only partially blend the soup, leaving plenty of chunks. Over-working releases too much starch, creating a gummy texture.
Can I use Yukon Gold potatoes? Yes! Yukon Golds work well and hold their shape better than russets, resulting in a chunkier soup. They’re slightly less starchy, so your soup may be a bit thinner. You can add an extra tablespoon of flour to compensate if desired.
How do I make this soup thicker? There are several ways to thicken potato soup. Mash more potatoes against the side of the pot to release starch. Simmer uncovered to reduce the liquid. Blend a portion of the soup and return it to the pot. Or make a slurry with 2 tablespoons of cornstarch mixed with cold milk and stir it in.
Why did my soup curdle? Curdling happens when dairy is added to very hot soup or when the soup boils after dairy is added. Always reduce heat to low before adding cream, sour cream, or cheese, and never let the soup boil afterward. If curdling happens, try blending the soup to smooth it out.
Can I make this soup without bacon? Absolutely! For a vegetarian version, skip the bacon and use vegetable broth. Add a bit of smoked paprika for smokiness. The soup will still be creamy and delicious. You can also substitute with turkey bacon for a lighter option.
Can I make this dairy-free? Yes, substitute the milk with unsweetened oat milk or coconut milk, use coconut cream instead of heavy cream, skip the sour cream or use a dairy-free alternative, and use dairy-free cheese. The soup will taste slightly different but still be delicious.
How do I prevent the bottom from burning? Stir the soup frequently, especially once the potatoes are added. Keep the heat at a gentle simmer, not a rolling boil. Use a heavy-bottomed pot that distributes heat evenly. If you’re using a thin pot, keep the heat lower.
Can I make this in a slow cooker? Yes! Combine the raw diced potatoes, onion, garlic, broth, and seasonings in a slow cooker. Cook on low for 6 to 8 hours or high for 3 to 4 hours until potatoes are tender. Stir in the cream, sour cream, and cheese during the last 30 minutes on low. Cook the bacon separately and add before serving.
Can I make this in an Instant Pot? Yes! Use the sauté function to cook the bacon and aromatics. Add potatoes, broth, and seasonings. Pressure cook on high for 8 minutes with a quick release. Mash some potatoes, then stir in cream, sour cream, and cheese on the keep warm setting until melted.
How far ahead can I make this soup? The soup can be made up to 3 to 4 days ahead and stored in the refrigerator. It actually tastes even better the next day as the flavors meld together. Reheat gently over low heat, adding milk to thin as needed. Add fresh toppings just before serving.
Final Thoughts
This Creamy Potato Soup is the definition of comfort food. Rich, creamy, loaded with bacon and cheese, and absolutely satisfying, it’s the kind of soup that warms you from the inside out and makes everything feel a little bit better. Whether you’re serving it on a cold winter evening, bringing it to a potluck, or making a batch for meal prep, this soup never disappoints.
What makes this recipe so special is its versatility. You can keep it simple with the classic loaded potato toppings, or you can customize it endlessly with different add-ins, vegetables, or proteins. It’s forgiving enough for beginner cooks yet impressive enough to serve to guests. And with the make-ahead and freezer-friendly options, it fits into even the busiest schedules.
Once you’ve made this soup a few times, you’ll understand why it becomes a household favorite. There’s something deeply satisfying about a bowl of homemade potato soup, topped with all the fixings, served alongside crusty bread on a chilly day. This is the kind of recipe that creates memories and brings people together around the table. Enjoy!